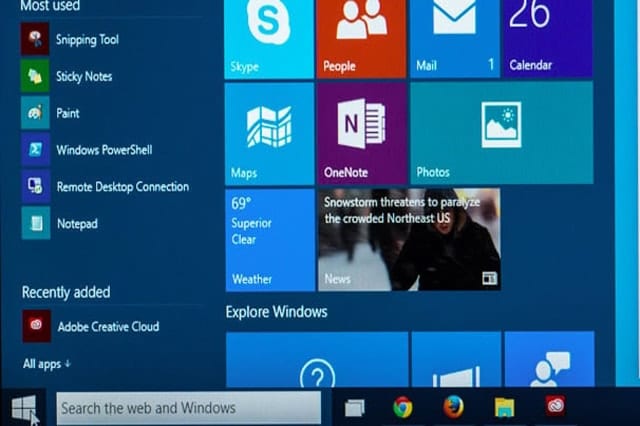
Mac and Linux users have been enjoying virtual desktops for years, but it’s a different story in the Windows world. It wasn’t until Windows 10 did Microsoft developers introduce a native ability for power users to have additional desktops. These virtual desktops are fully integrated into the new operating system, letting you multitask and create several workspaces for your personal, professional and other needs. Here’s everything you need to know about virtual desktops in Windows 10.
What is a Virtual Desktop?
You’re probably reading this article on a Windows computer with a single monitor or, if it’s a laptop, a built-in display. That single screen shows the Windows desktop environment. It’s good enough for having a couple of running applications, and you can easily arrange application windows and switch between them in a jiffy. But imagine having a dizzying array of running apps.
One convenient way for organizing or grouping various apps is to use virtual desktops. For instance, you can arrange your applications such that one desktop contains productivity-related apps (Word, Evernote, Dropbox), another desktop houses your sources of entertainment (your music app and games), yet another desktop has your social networks, and so on. Basically, when you’re using virtual desktops, you’re no longer confined to the limitations of a single physical screen in order to organize and navigate apps.
Virtual desktops are similar to virtual machines in that they provide logical workspaces within one system, but they do not consume system resources as much as virtual machines do. Virtual desktops are the practical choice for setups with only one display.
In Windows 10, the virtual desktop functionality is called the Task View.
How to Use Windows 10’s Task View
Your virtual desktop adventure starts with the Task View button that’s sitting on your taskbar. It looks like a square that’s overlapping a horizontal rectangle, and it’s right beside the Cortana search box or button. If the button is not there, right-click an empty area of the taskbar and click Show Task View Button.
When you click the Task View button, you’ll be redirected to the Task View interface. Pressing Windows+Tab (or, if you have a touchscreen, swiping in from the left) also launches the Task View interface. All open application windows on your desktop are displayed here as large thumbnails. Clicking a thumbnail make its corresponding application active.
How to Create and Manage Virtual Desktops
At the bottom of the Task View interface, you can find the New Desktop button. Click it to create a new desktop. Pressing Ctrl+Windows+D also has the same effect. A new desktop should appear in the interface called Desktop 2, whereas your previous or existing desktop is called Desktop 1. There seems to be no limit to the number of desktops you can create. But like browser tabs, having multiple desktops open can slow down your system.
Clicking on a desktop on Task View makes that desktop active. Alternately, press Ctrl+Windows+Left/Right to move between desktops.
To close a virtual desktop, launch Task View, highlight a desktop and click its Close button. Or use the keyboard shortcut, Ctrl+Windows+F4. Any programs you’ve left open are transferred to another desktop, specifically the one to the left of the desktop you’ve just closed.
How to Manage Applications Between Multiple Desktops
Switching Between Applications
To switch between open applications in different desktops, launch Task View, move your cursor to highlight a desktop and click the application’s thumbnail.
Your taskbar and the Alt+Tab task switcher can be configured in relation to virtual desktops. Press Start and click Settings. Select System, and click Multitasking. Check the settings found under Virtual Desktops. One modifies the taskbar such that it shows apps that are running on either all desktops or only the desktop you’re currently using. The other setting determines whether the Alt+Tab preview pane shows only the apps on the desktop you’re currently using or all running apps regardless of the desktops where they’re located.
Transferring an Open Application to Another Desktop
If an app window is open and you’d like to move it to another desktop, launch Task View, highlight the desktop where the app is currently located, and drag-and-drop the app’s thumbnail to another desktop.
Alternately, right-click the app’s thumbnail, select Move To, and choose the desktop to which you want the app’s window to be transferred. You can also drag an app’s thumbnail to the New Desktop button to create a new desktop and automatically transfer the app there.
Arranging Open Windows in a Particular Desktop
Highlight a particular desktop in Task View, right-click a thumbnail, and select either Snap Left or Snap Right. Optionally, click a thumbnail of another app to snap its window to the other half of the screen.
Limitations of the Task View
Some applications do not work well with Task View. For instance, we tested running Microsoft Word 2013 on one desktop and then tried to run another instance of the word processor on another desktop. But instead of staying on this other desktop and opening a new Word window, the screen immediately switched back to the former desktop and showed the open Word window there. Similarly, when we tried opening a locally saved HTML file using Google Chrome on one desktop, the screen switched to another desktop and opened a new Chrome tab there for the HTML file. These quirks do not happen all the time, but they can be quite distracting or disorienting when they occur.
Although it gets the job done, Window 10’s Task View could be better by having more features. At the moment, each desktop has limited customization options. You can’t name the desktops (like “Work” or “Play”) and use custom background images and themes to correspond with their functions. You can’t assign or limit access of files or shortcuts to a particular desktop.
Let’s hope a future update will fix those minor annoyances and introduce extra features.


