Ever since Siri was first released in 2011, Apple’s voice assistant has helped us get directions, set reminders, and find answers to all sorts of questions. If you use Siri regularly, but you don’t like the sound of her voice, she can quickly get on your nerves. Here’s everything you need to know about how to change Siri’s voice, accent, and language on your iPhone, Mac, or HomePod speakers.
How To Change Siri’s Voice on Your iPhone
To change Siri’s voice and accent on your iPhone or iPad, open Settings, scroll down, and select Siri & Search. Then go to Siri Voice and choose a new accent and voice. All of the different accents for any language will be listed at the top, and the different voice variations will be listed at the bottom.
- Open the Settings app on your iPhone. If you can’t find this app, go to the home screen and swipe down from the middle of your screen. Then type “Settings” into the search bar and select the app when it appears at the top of your screen.
- Then, go to Siri & Search. You will need to scroll down a little to find this option.
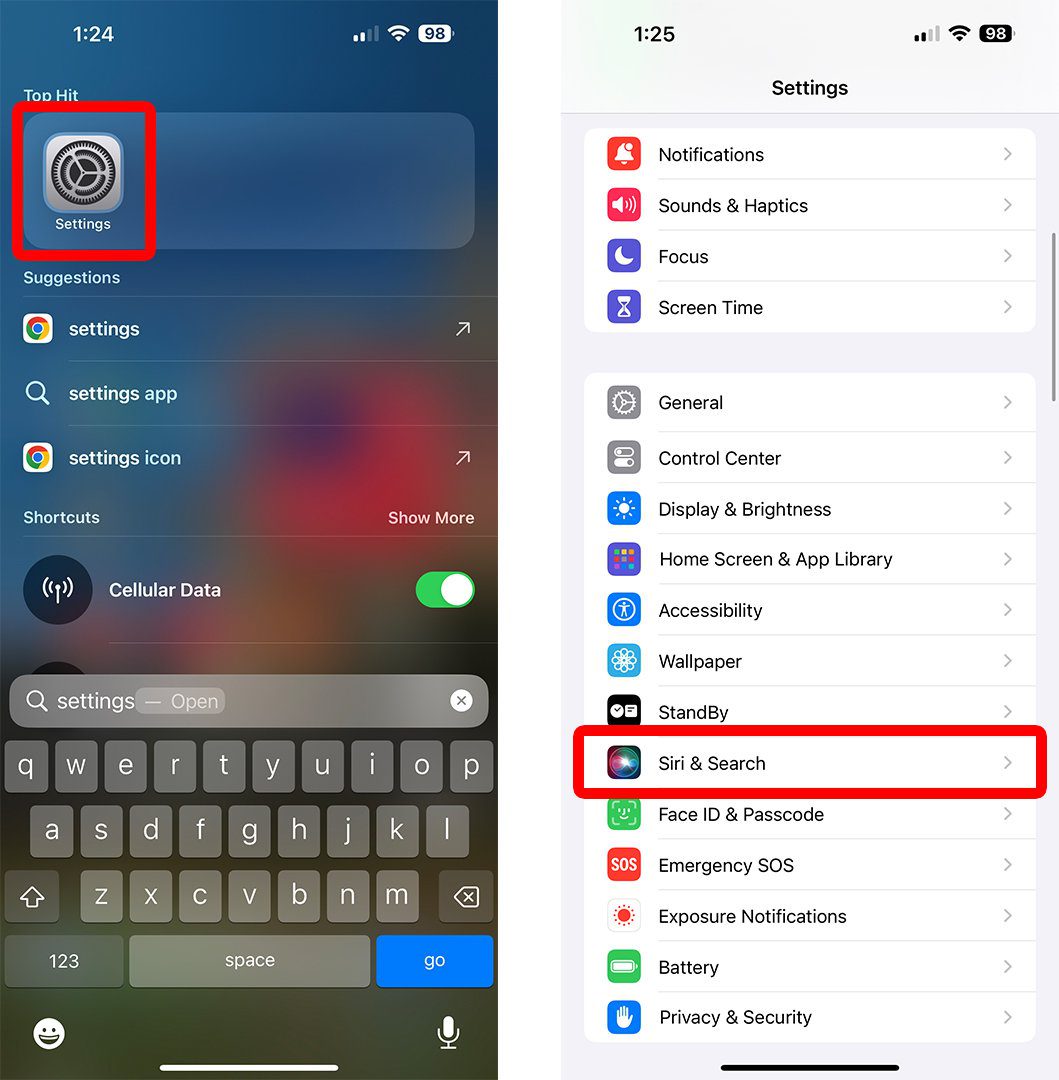
- Next, select Siri Voice.
- Finally, change Siri’s accent and voice. You can find Siri’s available accents for your language under the Variety section at the top of your screen. Then, you’ll find variations of each voice, including male and female voice, under the Voice section at the bottom of your screen.
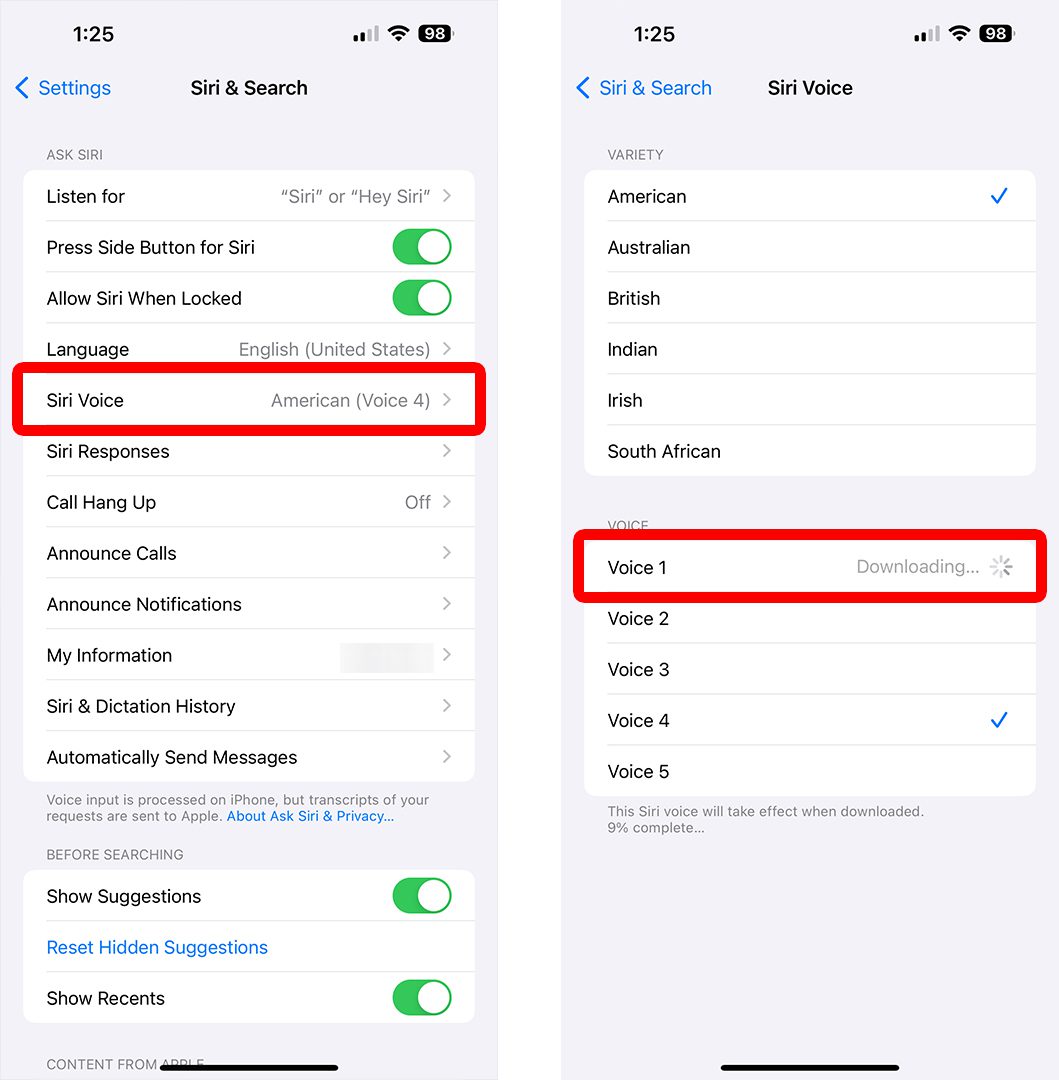
If you don’t like any of the available voices, you can also find additional voice profiles by changing Siri’s language. For example, English speakers can choose between nine different English language variations, including Australia, Canada, India, Ireland, New Zealand, Singapore, South Africa, the United Kingdom, and the United States.
How To Change Siri’s Language on Your iPhone
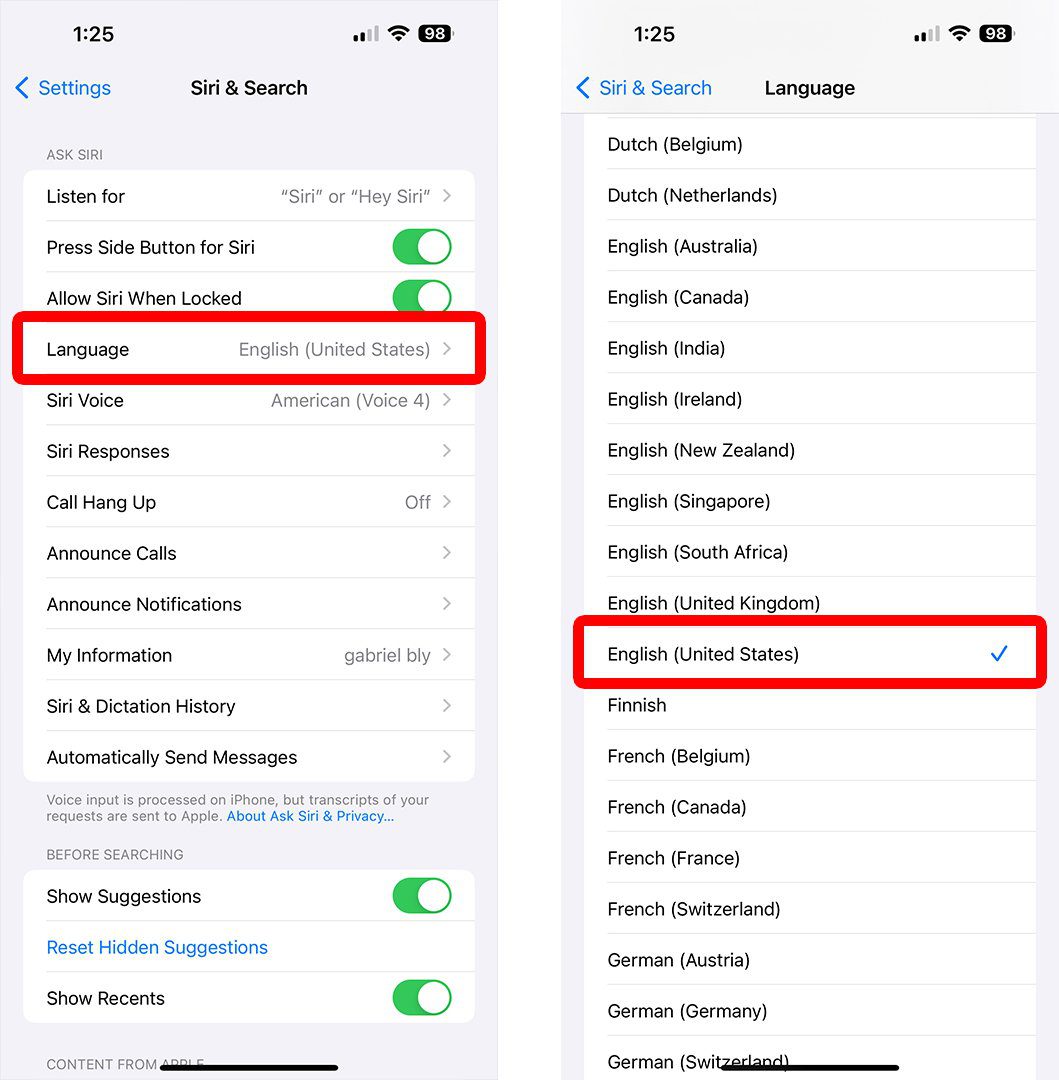
To change the language Siri uses on your iPhone, open the Settings app, scroll down, and select Siri & Search. Then go to Language and choose which language you want Siri to use. It will take a minute for the language to be downloaded to your iPhone.
Read More: What to do when Siri isn’t working
- Open the Settings app on your iPhone.
- Then, go to Siri & Search.
- Next, select Language.
- Finally, change which language you want Siri to use.
You can also use Siri on your Mac computer to open apps, set up meetings, and more, as long as you are running macOS 10.12 or later. Here’s how to change Siri’s voice on your Mac:
How To Change Siri’s Voice on Your Mac Computer
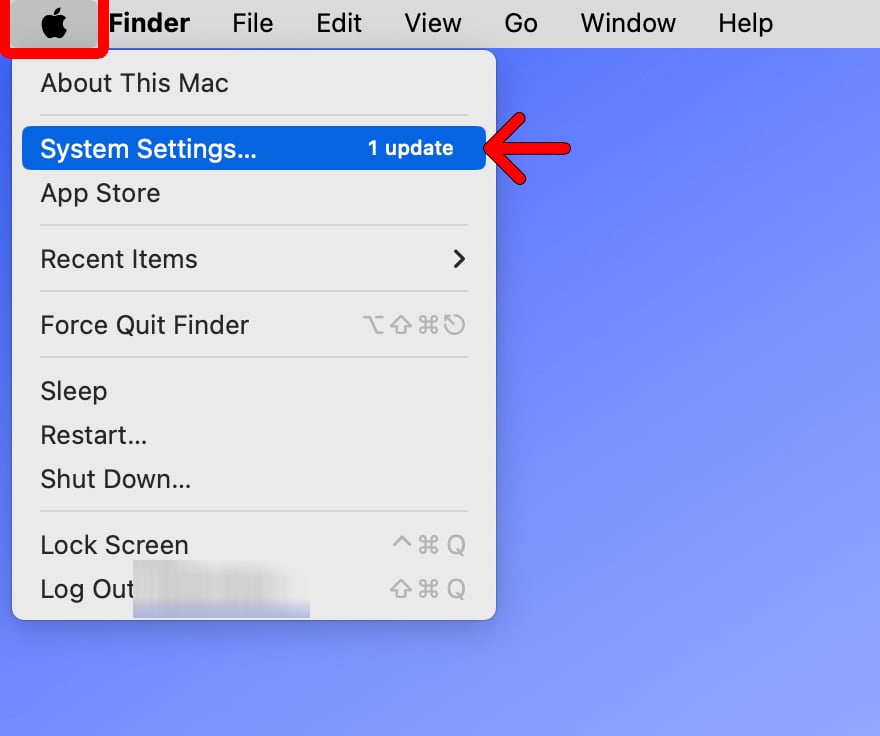
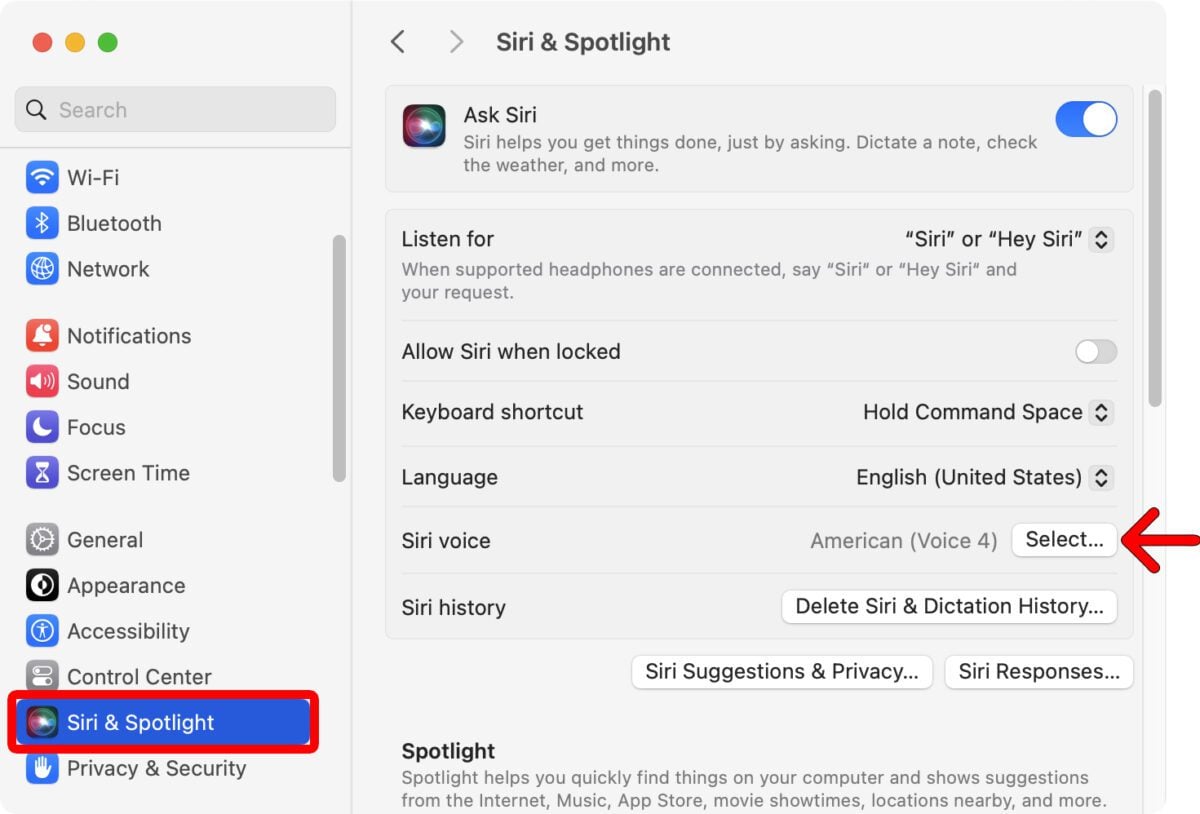
To change Siri’s voice, accent, and language on your Mac, click the Apple icon in the top-left corner of your screen. Then select System Settings and go to Siri & Spotlight in the left sidebar. Finally, choose Select next to Siri Voice or click the drop-down menu next to Language.
- Click the Apple icon in the top-left corner of your Mac’s screen.
- Then, select System Settings. On an older Mac, this will be called System Preferences.
- Next, go to Siri & Spotlight. You will find this by scrolling down the left sidebar. On an older Mac, this option will just be called Siri.
- Then, click Select next to Siri Voice.
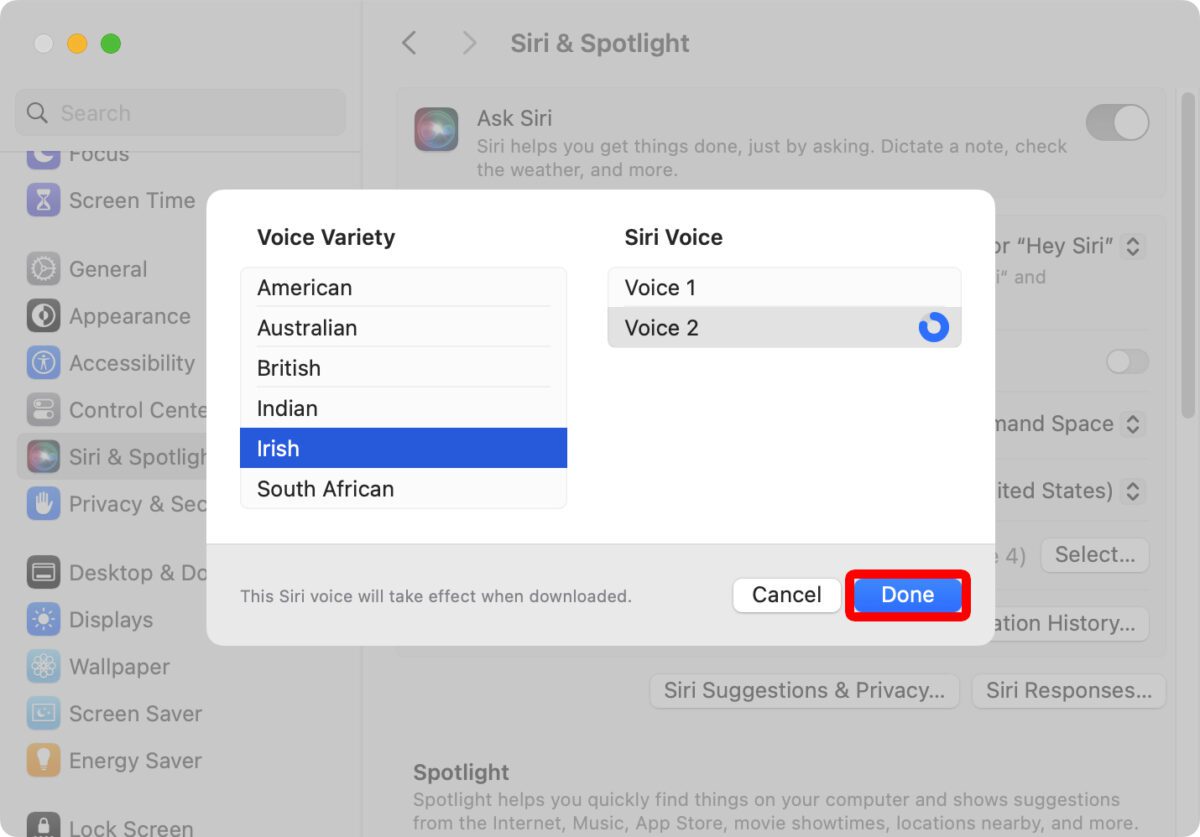
- Next, choose an accent and voice. The accents for any language will be listed under Voice Variety on the left, while different voices will be listed under Siri Voice on the right.
- Finally, click Done.
How to Change Siri’s Voice on Your HomePod Speakers
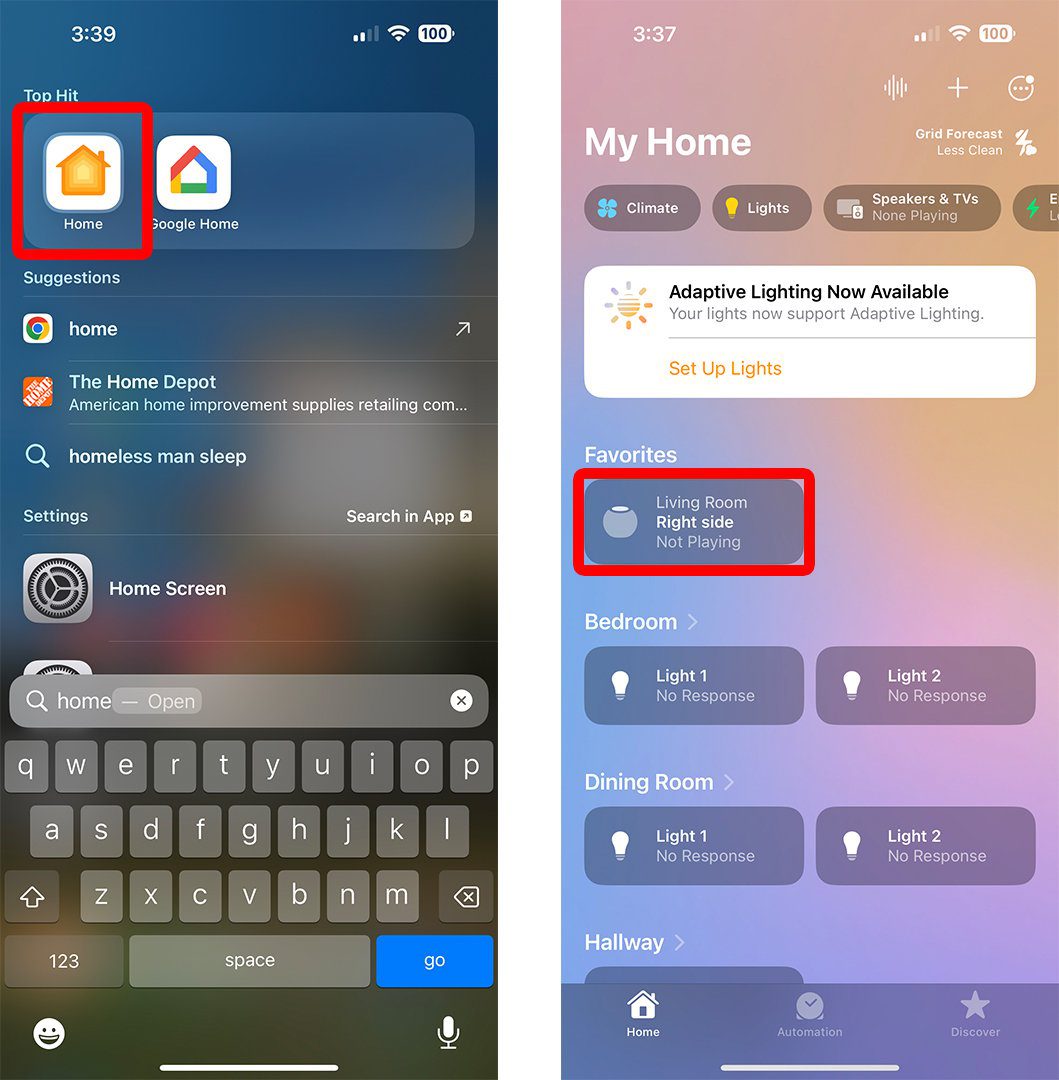
To change Siri’s voice on your HomePod speakers, open the Home app on your iPhone or iPad. Then select your HomePod speaker and tap the gear icon in the bottom-right corner. Next, scroll down and select Siri Voice to change the accent and voice on your device.
- Open the Home app. This app comes pre-installed on all new iPhones since iOS 16.
- Then, select your HomePod. Unless you have your HomePod favorited, you might need to scroll down to find it. Your Home app will sort all your smart devices by room or group.
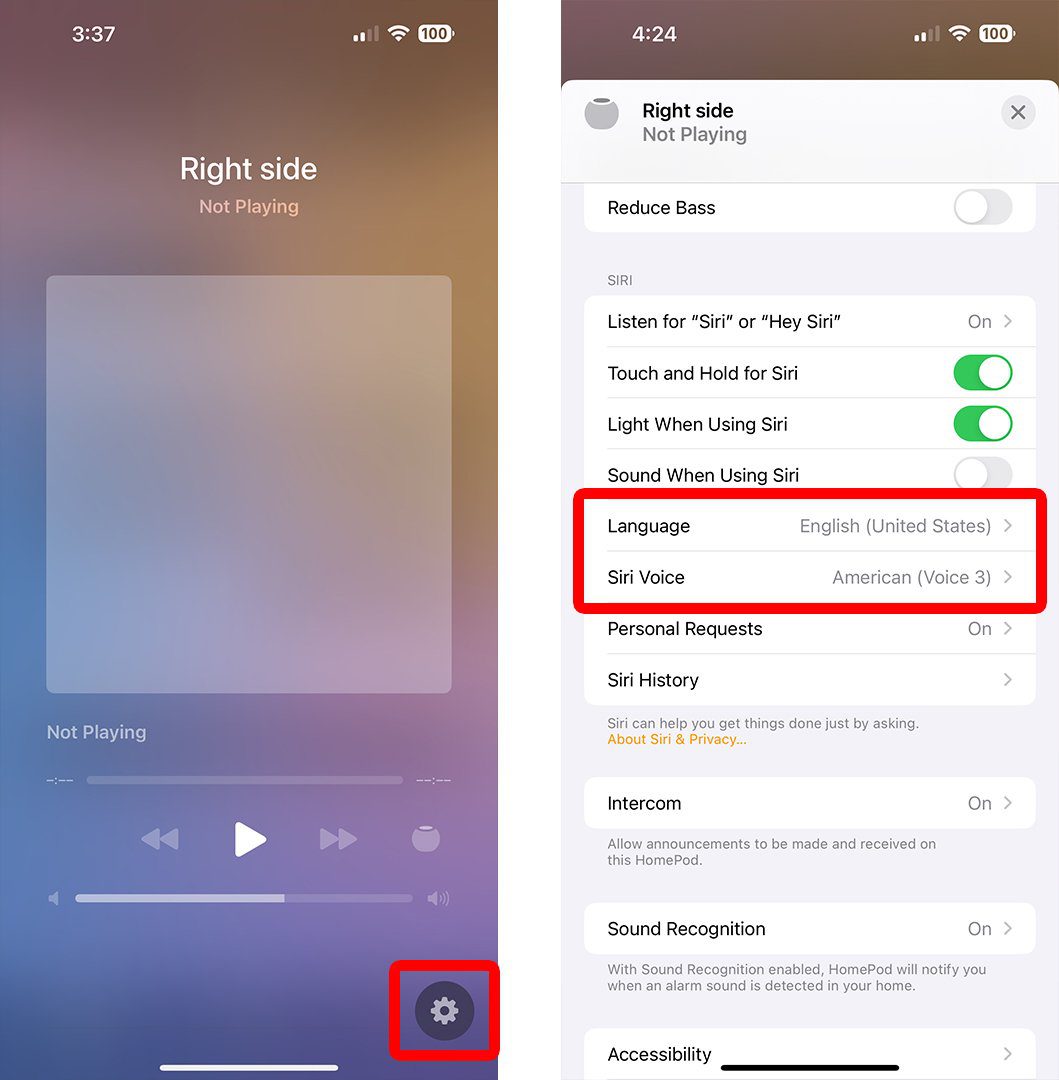
- Next, tap the gear icon. You will see this in the bottom-right corner of your screen.
- Finally, tap Siri Voice to change the voice and accent on your HomePods. From here, you can also select Language to change Siri’s language on your speakers.
Read More: How to factory reset your HomePod
HelloTech editors choose the products and services we write about. When you buy through our links, we may earn a commission.


