Whether you are giving a presentation, or you just want to watch movies on a bigger screen, you can plug your Mac into a TV or connect them wirelessly. Here’s everything you need to know about how to connect your Mac to a TV and which settings you should change to make everything look and sound right.
How to Connect Your Mac to a TV via HDMI
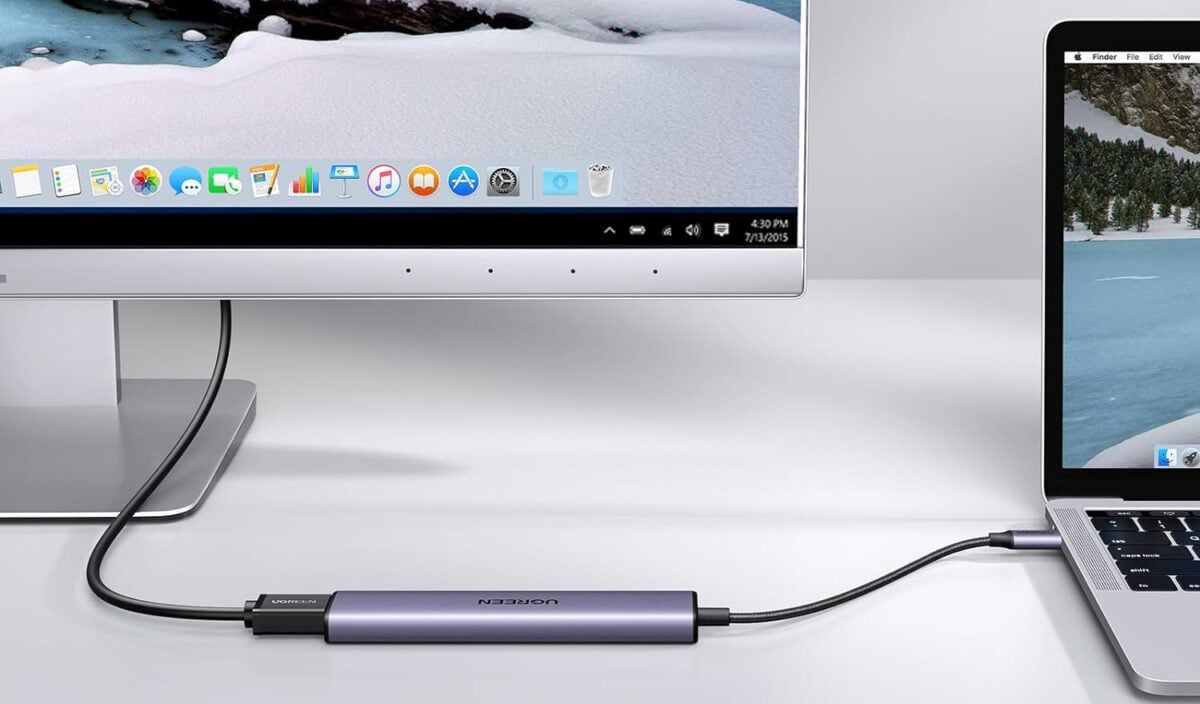
To connect your Mac to a TV, plug an HDMI cable into your computer. If your Mac doesn’t have an HDMI port, you’ll need to use a special cable or adapter. Then, plug the other end of the HDMI cable into your TV and use your remote to switch to the same HDMI channel. Finally, you should see your Mac displayed on your TV.
- Connect an HDMI cable to your Mac. If your Mac has an HDMI port, you can simply use an HDMI-to-HDMI cable to connect to your TV. If your Mac doesn’t have an HDMI port, you’ll need to use a Thunderbolt-to-HDMI cable, or a USB-C to HDMI adapter, or a USB hub with an HDMI port. If you do use an adapter or a USB hub, you will also need to use an HDMI-to-HDMI cable to connect to your TV.
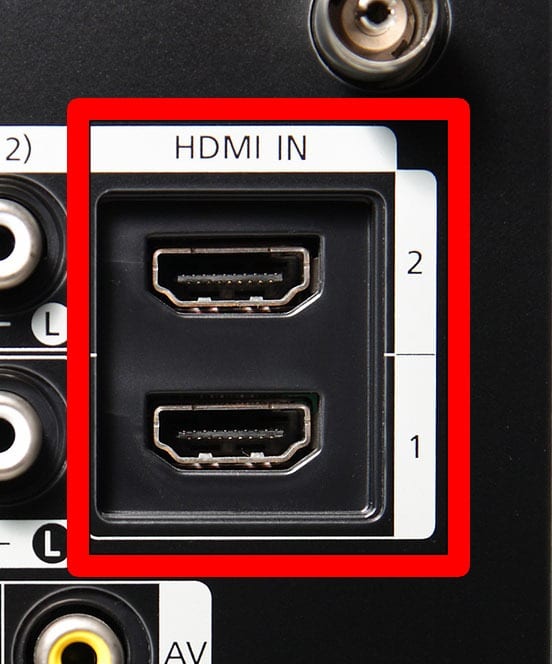
- Then, plug the cable into an HDMI port in your TV.
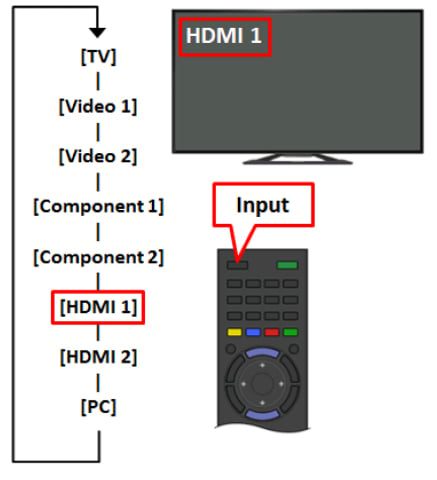
- Finally, switch your TV to the correct HDMI channel. On most TVs, you’ll need to press the “Input” or “Source” button on your remote. Press this button until you see the same HDMI number of the port you plugged the cable into.
Once you have connected your Mac to a TV, you should change the settings to make things look better. Scroll down to the final sections of this article to find out how to change your connected TV display settings on a Mac.
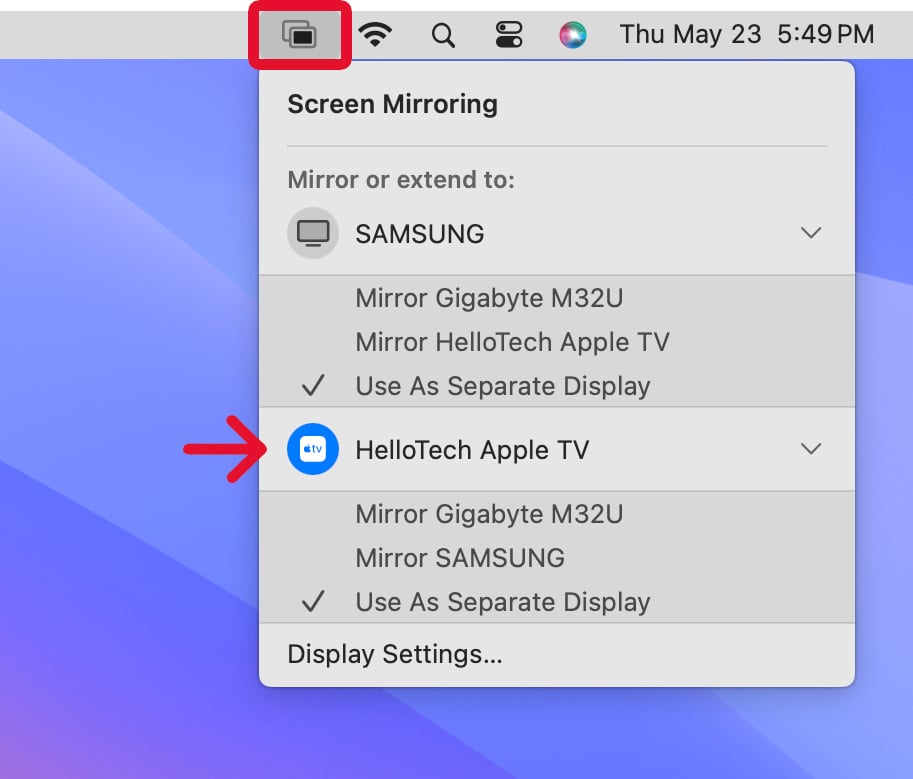
How to Wirelessly Connect Your Mac to a TV
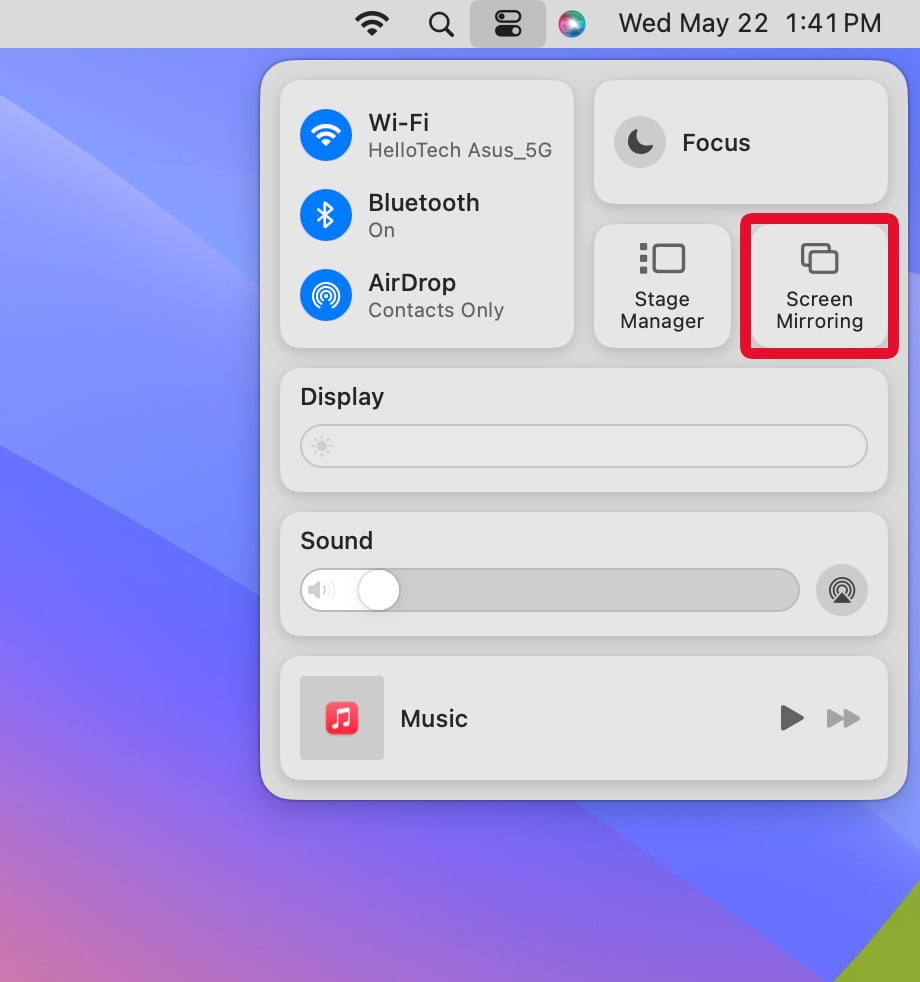
To connect your Mac to a TV wirelessly, click the “Control Center” icon in the top-right corner of your screen and select Screen Mirror. Finally, select your TV from the list under “Mirror or extend to” and choose whether you want to mirror your Mac or use your TV as a separate display.
Read More: How to update your Mac
- Click the Control Center icon in the top-right corner of your Mac screen. This is the icon that looks like two sliders, with a gray one over a black one.

- Then, select Screen Mirroring.
- Finally, select your TV to start mirroring your Mac.
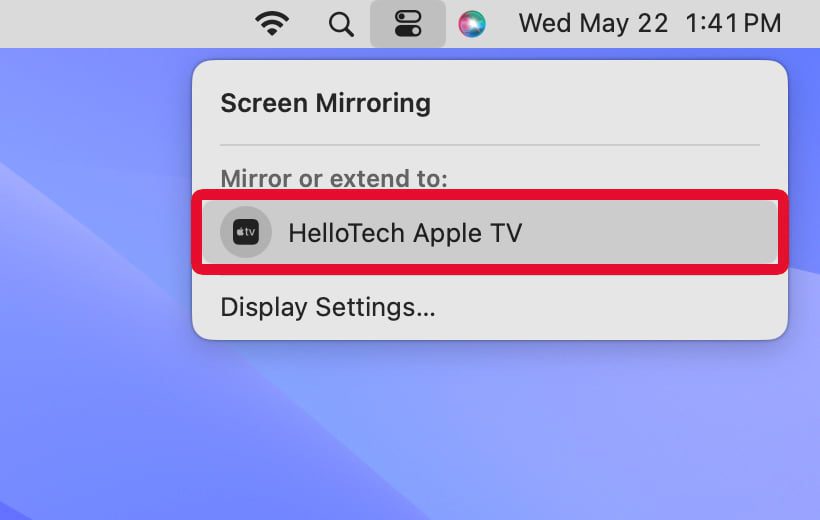
Depending on the TV or streaming device you are trying to connect to, you might need to enter a code on your Mac at this point. In that case, simply type the 4-digit code that appears on your TV into the pop-up window on your Mac.

If you click the Screen Mirroring icon at the top of your screen again, you can switch between “mirroring” your current monitor or using your TV as a “separate display.” Mirroring means your Mac and TV will have the exact same image, while “extending” lets you use your TV as a separate monitor.
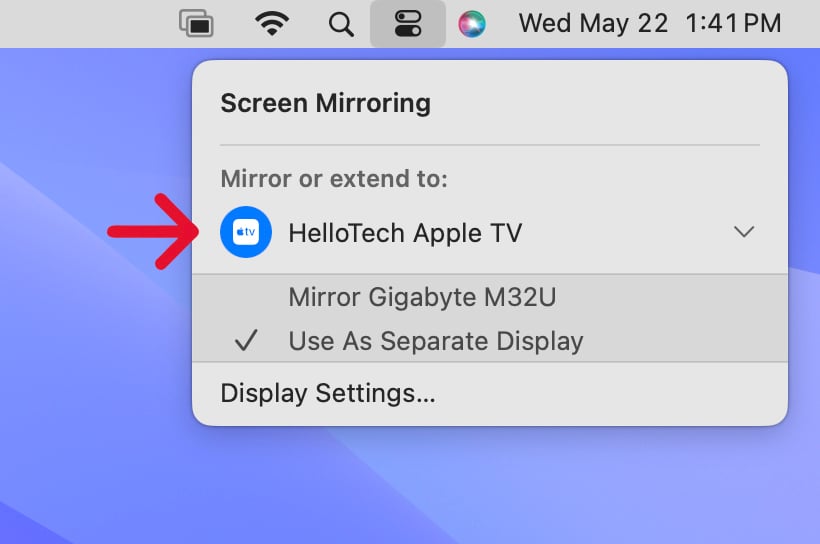
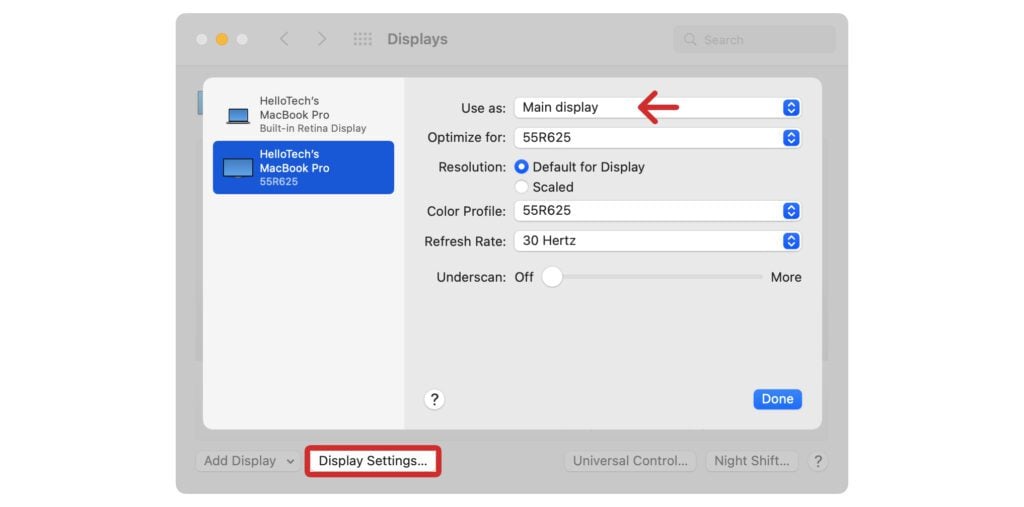
To stop mirroring or extending your Mac, simply click its name in this menu. From here, you can also select Display Settings to change your TV’s resolution, color profile, refresh rate, and more.
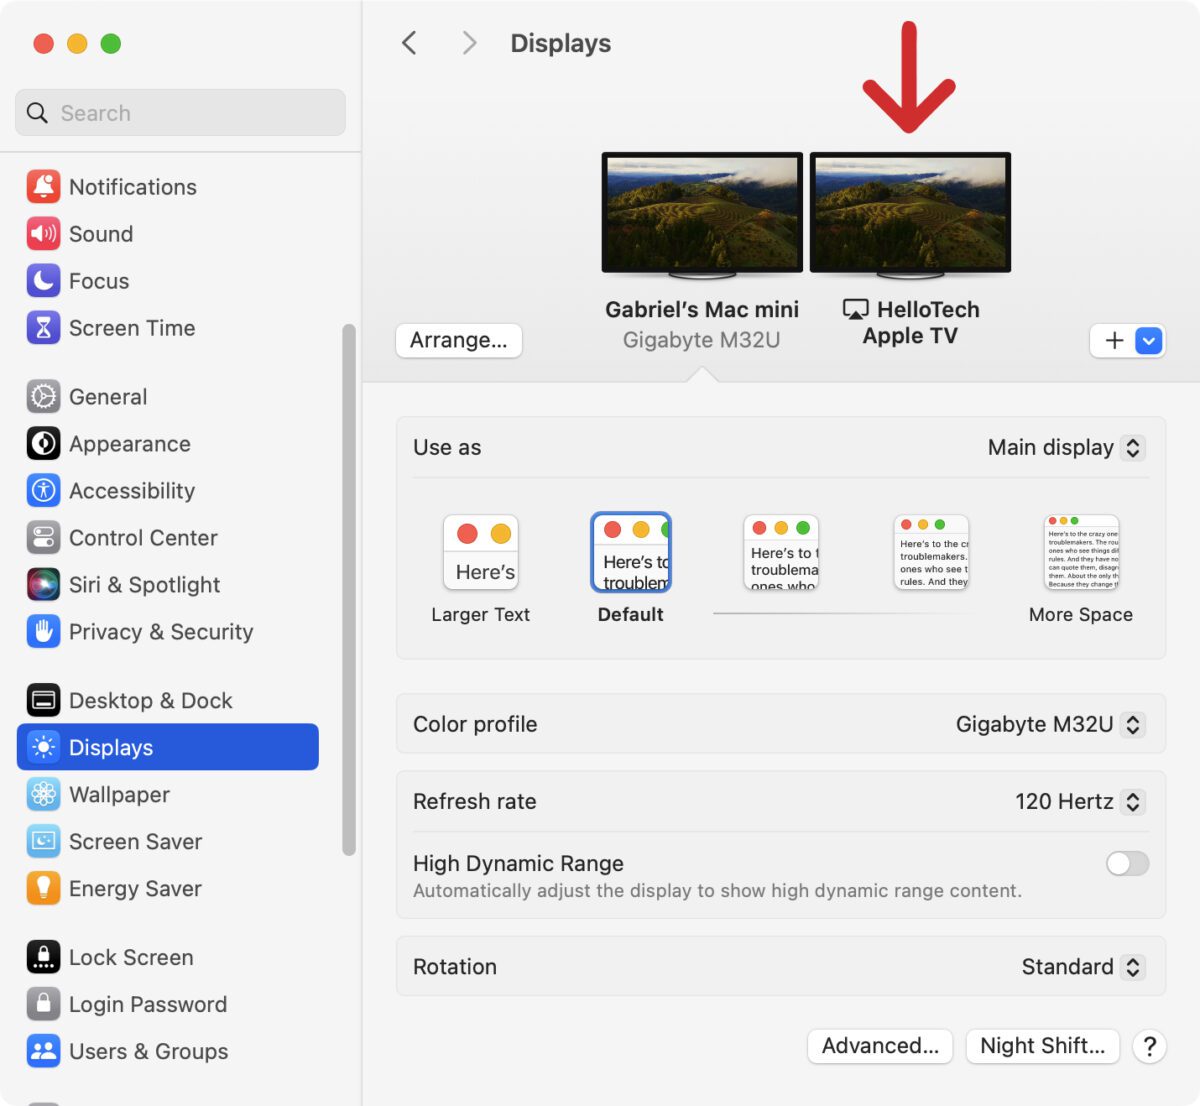
How to Change Your Connected TV Settings on a Mac
To change the display settings for your connected TV, click the Apple logo in the top-left corner of your Mac screen. Then, go to System Settings > Displays. Next, select your connected TV to change your TV resolution, set your TV a separate display, and more.
- Click the Apple logo in the top-left corner of your Mac screen.
- Then, select System Settings. If you are using an older Mac, click System Preferences instead.

- Next, go to Display. You can find this by scrolling down the left sidebar.
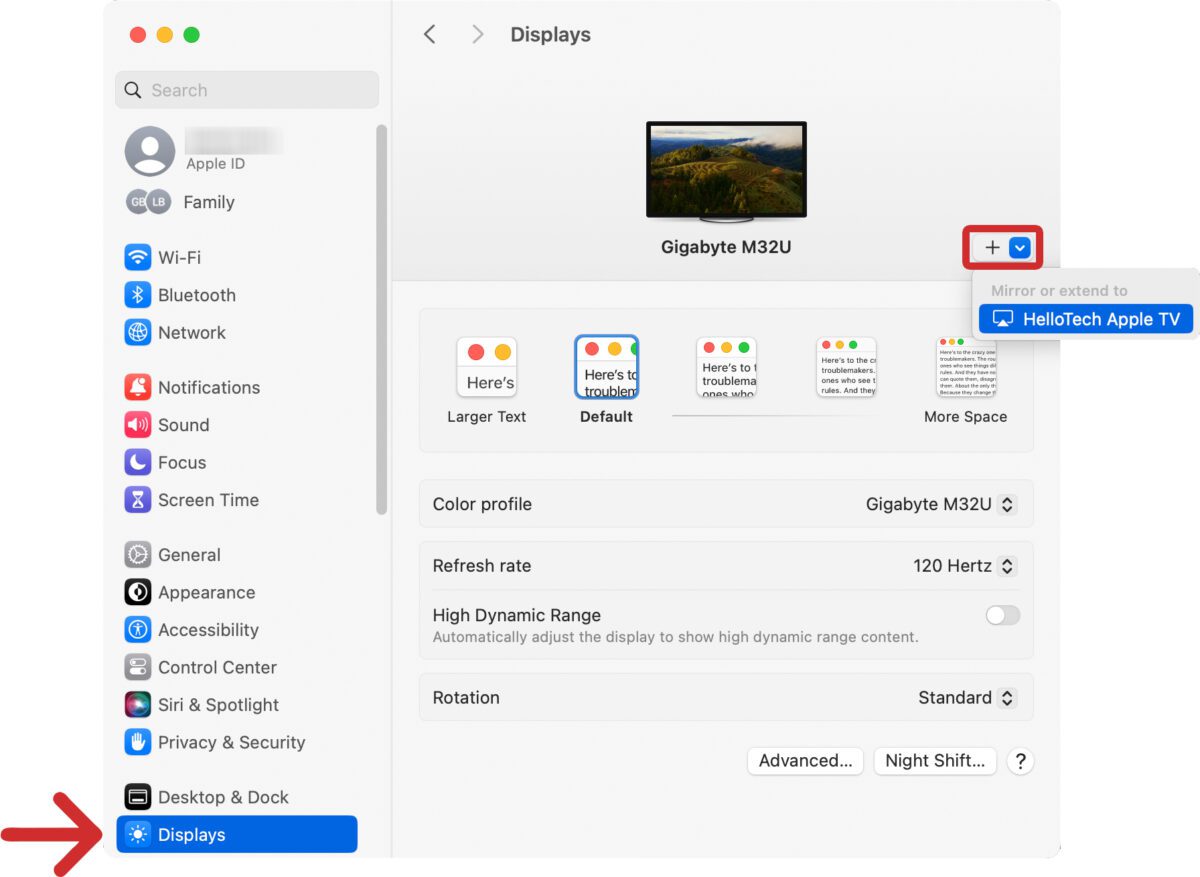
- Finally, select your TV icon to change its display settings.
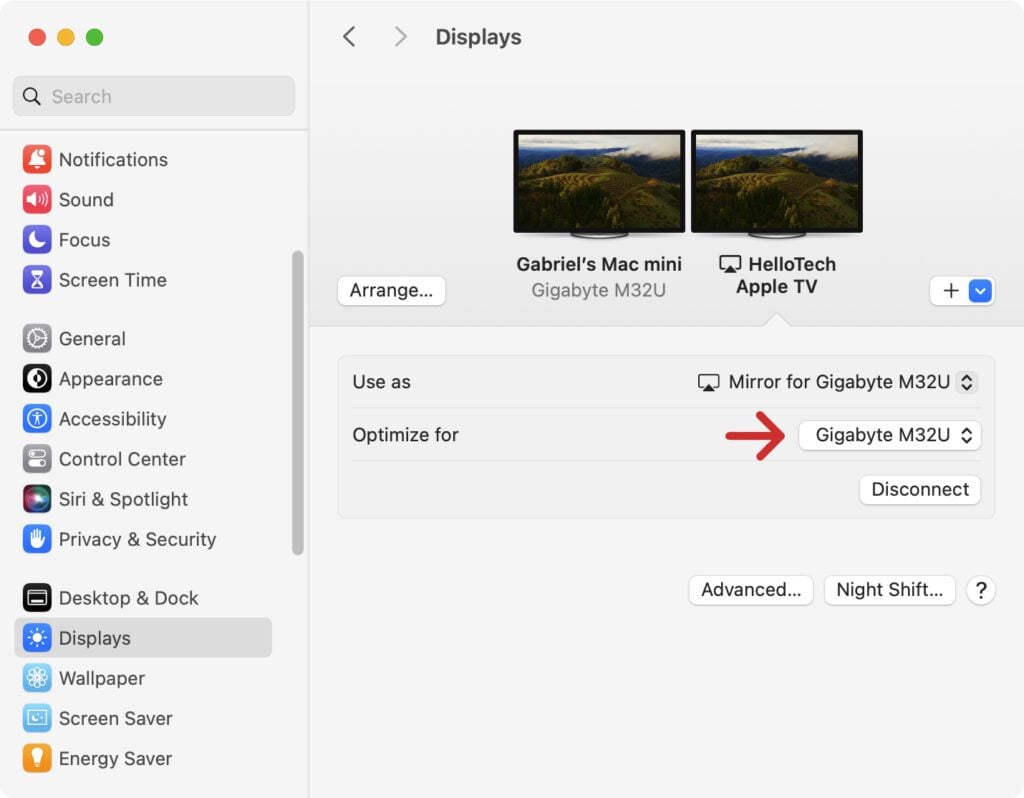
How to Optimize Mirroring for Your TV
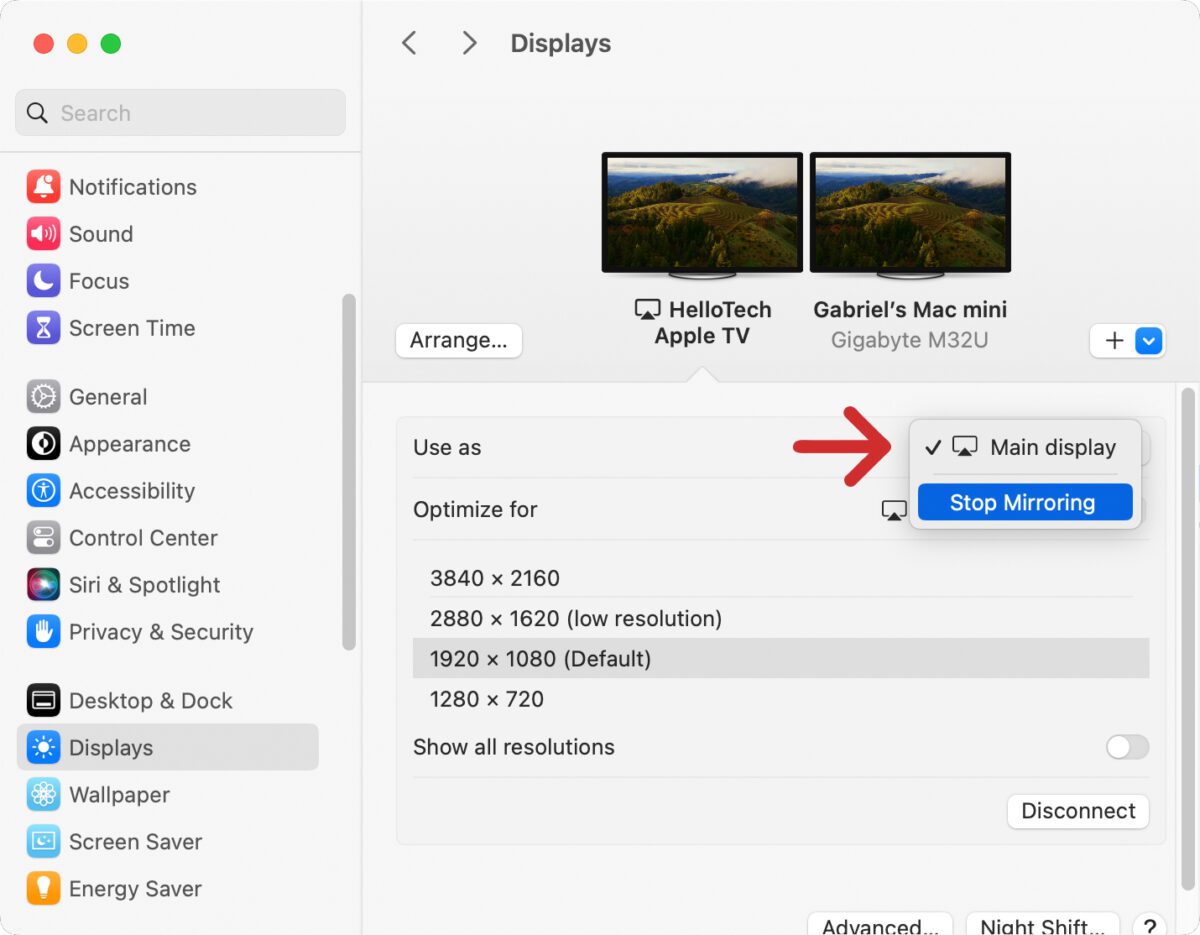
Under your TV’s display settings, click the drop-down next to “Optimize for” and select your TV. This will turn your TV into your “Main display,” which will make it easier to control everything while looking at your TV. This is especially important to change if your cursor is stuttering as you move your mouse across the screen.
Read More: How to calibrate your Mac screen
How to Extend Your Mac Display
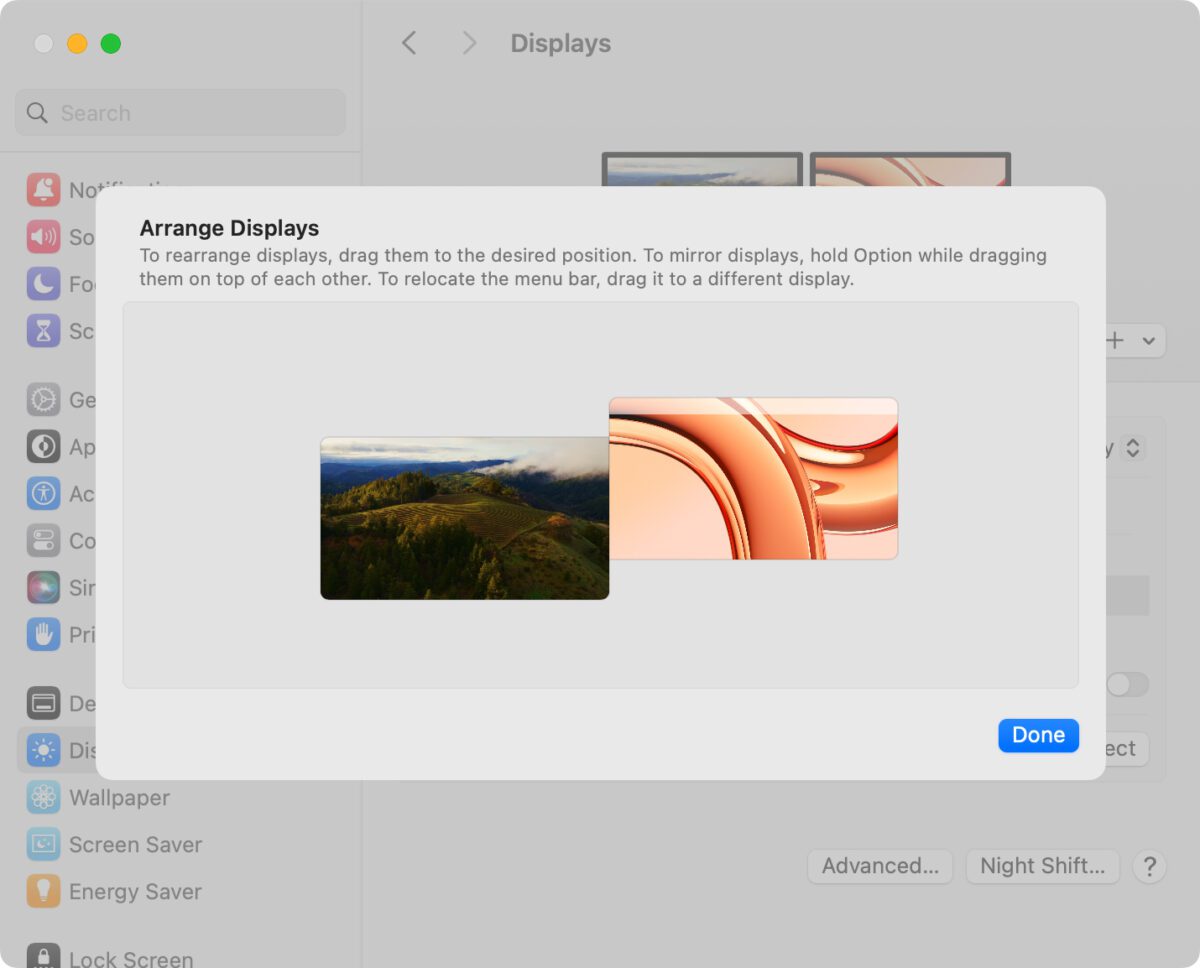
If you don’t want your TV and Mac to display the same images, click the drop-down next to “Use as” and select “Extend display.” This will turn your TV into a separate monitor, so you can open apps and move windows between your Mac monitor and TV.
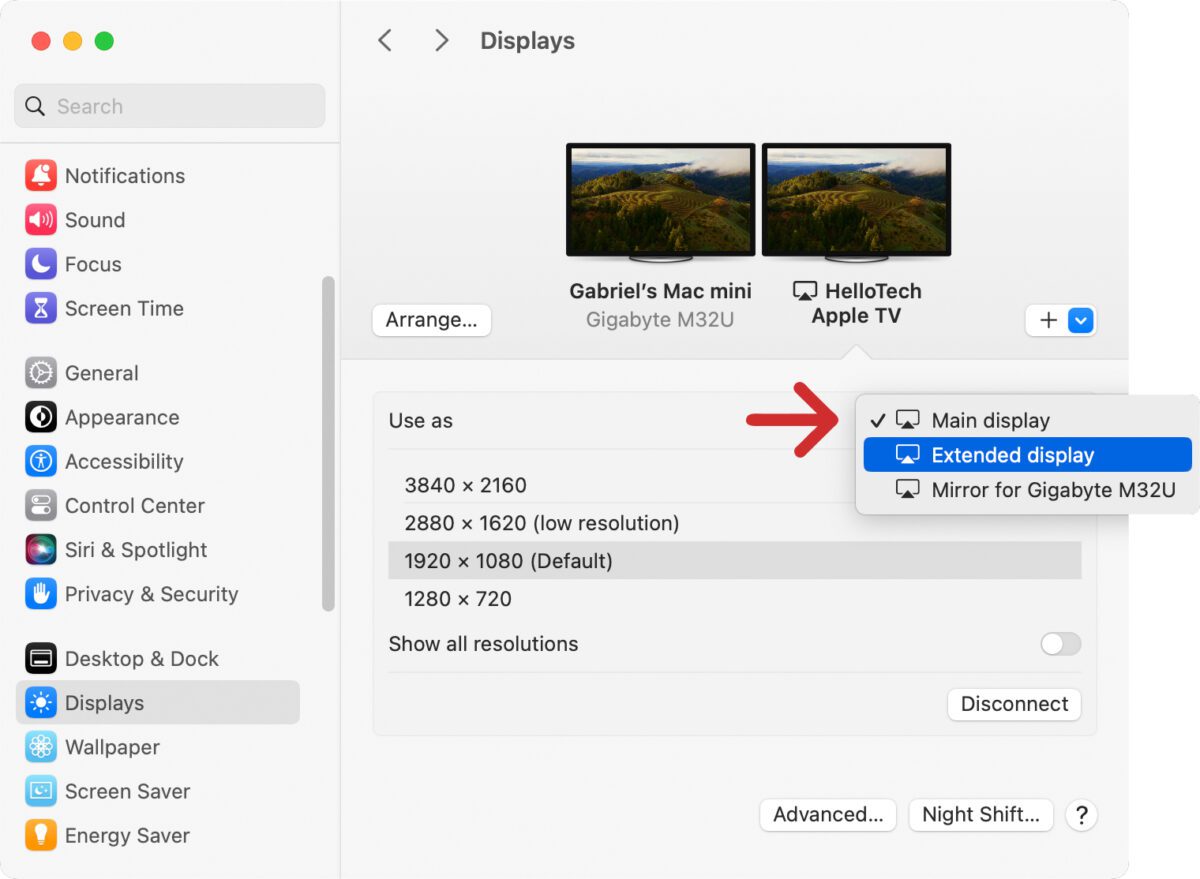
Once you extend your Mac display, you can click the “Arrange” button to change the orientation of your screens. This makes it easier for you to move your mouse across your two screens in the way that your monitors are physically arranged.
How to Change Your TV Resolution
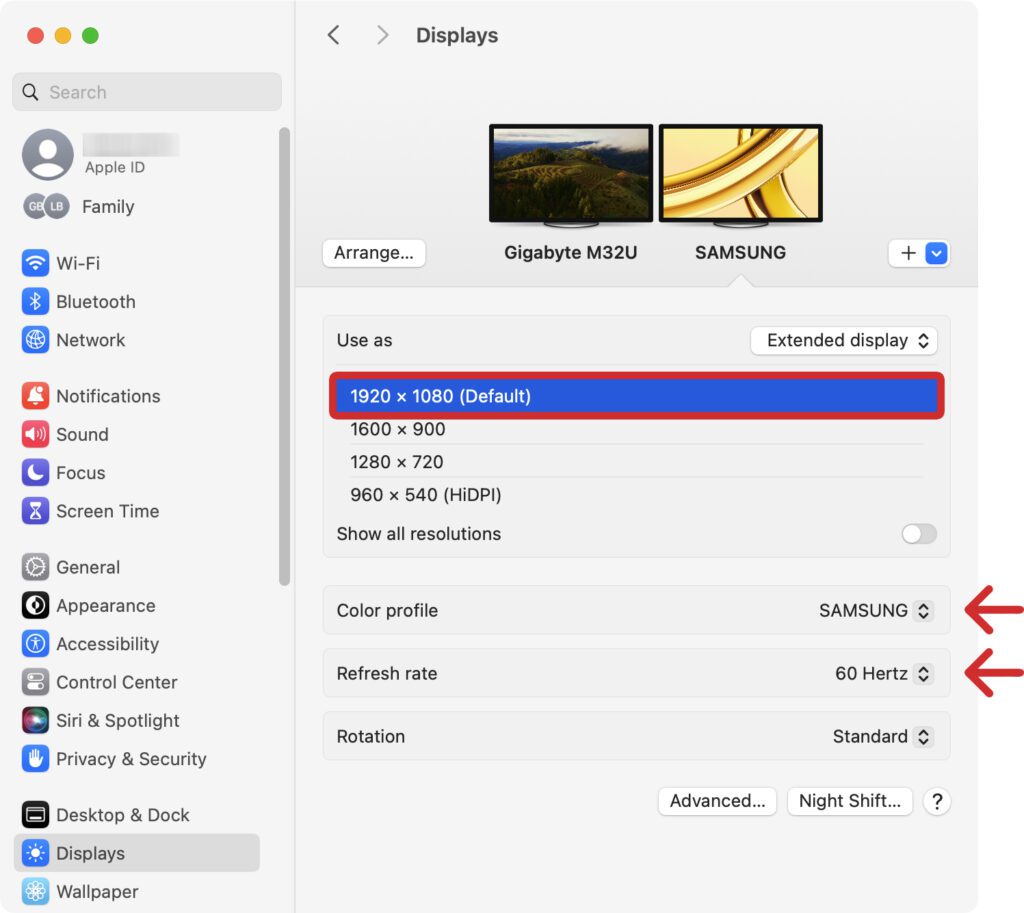
If you are using a TV as your main display, or you choose to extend your Mac to your TV, you’ll be able to change the resolution to match your TV. Go to your Display settings, select your TV, and choose a resolution from the list. You should try to match your TV’s resolution to make the image look as good as possible.
From here, you can also change the TV’s color profile and refresh rate. You should set them both to match your TV’s native color profile and refresh rate for the best image quality.
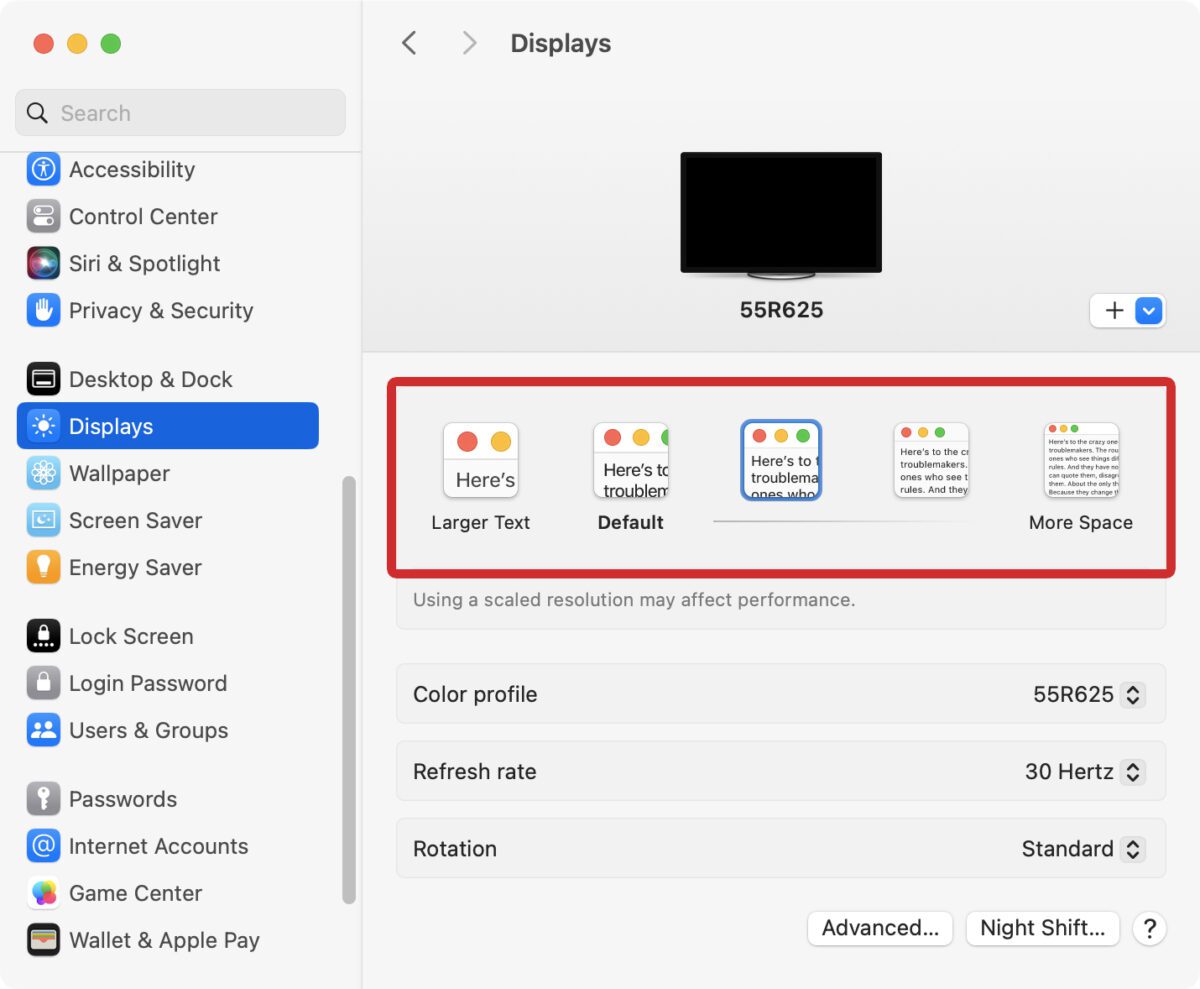
If you are connecting to a TV as your only display, you can also change the resolution by clicking one of the Text boxes instead.
How to Stop Mirroring Your Mac
To stop mirroring your Mac to a TV, you can go to System Settings > Displays. Then select your TV icon and choose Stop Mirroring from the drop-down menu next to “Use as.”
Alternatively, you can also click the Screen mirroring icon in the top-right corner of your screen and select your TV to stop mirroring.
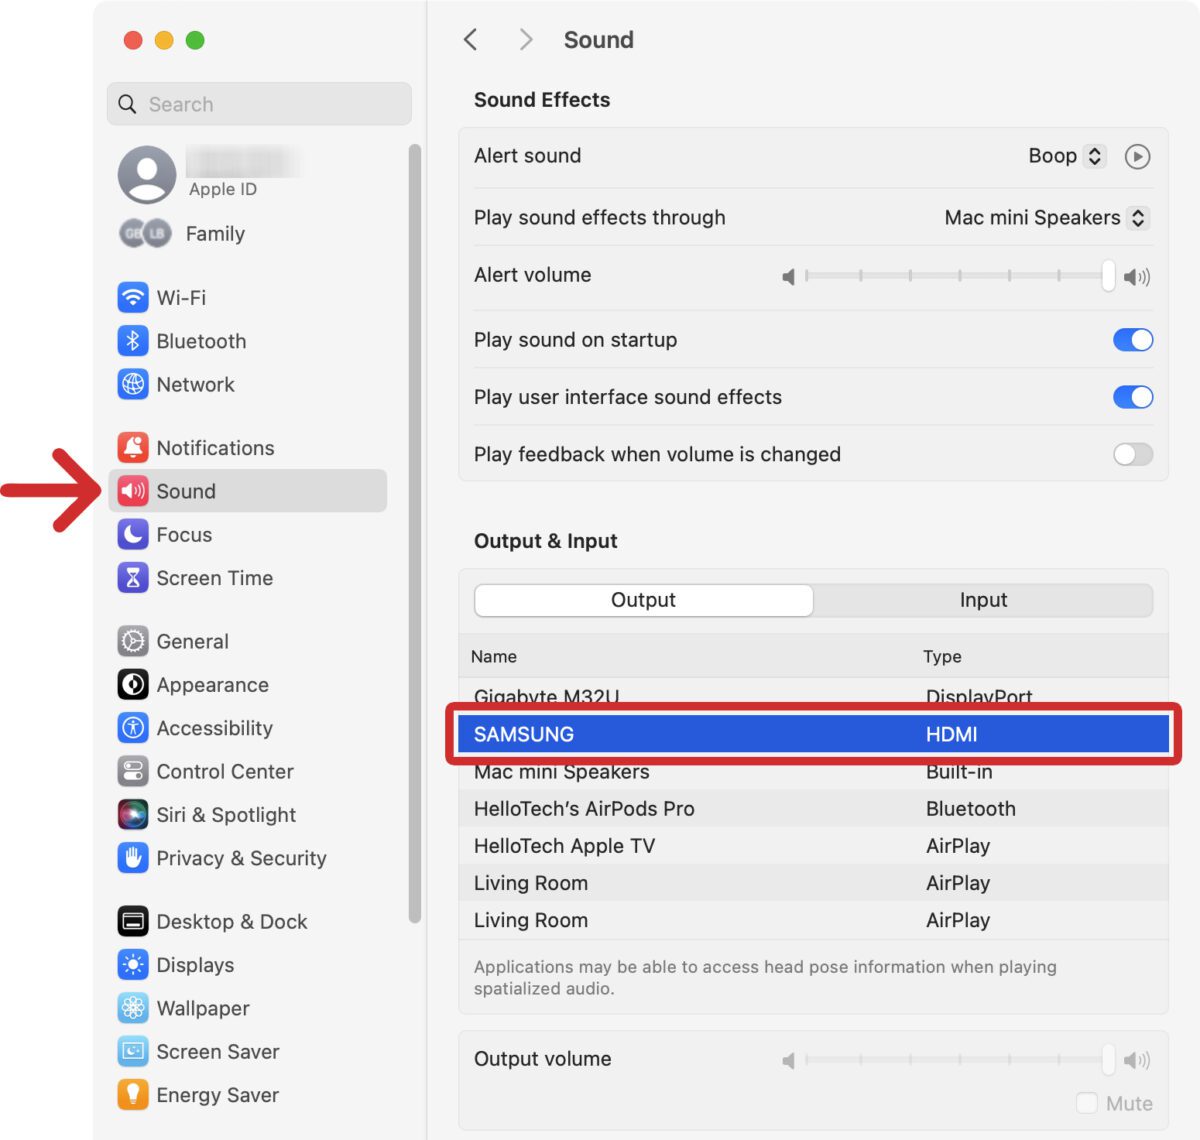
How to Change Your Mac Audio Settings
If you want to hear audio coming from your connected TV instead of your Mac, go to System Settings and select Sound from the left sidebar. Then, choose your TV from the list under Output. You should start hearing the sound coming from your TV, and you can change the volume with your remote.