If you want to test your computer connectivity or check the quality of your internet connection, all you need to do is perform a ping test. If you are experiencing a connectivity issue, you’ll be able to tell if this is limited to your local network (your home or office setup) or if the problem goes beyond (your internet service provider, host network, or a particular website). Here’s how to do a ping test on a Mac computer and how to read the results.
What is a Ping Test?
When you do a ping test, your computer sends a small packet of data to your host, a web domain, or another device in your network. The results will show you how fast your computer gets a “pong” response back in milliseconds.
A ping test is used to measure latency, which tells you the quality of your connection. It is important to have a low latency connection for online gaming, loading web pages quickly, video chatting, and more.
How to Do a Ping Test on a Mac
To do a ping test on Mac, open Finder and go to Applications > Utilities. Then open the Terminal app and type ping followed by a space and then an IP address or domain. To stop the test, hit Control + C on your keyboard.
- Open a Finder window on your Mac. You can do this by clicking the half-blue, half-gray face icon in your Dock.
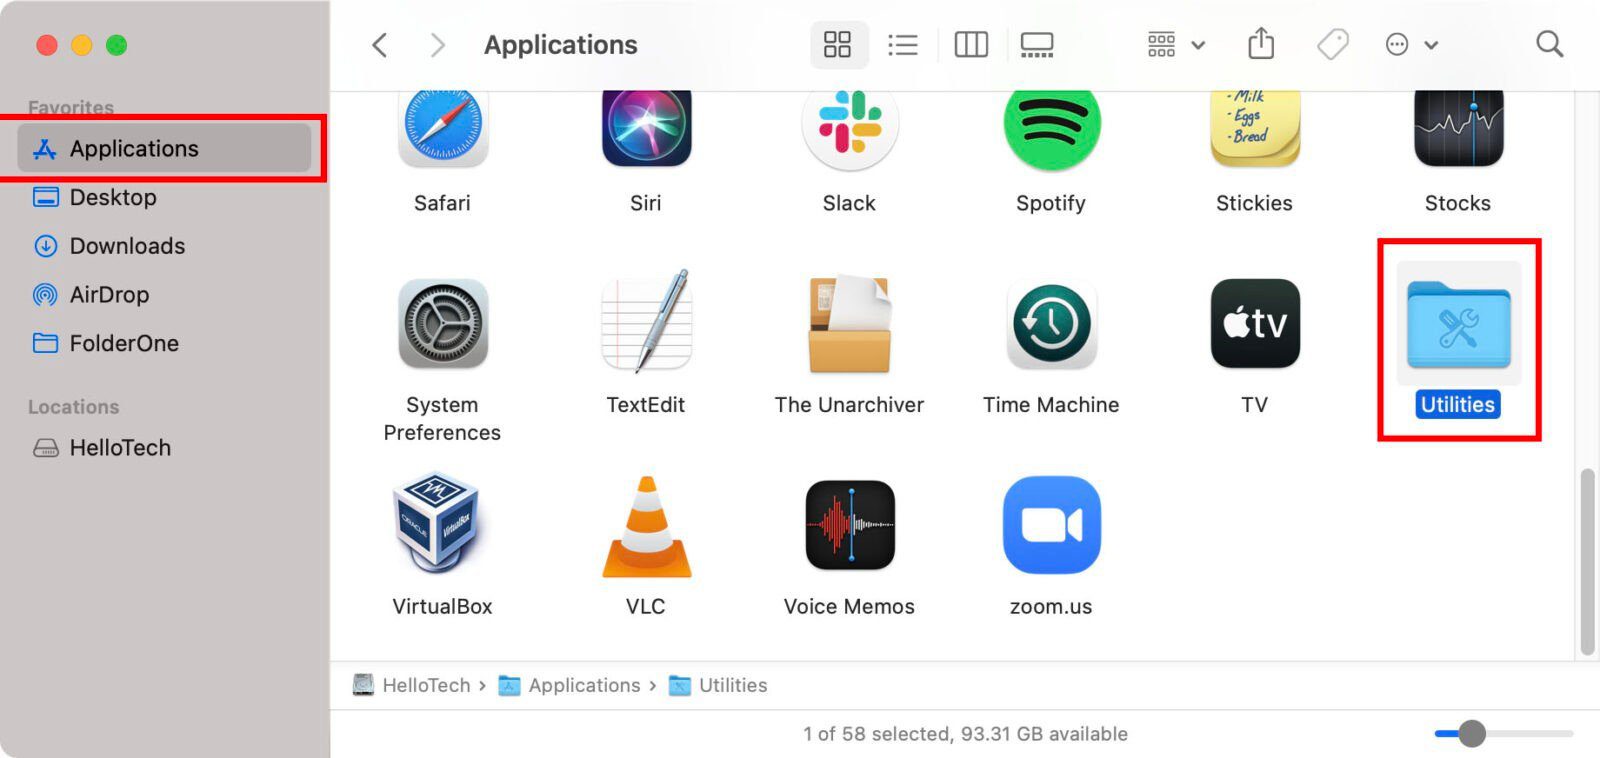
- Then click Applications in the left sidebar. If you don’t see this option in your left sidebar, you can also hit the Command + A keys on your keyboard from any Finder window.
- Next, open the Utilities folder.
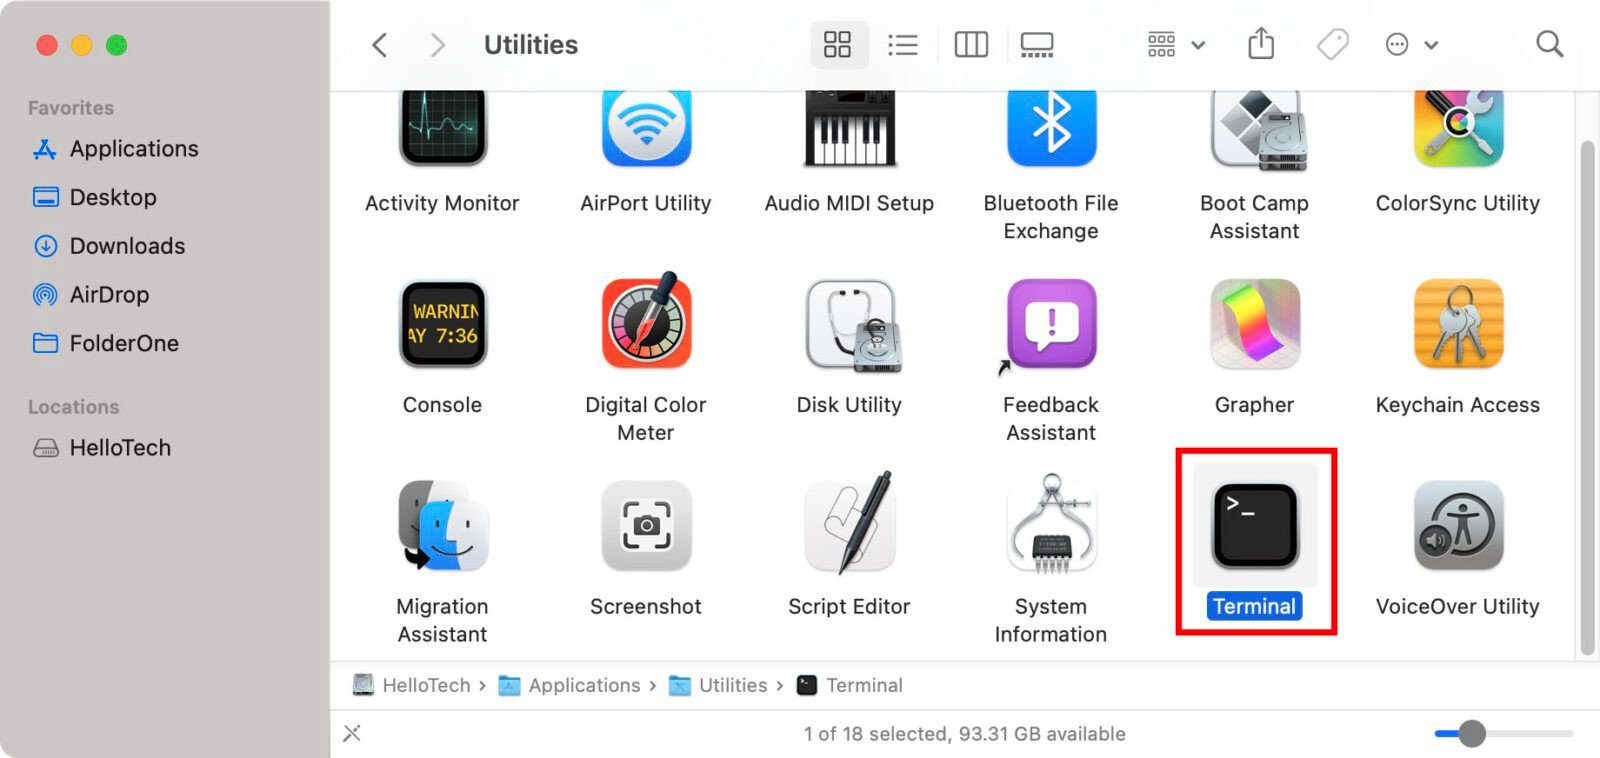
- Then open the Terminal app.
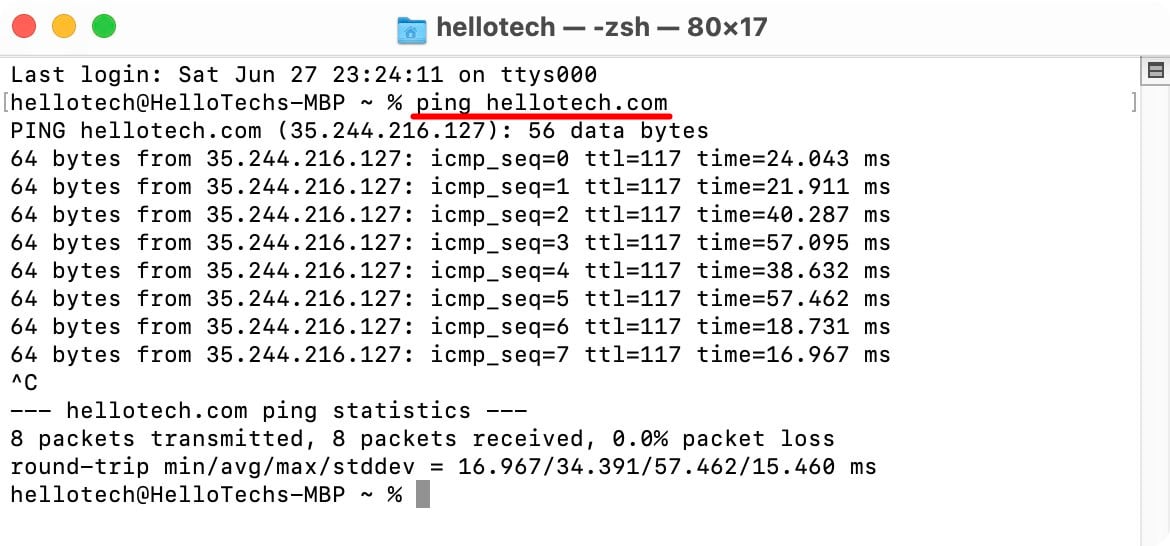
- Next, type ping followed by a space and an IP address or domain name. For example,you would enter “ping 192.168.1.1” or “ping hellotech.com”.
- Then hit Enter on your keyboard and wait for the results.
- Finally, hit Control + C on your keyboard to stop the ping test.
How to Interpret Ping Test Results on a Mac
Each time you do a ping test on a Mac, you will see the ping time in milliseconds (ms) and how many packets were received or lost. You will also see the minimum, average, maximum, and standard deviation (stddev) ping response times.
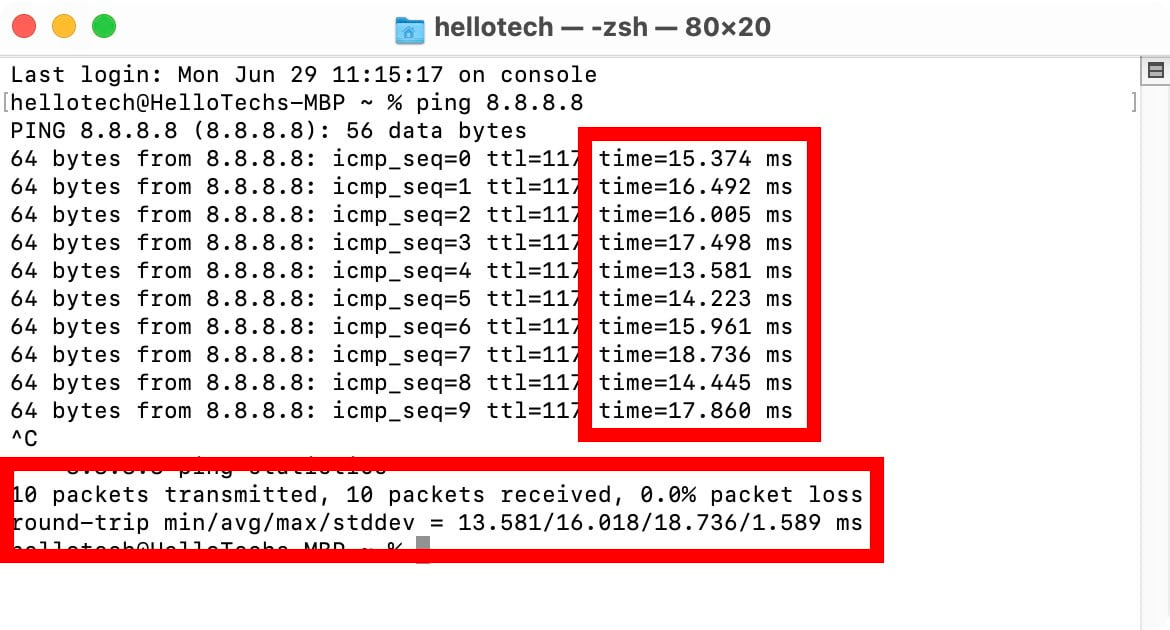
If you are doing a ping test to check your internet connection, you can ping Google’s DNS servers by entering “ping 8.8.8.8”. This will tell you if there is a problem with your internet connection, rather than just the connection to a certain site.
If one of your ping tests showed that packets were lost or one ping test took a lot longer than the others, it could be a sign that there is a problem with your connection.
Common Ping Error Messages
Here are the most common error messages you will see if your ping test returned failed results:
- Request timeout: This means the ping test took longer than the default limit of 4,000 milliseconds (4 seconds). This could be caused by network congestion, a firewall set to stop specific traffic, defective cables or ports, and more.
- Host is down: This error message means that the requested host name is not responding. Check that the name is entered correctly and that your router is functioning properly. If you are having problems with your router, check out our guide on how to reset your router here.
- TTL expired in transit: The TTL you see before your ping time for each test refers to the number of “hops” that your packet is allowed to make before being discarded. So, this error message means that your packet exceeded the maximum number of allowable hops.
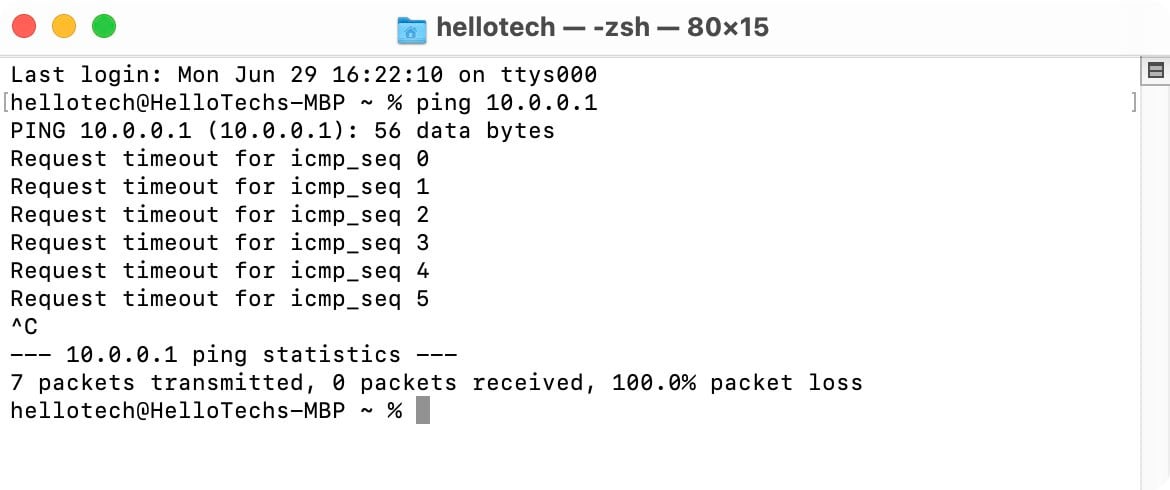
If you see one of these failure indicators, you would need to troubleshoot network issues. Moreover, if the remote device does not respond to the packets you sent, try to ping devices in other locations. This would help you determine whether the problem is with the remote device or with your network connection.
You can also do a ping test and find out more about your internet connection by checking out our step-by-step guide on how to test your WiFi speed.
