While most external hard drives are already designed to work for Windows computers, there are times when you need to reformat one. Formatting will let you erase everything on the drive, or you can partition half of the drive to work for Mac computers. Here’s everything you need to know about how to format and partition an external hard drive on a Windows 10 or Windows 11 PC.
How to Format a Hard Drive on a Windows PC
To quickly format an external hard drive in Windows 10 or Windows 11, open a File Explorer window and go to “This PC.” Then, right-click your external hard drive and select Format. Next, choose a File System, enter a name, and check Quick Format. Finally, click Start > OK.
- Connect your external hard drive to a Windows computer.
- Then, open a File Explorer window. You can do this by clicking the folder icon at the bottom of your screen. If you don’t see this icon, you can also press the Windows + E keys at the same time.

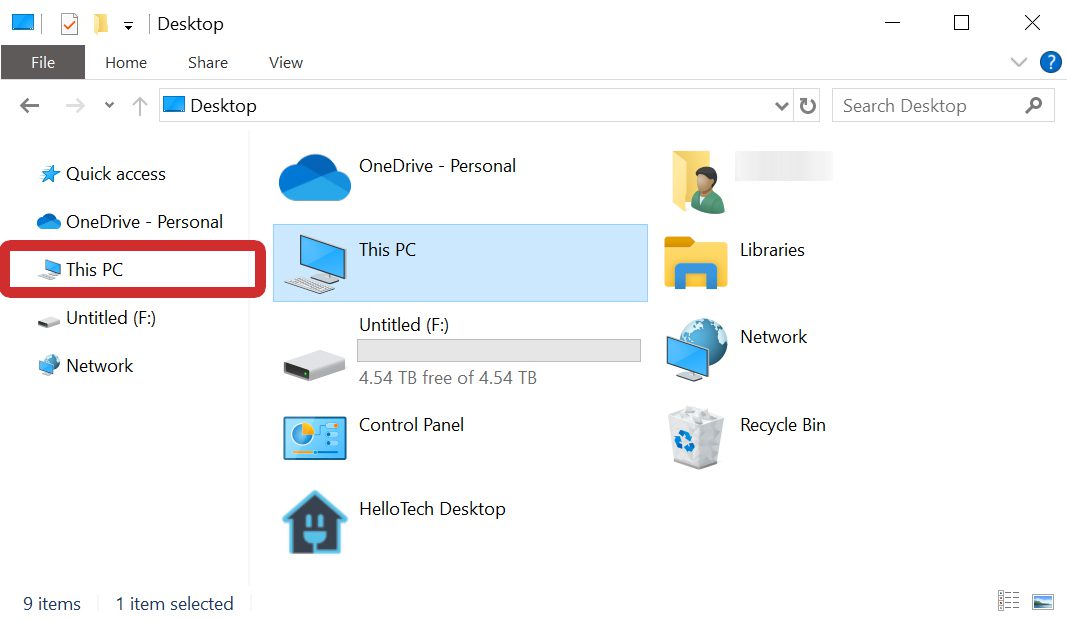
- Next, go to the “This PC” folder. You should see this in the left sidebar of the File Explorer window.If you can’t find This PC, open File Explorer and press the Alt + Up Arrow keys on your keyboard until you see it. You should also see any external hard drives here.
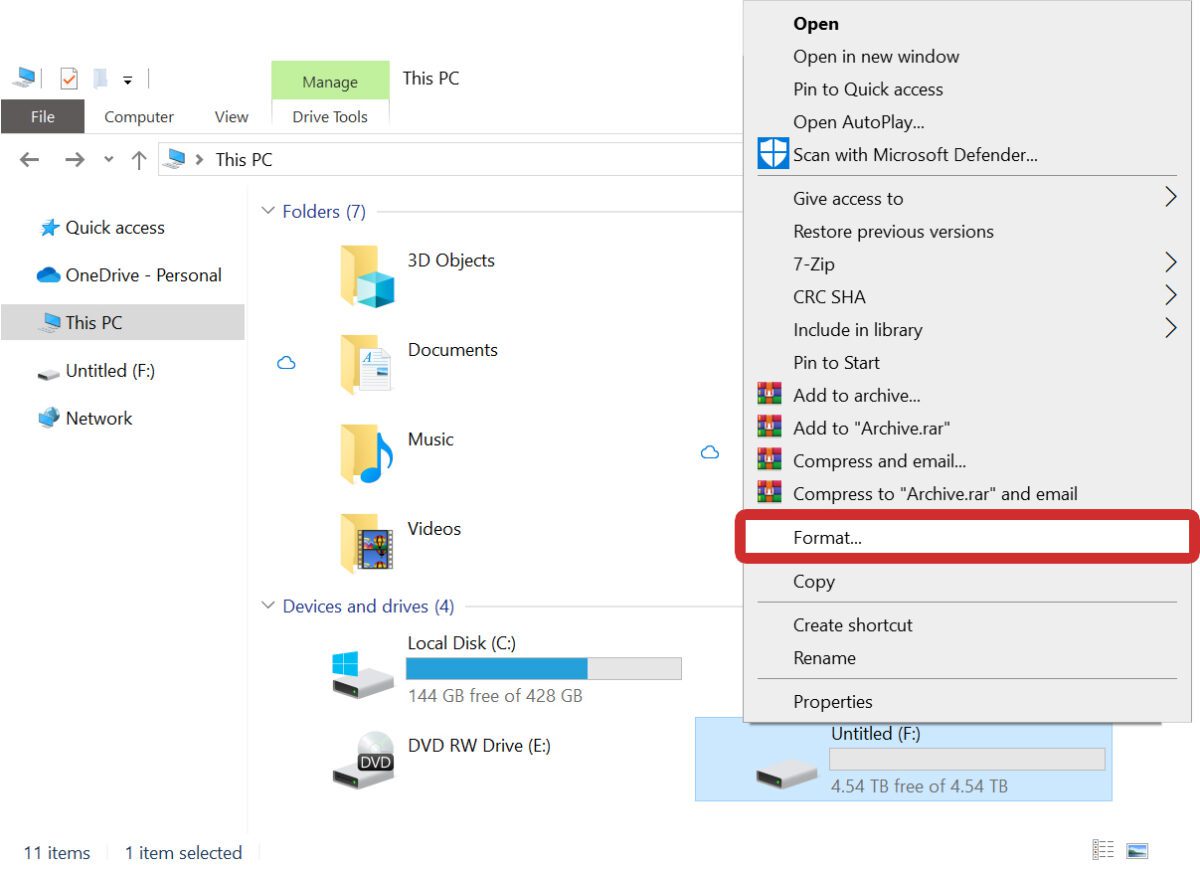
- Then, right-click on the external hard drive and select Format.
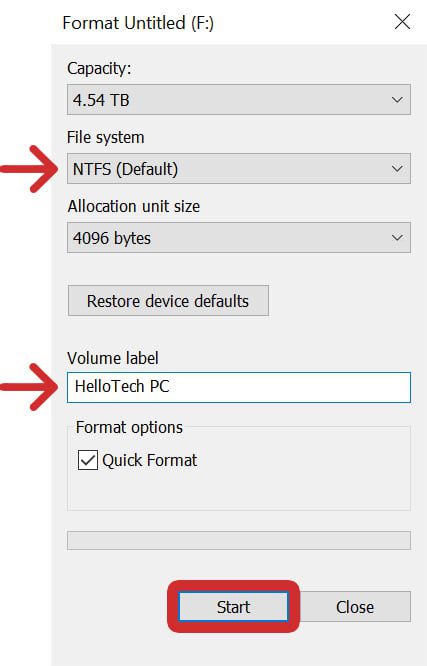
- Next, choose a format under File System. By default, Windows computers will choose NTFS (New Technology File System) for you because that’s the default file system for new Windows PCs. On the other hand, exFAT is good for older PCs, and it allows you to transfer files with a Mac computer.
- Then, enter a name under Volume label. This will be the name of your hard drive after it gets formatted.
- Next, check the Quick Format box, and click Start. Depending on the size of the drive and how many large files need to be deleted, this can take a few to several minutes to finish.
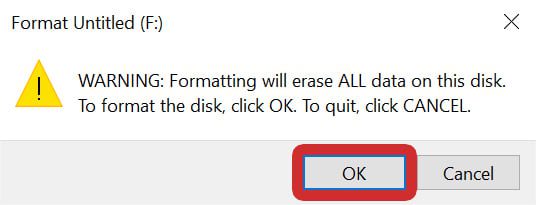
- Finally, click OK to format your hard drive. This is the last warning to back up your data before it gets erased.
If you have trouble formatting your external hard drive with the previous steps, try using Disk Manager in the steps below.
The following steps also show you how to partition a hard drive, which will basically divide it into two separate drives. This can be helpful for security, backups, or transferring files between two different operating systems (i.e. Windows and Mac).
How to Partition an External Drive in Windows
To partition a hard drive, press the Windows + R keys on your keyboard. Then, type “diskmgmt.msc” and hit Enter. Right-click your hard drive, select Shrink Volume, enter a size, and click Shrink. Finally, right-click unallocated space on your drive, select New Simple Volume, and follow the instructions.
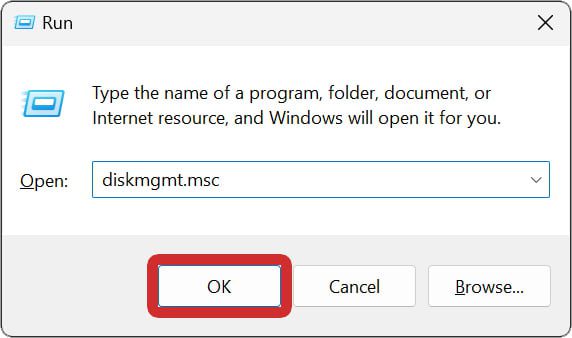
- Press the Windows + R keys on your keyboard. When you press these keys at the same time, the Windows Run box will open.
- Then, type “diskmgmt.msc,” and click OK. Alternatively, you can click the Windows logo at the bottom of your screen, type “disk management,” and click Open.
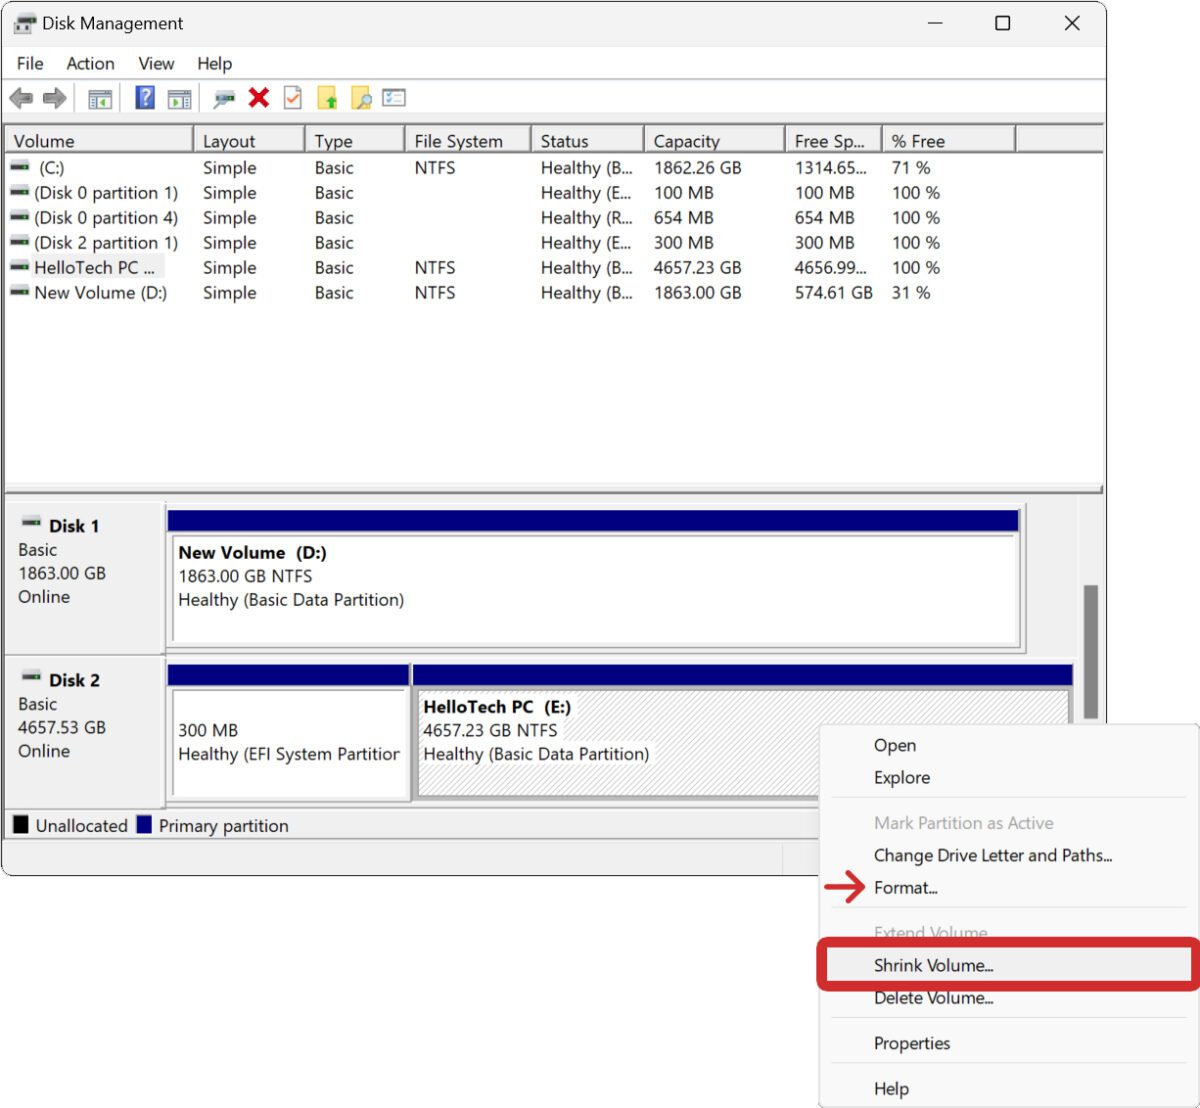
- Next, right-click on your external hard drive and select Shrink Volume. You might have one small partition on your hard drive that contains necessary information, so make sure you are shrinking the right partition. Also, make sure not to format your main “(C:)” drive or any other drives permanently connected to your Windows 10 or 11 PC.
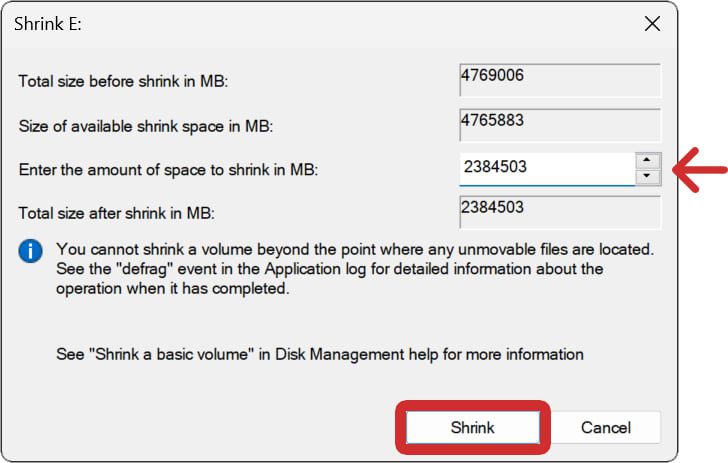
- Then, enter an amount of space by which you want to shrink your volume. For example, if you want to divide the drive into two equal partitions, you’ll want the number you enter to be the same number as the “Total size after shrink.”
- Next, click Shrink. This will split the hard drive, with one part becoming unallocated space.
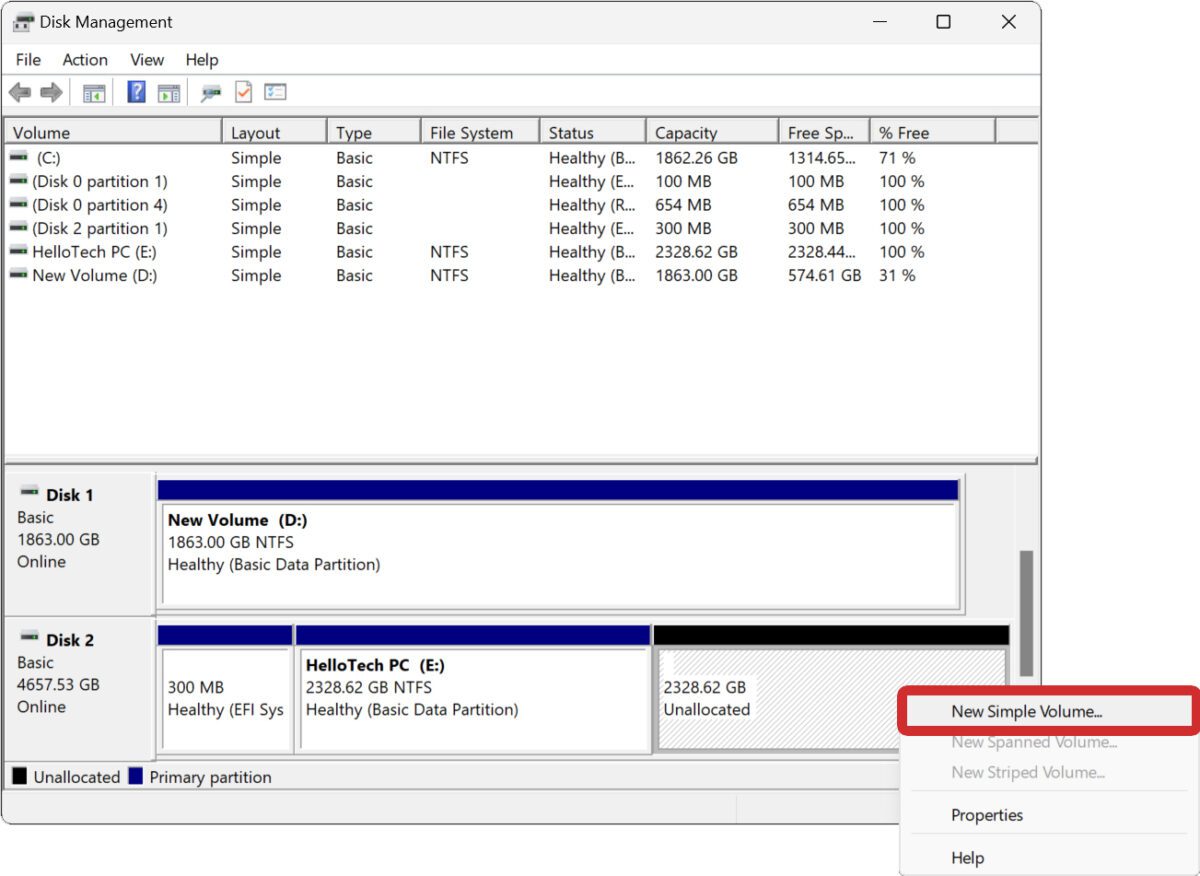
- Then, right-click the unallocated space on your drive and select New Simple Volume.
- Next, click Next.
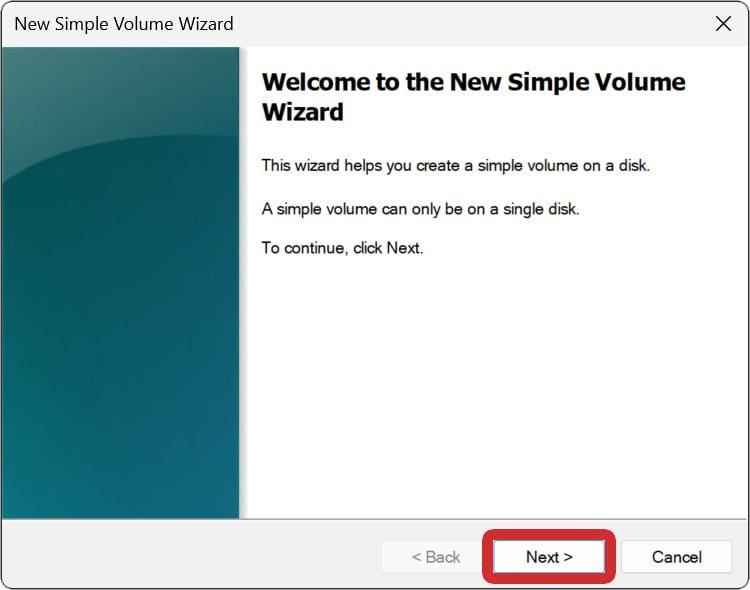
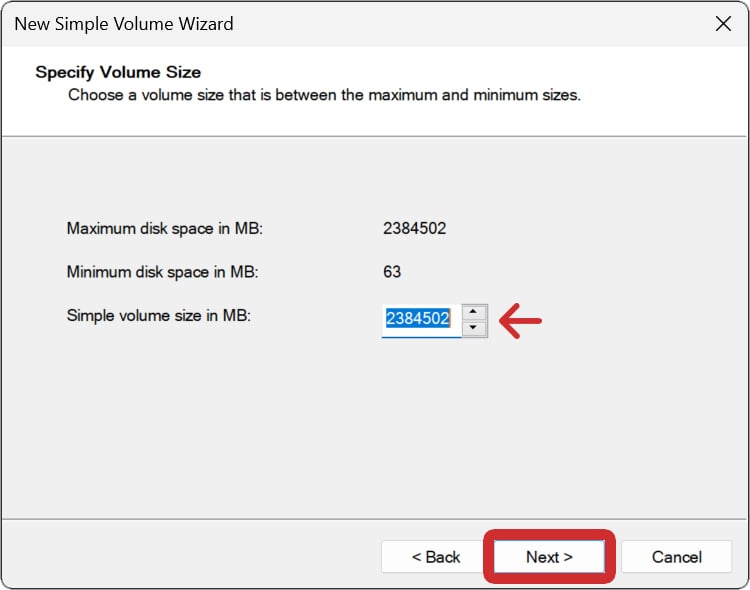
- Then, enter how large you want the partition to be. If you want to use the rest of the space, enter the maximum disk space indicated above it. Then click Next.
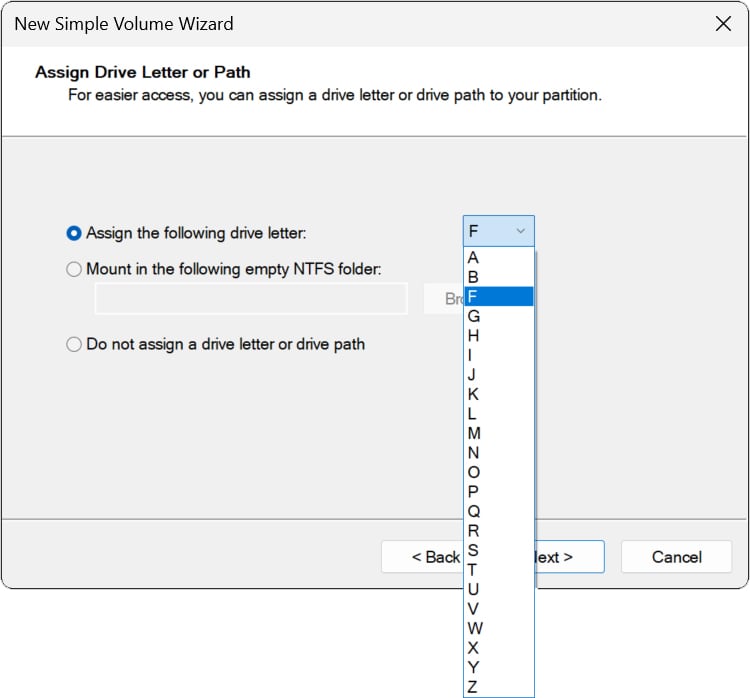
- Next, choose which drive letter you want to use. Letters that have already been assigned to other drives will not be on this list, so don’t worry if there are missing letters. Just choose from the drive letters still available.
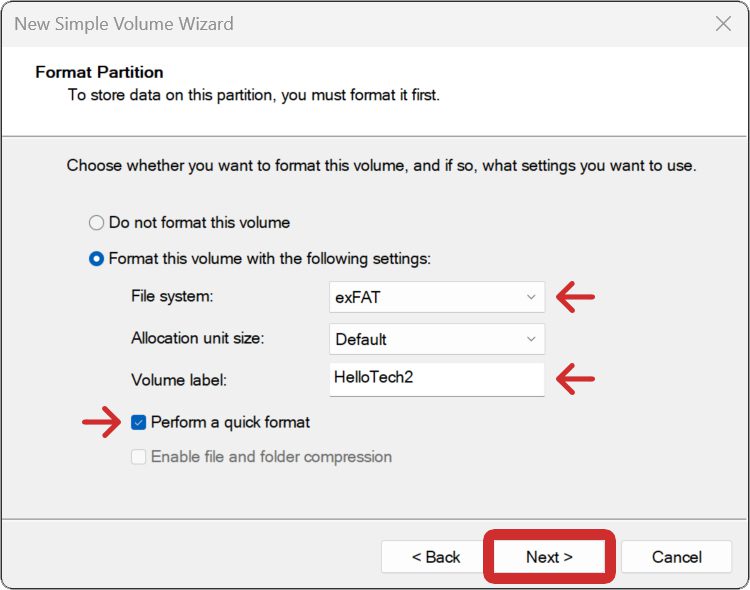
- Then, choose an option under File System. Windows will choose NTFS for you because that’s Microsoft’s native filing system. But if you want the external hard drive to also work on a Mac, you should choose exFAT, which is an upgraded version of FAT32.
- Next, enter a name under Volume label.
- Next, check the Perform a Quick Format box, and click Next.
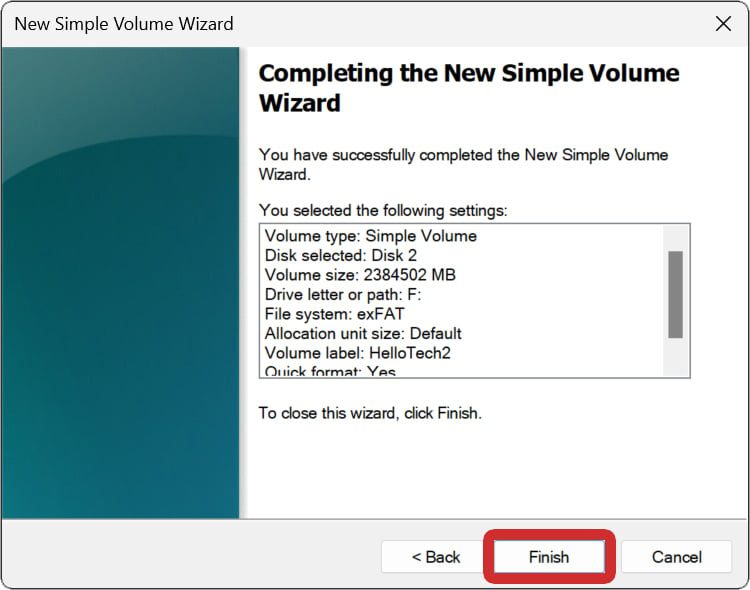
- Finally, click Finish. If a pop-up appears telling you to format the disk, click Format Disk. After that, the newly formatted disk will open automatically.
Once you format partition an external hard drive, you can go to This PC to see both partitions as different drives.
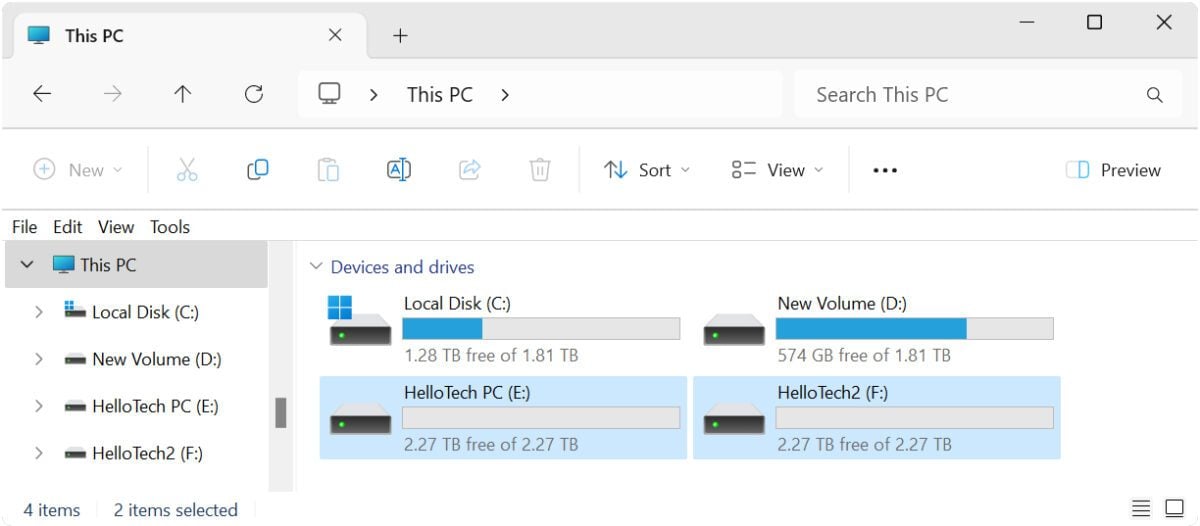
Partitioning your external hard drive will enable you to perform tasks in one section without affecting the rest of the drive. If you want to know how to format a hard drive for a Mac, check out our previous article here.
ADVANCED ADS


