Have you ever recorded a video with your iPhone, only to have it come out vertical when you wanted it to be horizontal? Or maybe it’s the other way around. Either way, it can be difficult to watch a video that has the wrong orientation. Here’s how to rotate a video on your iPhone, so you can watch it the right way.
How to Rotate a Video on iPhone
Just like photos, videos can either be in portrait or landscape orientation. If your video is in the wrong orientation on your iPhone, it can be difficult to watch. Here’s how to rotate a video on your iPhone using the Photos app and iMovie. You can also rotate the video on your Mac with the QuickTime app.
How to Rotate a Video on an iPhone with iOS 13
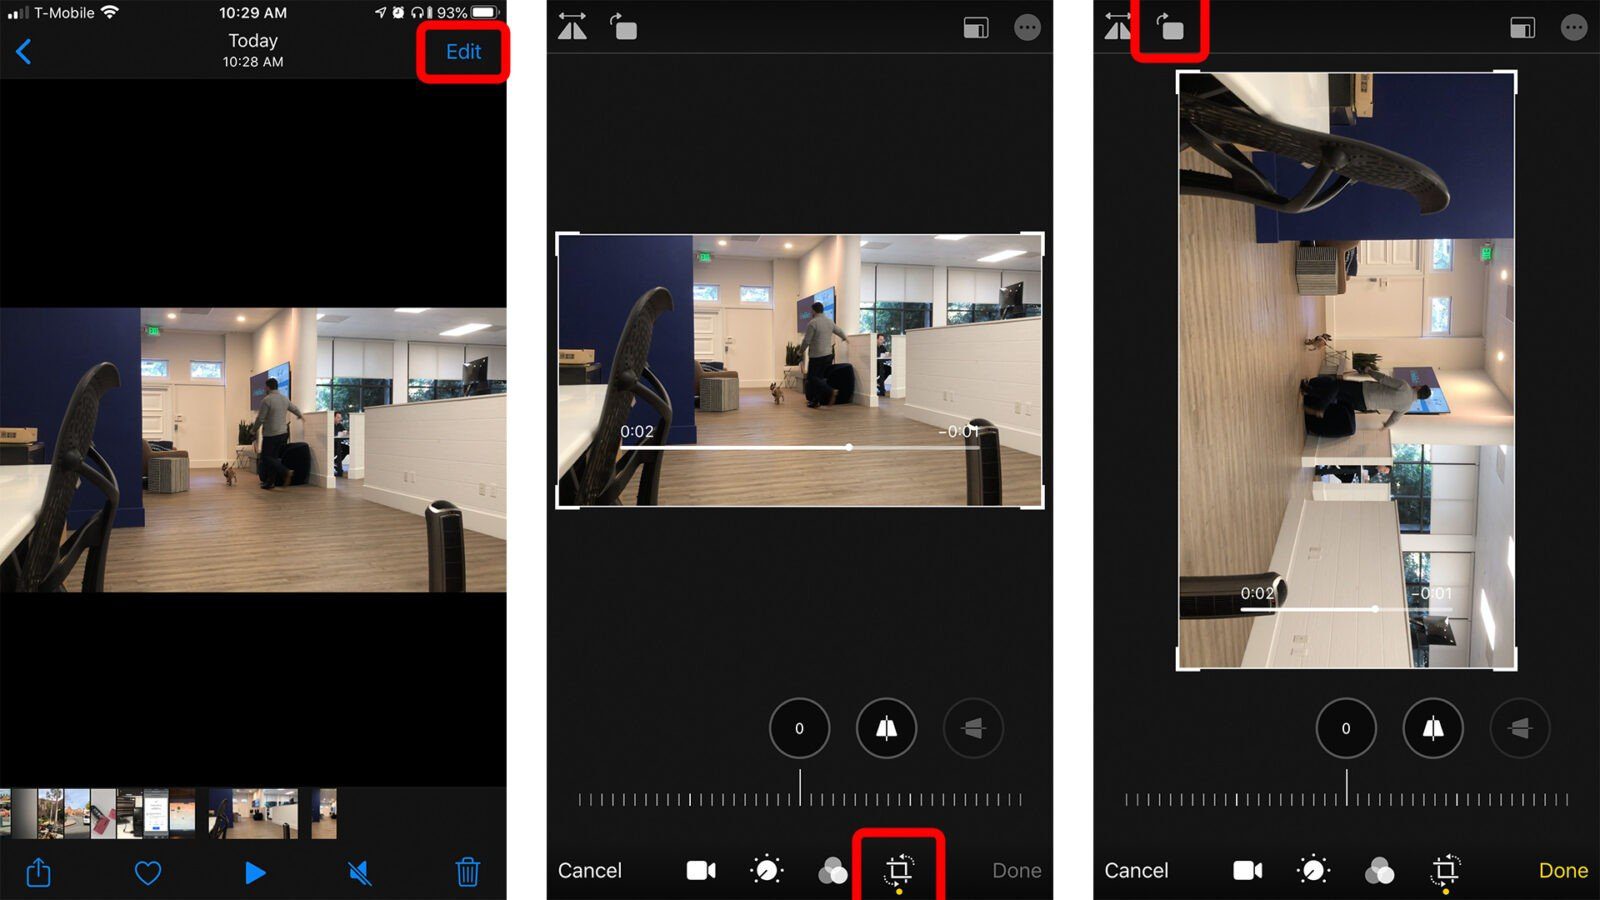
Rotating a video on an iPhone that runs on iOS 13 is straightforward because you can just use the Photos app. Here’s how:
- Open the Photos app on your iPhone. This is an app that comes pre-installed on your iPhone.
- Then select the video you want to rotate. You can find your video in Photos > All Photos.
- Then tap Edit. You will find this in the upper-right corner when you tap on the video.
- Tap the Crop icon. This is the square icon at the bottom of your screen with two arrows surrounding it pointing counterclockwise.
- Then tap the rotate button in the top-left corner of your screen. This is the button that has a square with an arrow around it pointing clockwise. If you need to rotate the other way, simply tap the button two more times.
- Finally, tap Done.
How to Rotate a Video on an iPhone with iMovie
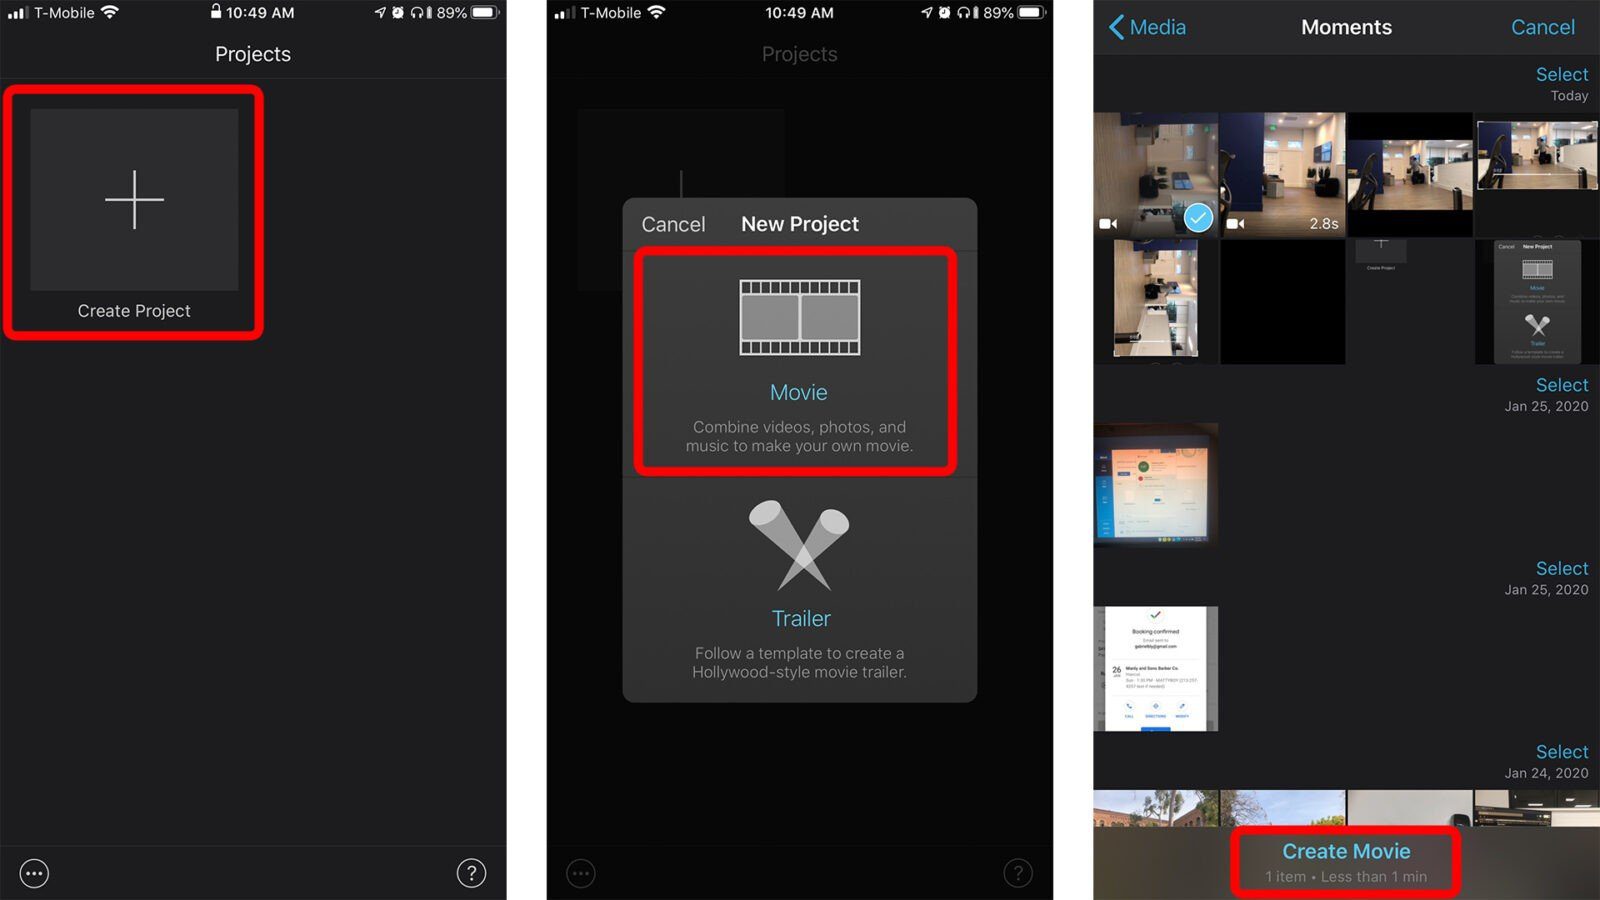
- Open iMovie on your iPhone. If you don’t have the app yet, you can download it from the Apple App Store for free here.
- Then tap Projects. You will see this at the top of your screen.
- Next, tap Create Project.
- Then select Movie.
- Choose the video you want to edit from your camera roll. A blue tick will appear in the video’s bottom-right corner.
- Then tap Create Movie. You will see this at the bottom of the screen. A new project page will open, and this will include your clip in a viewer at the top. You will also see a timeline below the viewer.
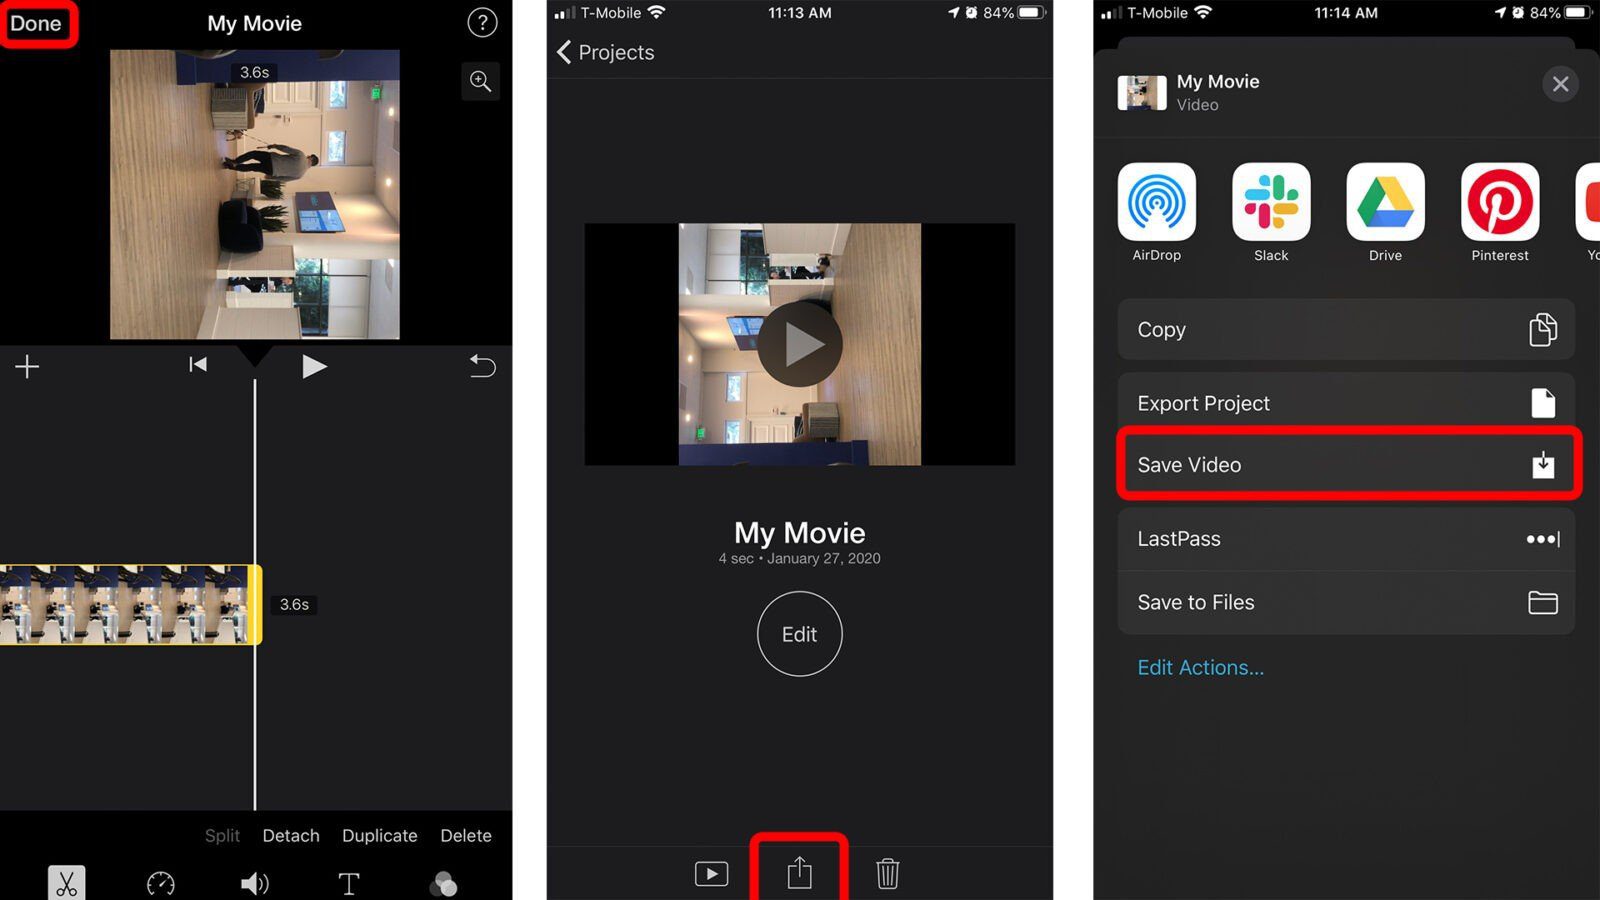
- Tap on the timeline clip. The outside of the timeline clip should turn yellow.
- Use two fingers to twist the video in the direction you want to rotate it. You can use your thumb and index finger, then turn them left or right on the screen as if you are turning an imaginary knob. Do this until you have rotated the frame to your desired orientation.
- Then tap Done. You will see this in the upper-left corner of the screen. You will see the video clip in the center of the screen without the timeline and with My Movie under it.
- Tap the share icon at the bottom of the screen. This is the icon with a square and an upward pointing arrow. Doing this will export the video file back to your camera roll, allowing you to share it on social media or on other apps.
- Finally, click Save Video or send it to one of the available options.
How to Rotate a Video on a Mac with QuickTime
If you have taken a video with your iPhone and want to edit its orientation on your Mac, you can do it using the QuickTime Player app. You don’t need to download this app because it comes pre-installed on all Macs.
- Send the video to your Mac. If you want to know how to transfer your photos and videos to a Mac, check out our guide here.
- Open the QuickTime Player app. You can find this in your Applications folder.
- Open the video in QuickTime. If your video doesn’t open in QuickTime by default, right-click the video, select Open with, and then choose QuickTime.
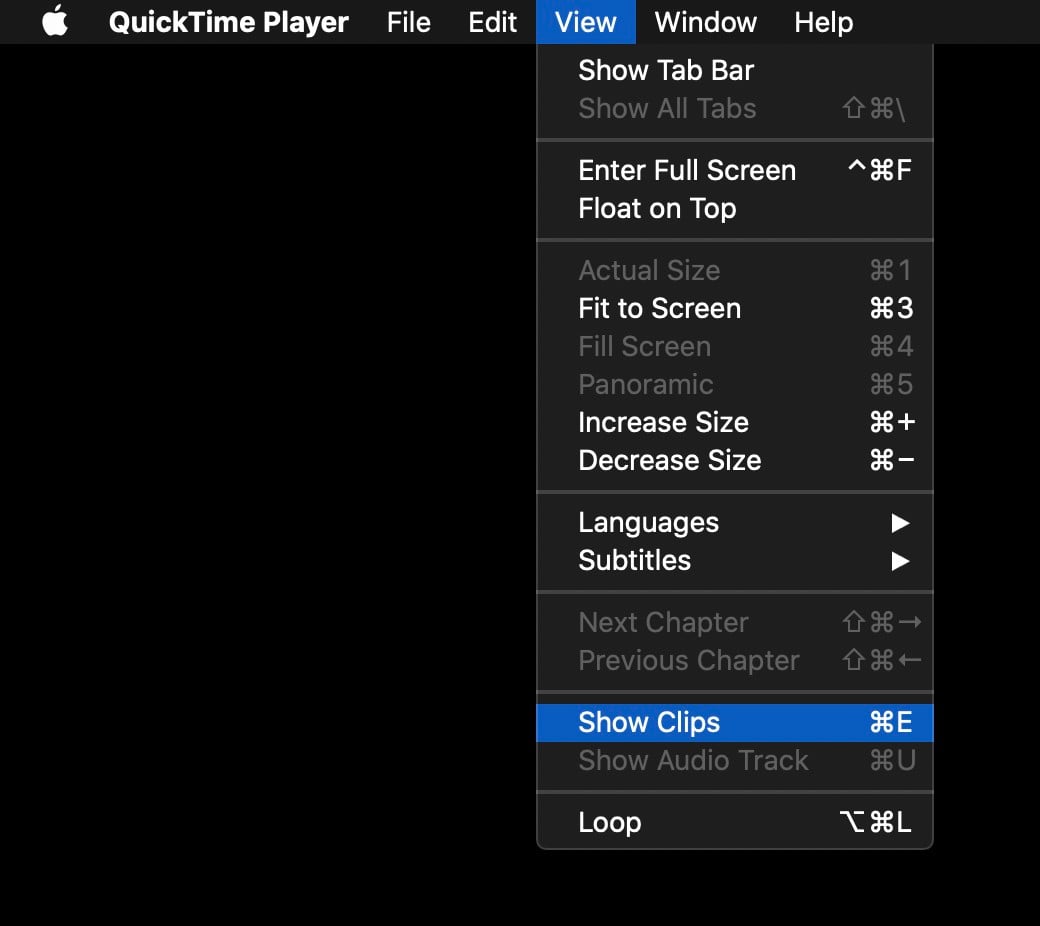
- Then click View. You will see this in the Apple Menu Bar at the top of your screen. You will only see this option if you first select the QuickTime app.
- Next, select Show Clips.
- Select the video. Once selected, the video will be outlined in yellow.
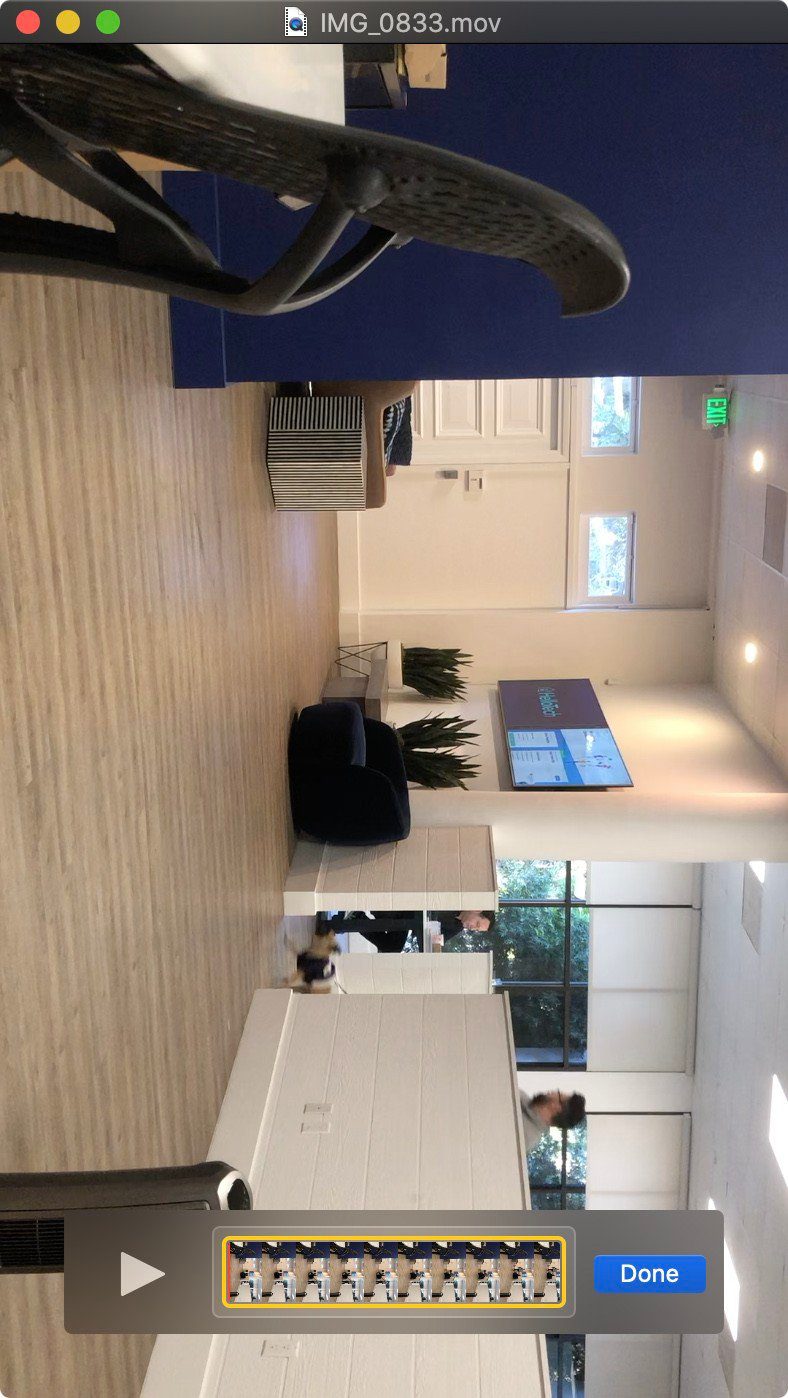
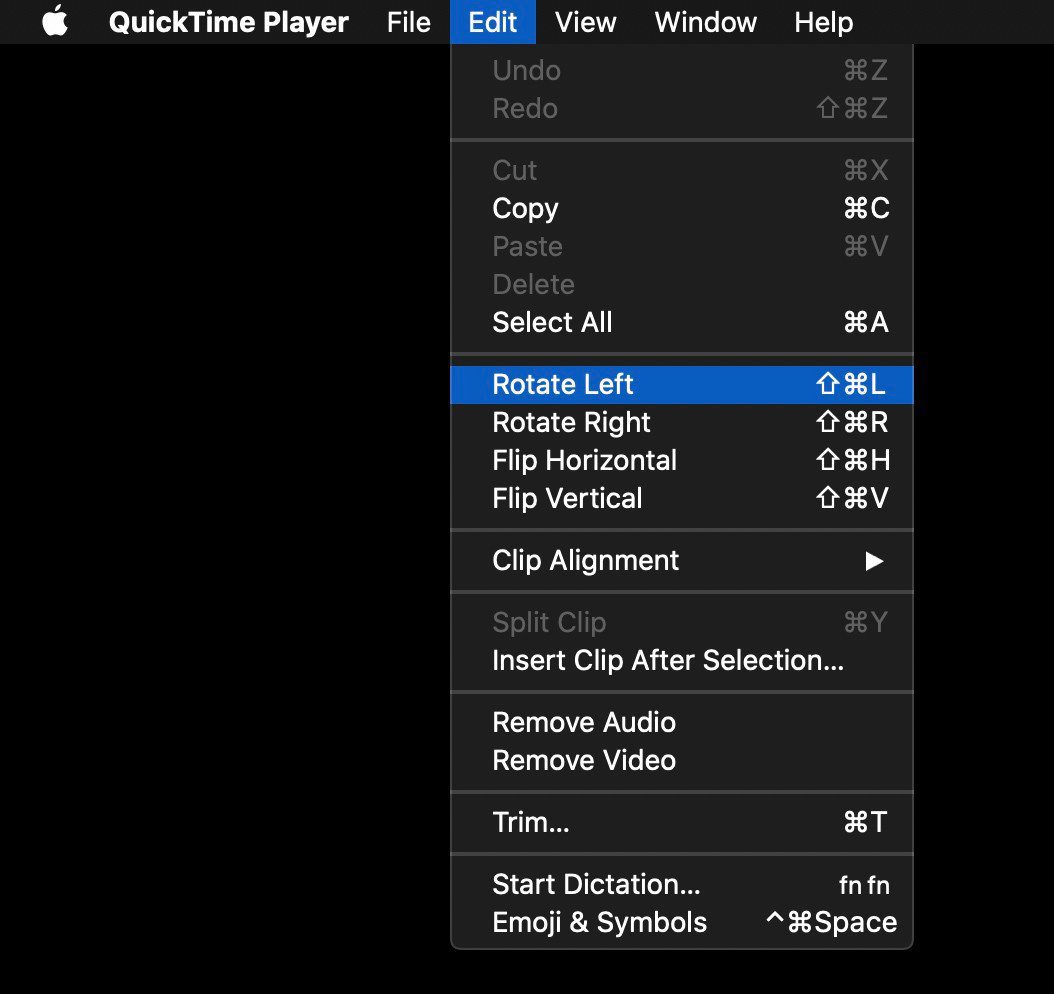
- Go to the Edit menu. This will be in your Apple Menu.
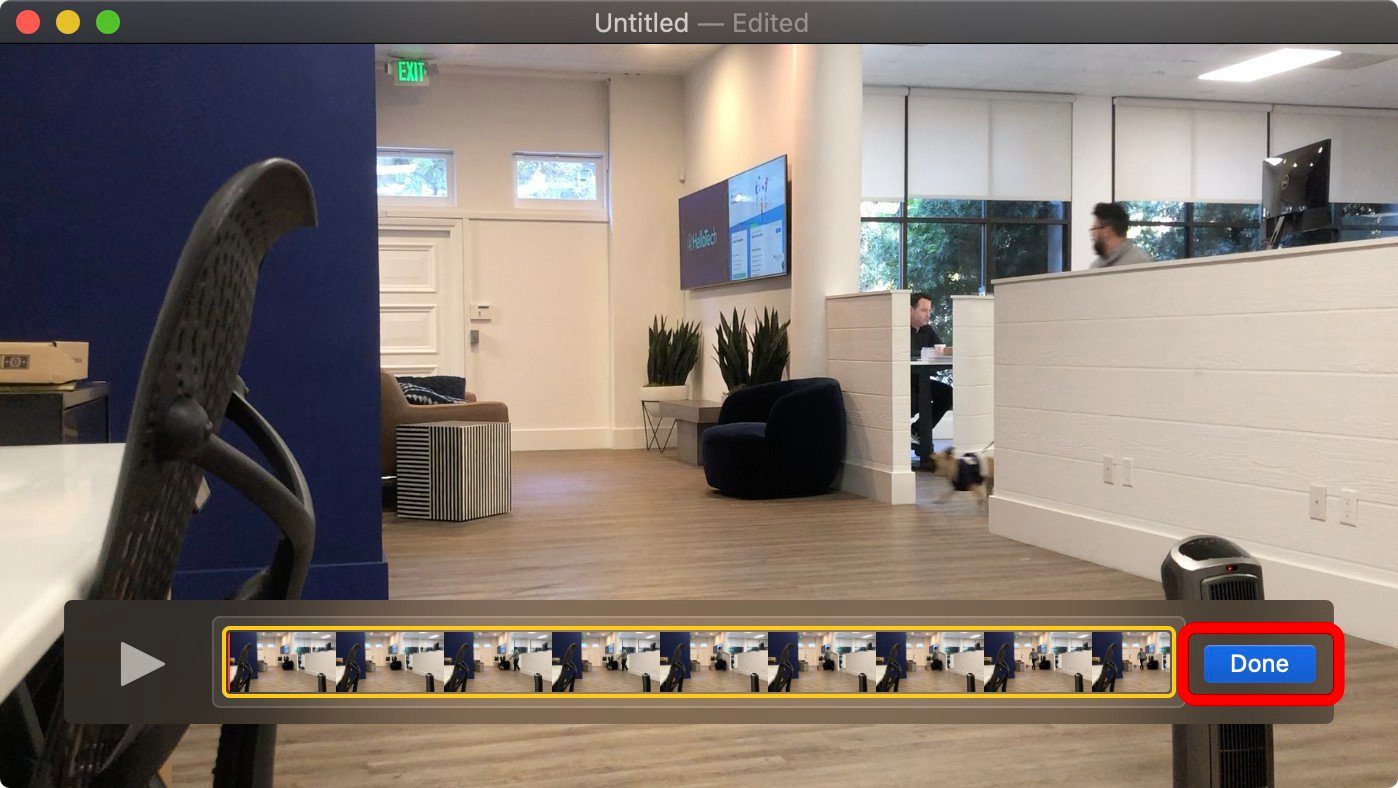
- Then choose Rotate Left or Rotate Right.
- Finally, click Done and save your new video to your Mac.
If you’re looking for more ways to edit your photos and videos, check out our list of the best photo editing apps for iPhone and Android here.
