Have you ever needed to send someone a document, but you weren’t near a scanner? All you need is an iPhone, and you can scan any document. You can even scan a handwritten note and turn it into digital text. Here’s how to scan a document or a handwritten note on your iPhone, how to save it as a PDF, add a signature, send it in an email, and more.
How to Scan a Handwritten Note on an iPhone
To scan text with your iPhone, including a handwritten note, open the Notes app and tap the pencil and paper icon to create a new note. Then tap the camera icon and select Scan Text. Finally, point your camera at the text you want to scan and tap insert.
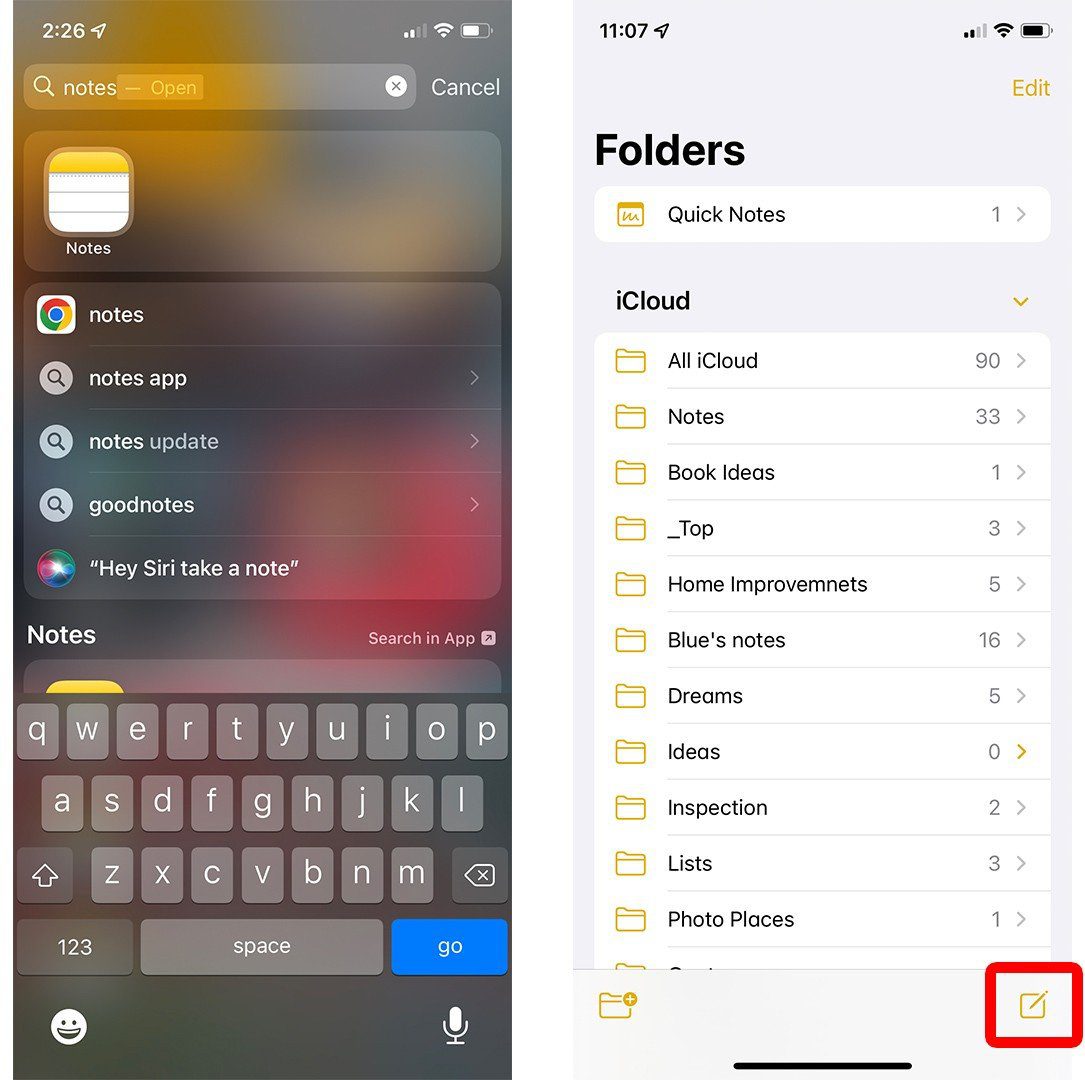
- Open the Notes app on your iPhone. This app comes with your device, so you don’t have to download it. If you can’t find it, swipe down from the middle of your screen, type “notes” in the search bar, and tap the app to open it.
- Then tap the pencil and paper icon to create a new note. You can find this icon in the bottom-right corner of your screen. If you don’t see it, go back to the Folders screen, and create a new folder or open an existing one.
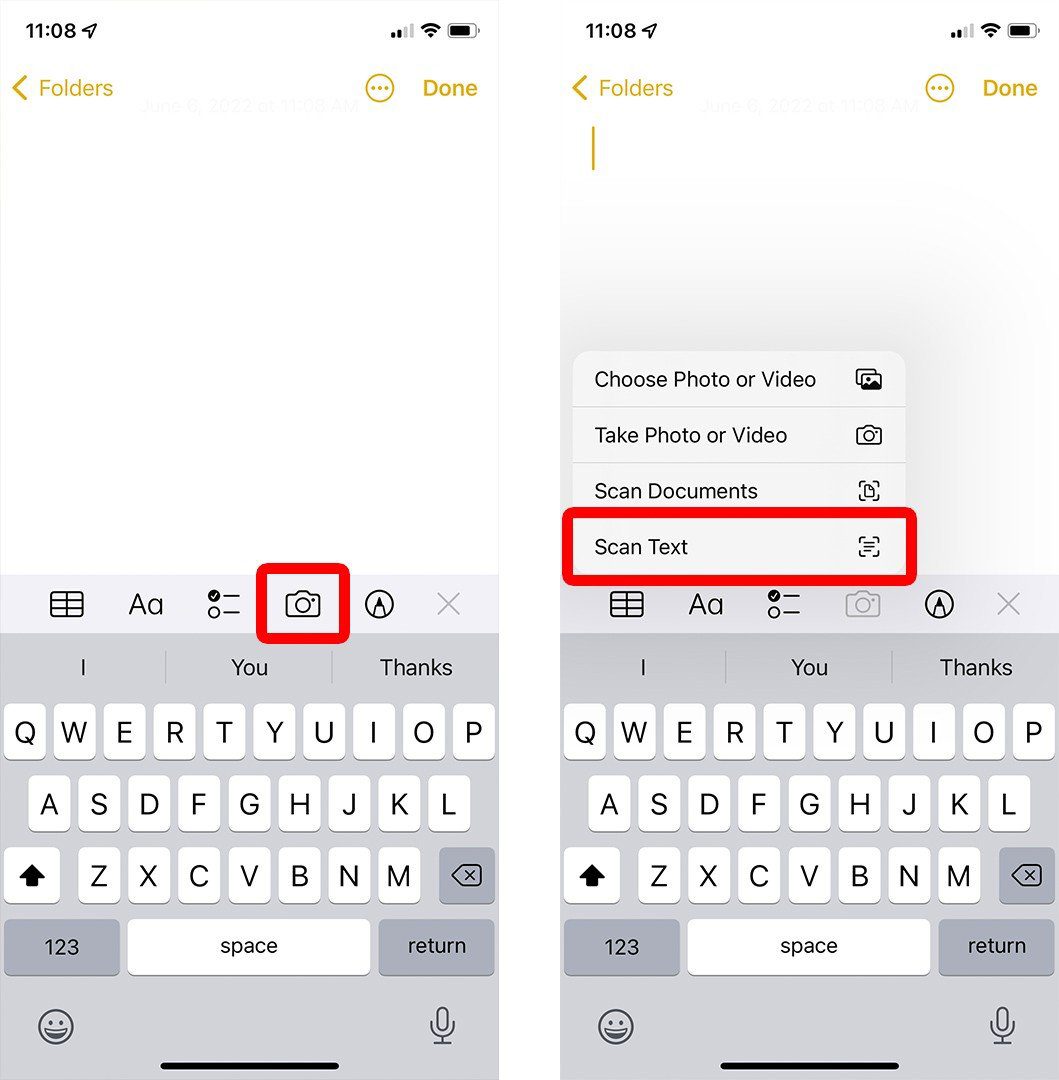
- Next, tap the camera icon. You can find this in the ribbon above the onscreen keyboard.
- Then tap Scan Text from the menu that pops up. After you do so, your camera will be enabled.
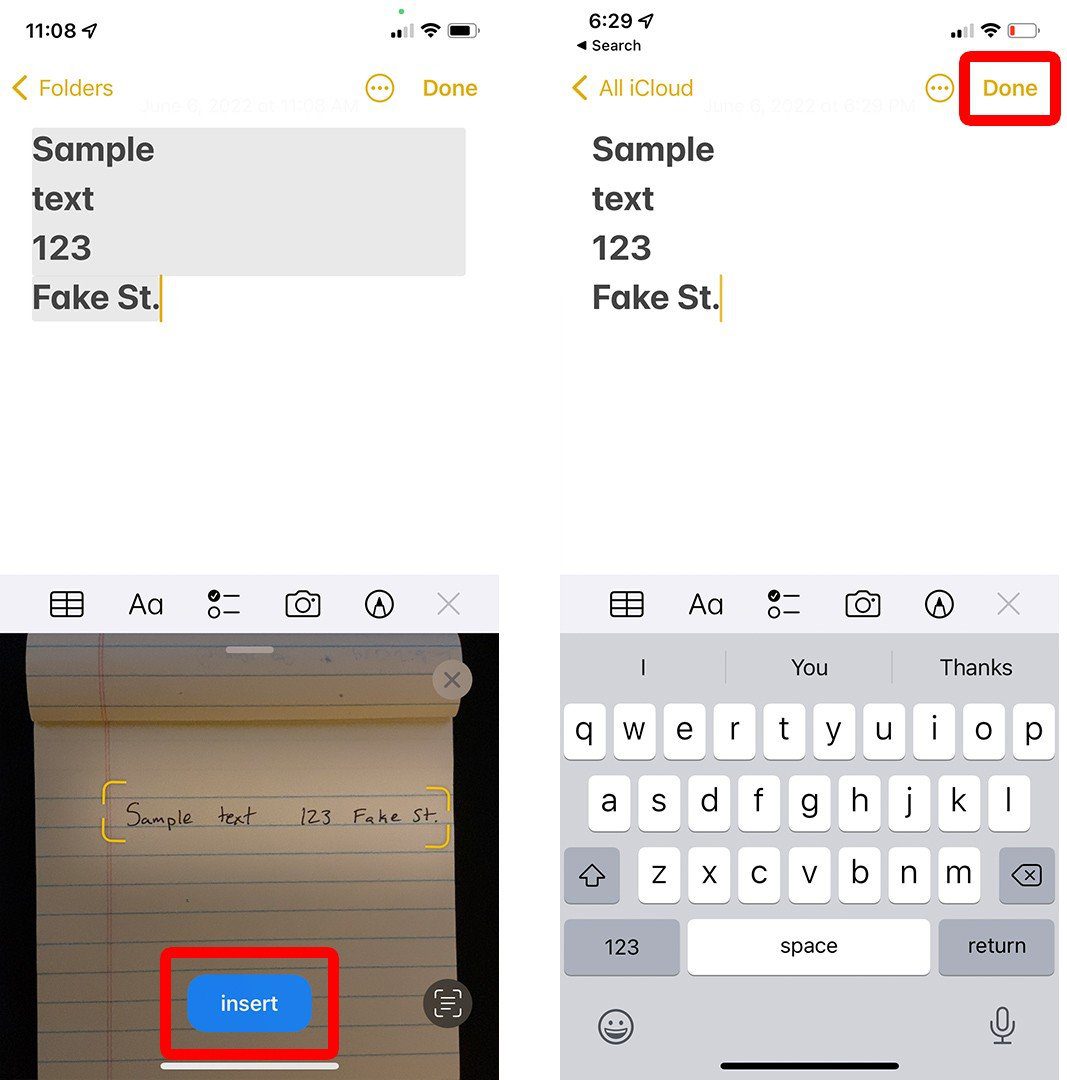
- Point your camera at the text you want to scan and tap insert. You will see this blue button at the bottom of your screen. Your iPhone will only scan the text inside the yellow box. You might have to reposition your iPhone in order to scan the text you want.
- Finally, tap Done. You will see this in the top-right corner of your screen.
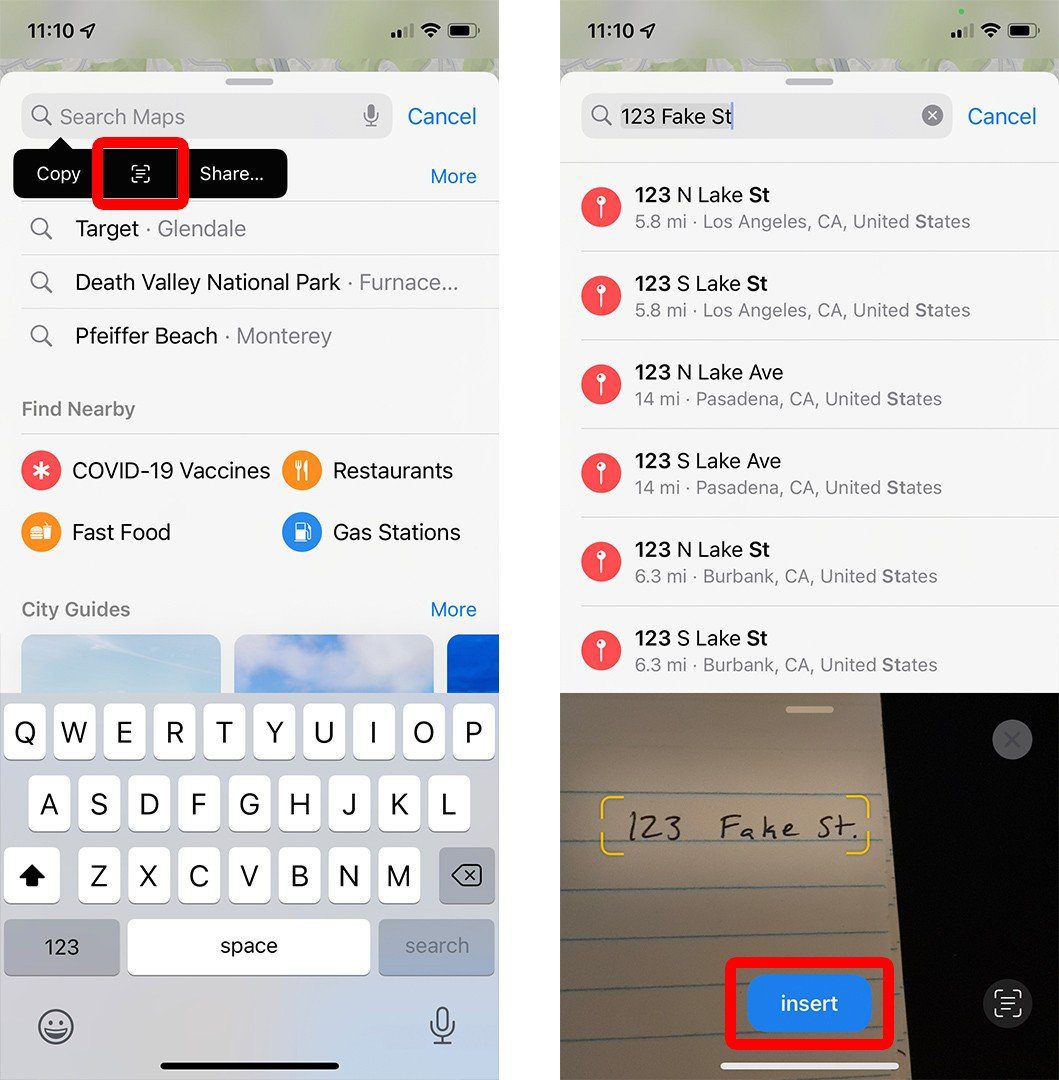
While this method allows you to scan text, it isn’t the best option if you want to scan a whole page. If you have a really important document you want to scan, check out the steps below:
Read More: How to scan a QR code on an iPhone or Android device
How to Scan a Document on Your iPhone
To scan a document on an iPhone, open the Notes app and tap the pencil and paper icon to create a new note. Then tap the camera icon and select Scan Documents. Finally, hold your device over the document to automatically scan it, and then tap Save.
- Open the Notes app on your iPhone.
- Then tap the pencil and paper icon to create a new note.
- Next, tap the camera icon.
- Then tap Scan Documents from the pop-up menu.
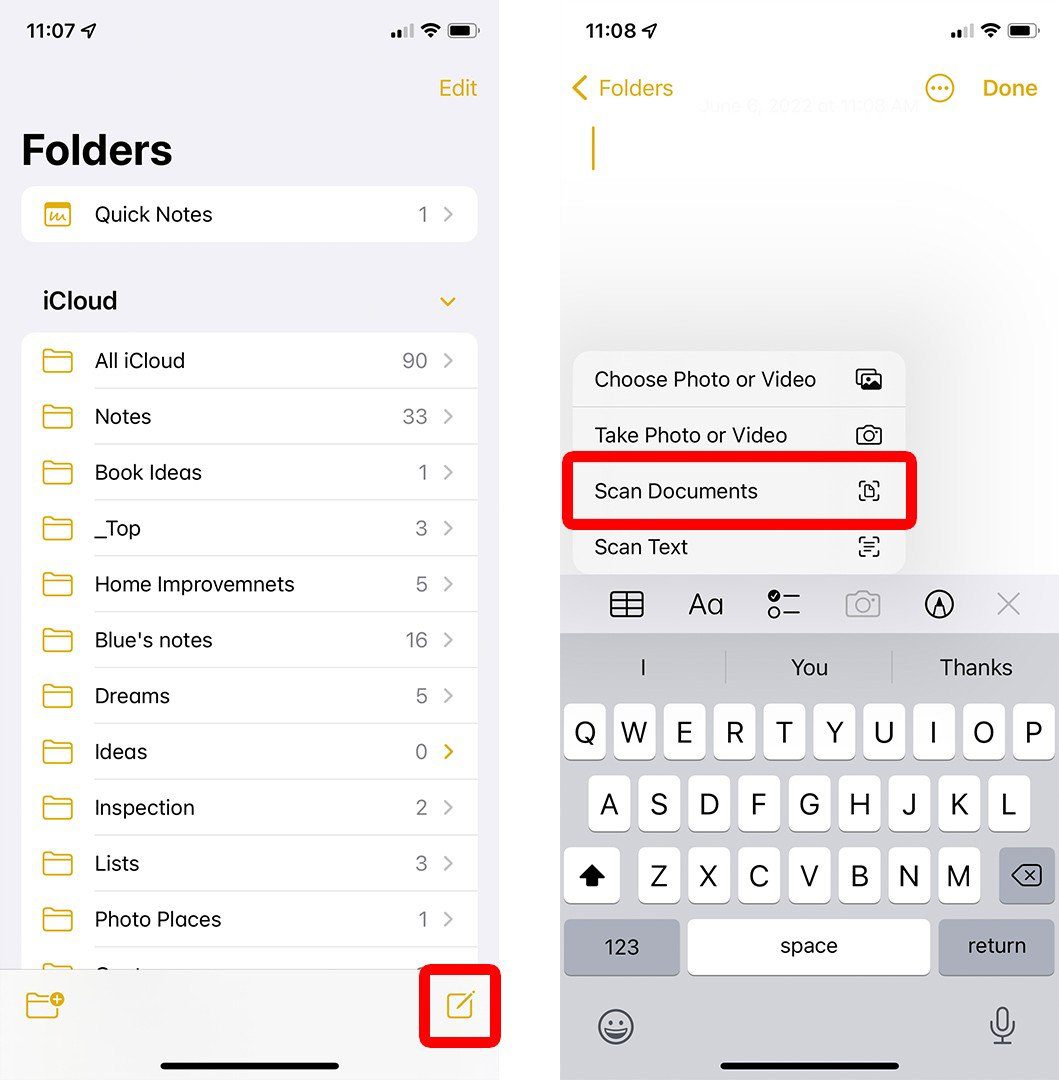
- Finally, position your iPhone over the document to scan it and tap Save. If the whole document is clear and well-lit, your device should scan it automatically. Then tap Save in the bottom-right corner to save the document to the Notes app.
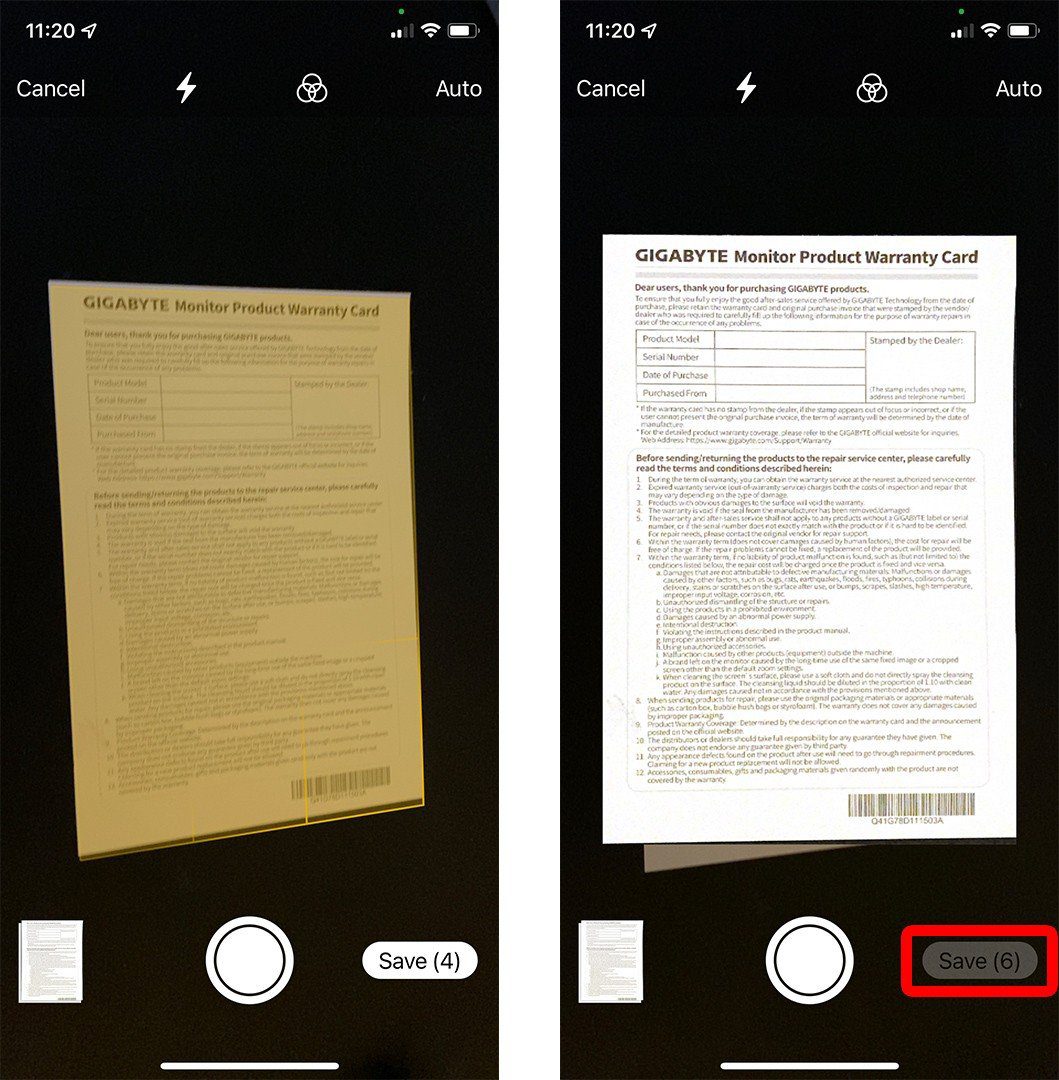
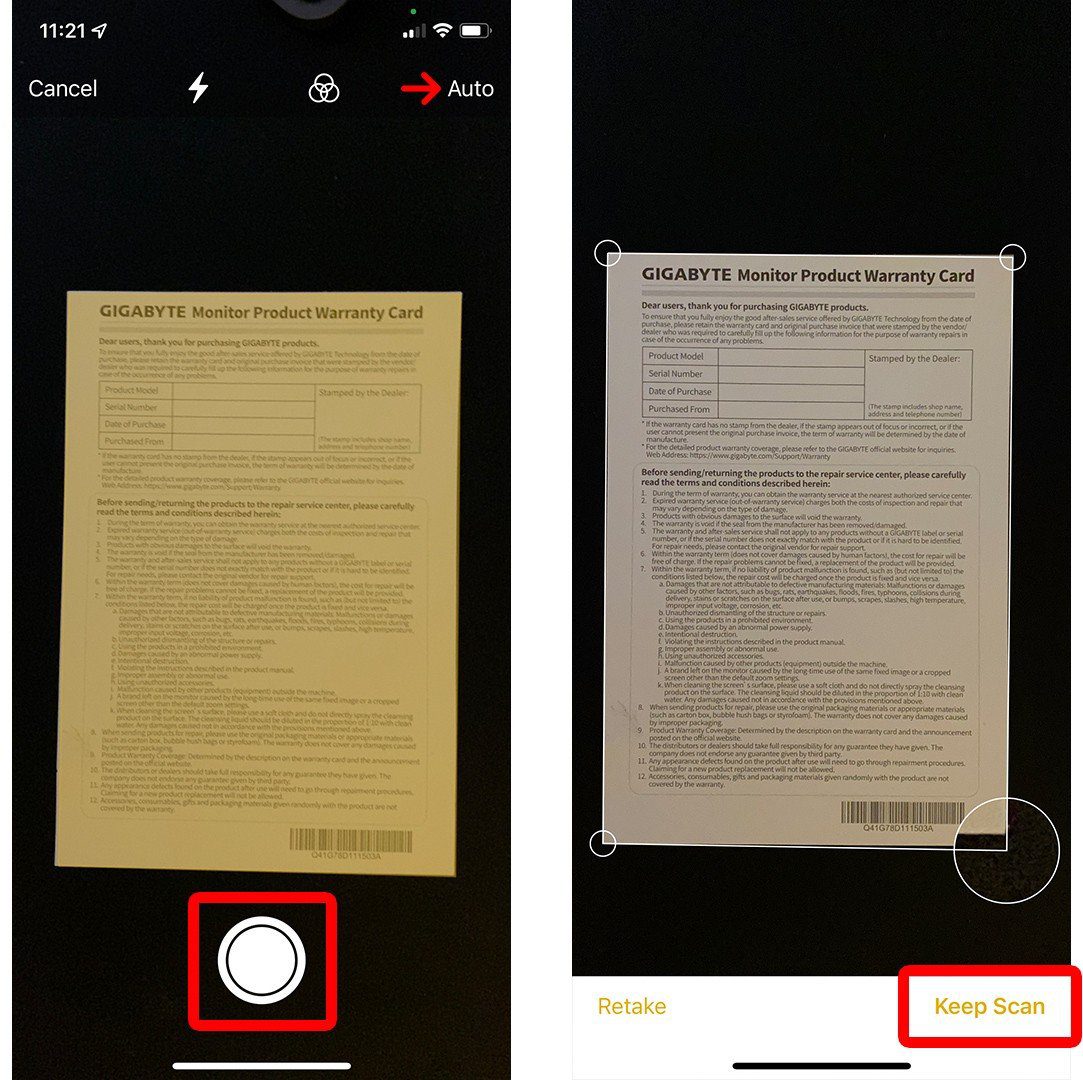
If your phone doesn’t scan the document automatically, you can tap Auto in the top-right corner to switch to manual mode. Then you can tap the shutter icon that looks like a white circle at the bottom of your screen to scan the document manually.
After you can the document, you can tap and hold the circles in the corner to adjust the area you want to scan. Finally, tap Keep Scan to start editing your document.
How to Edit a Scanned Document on your iPhone
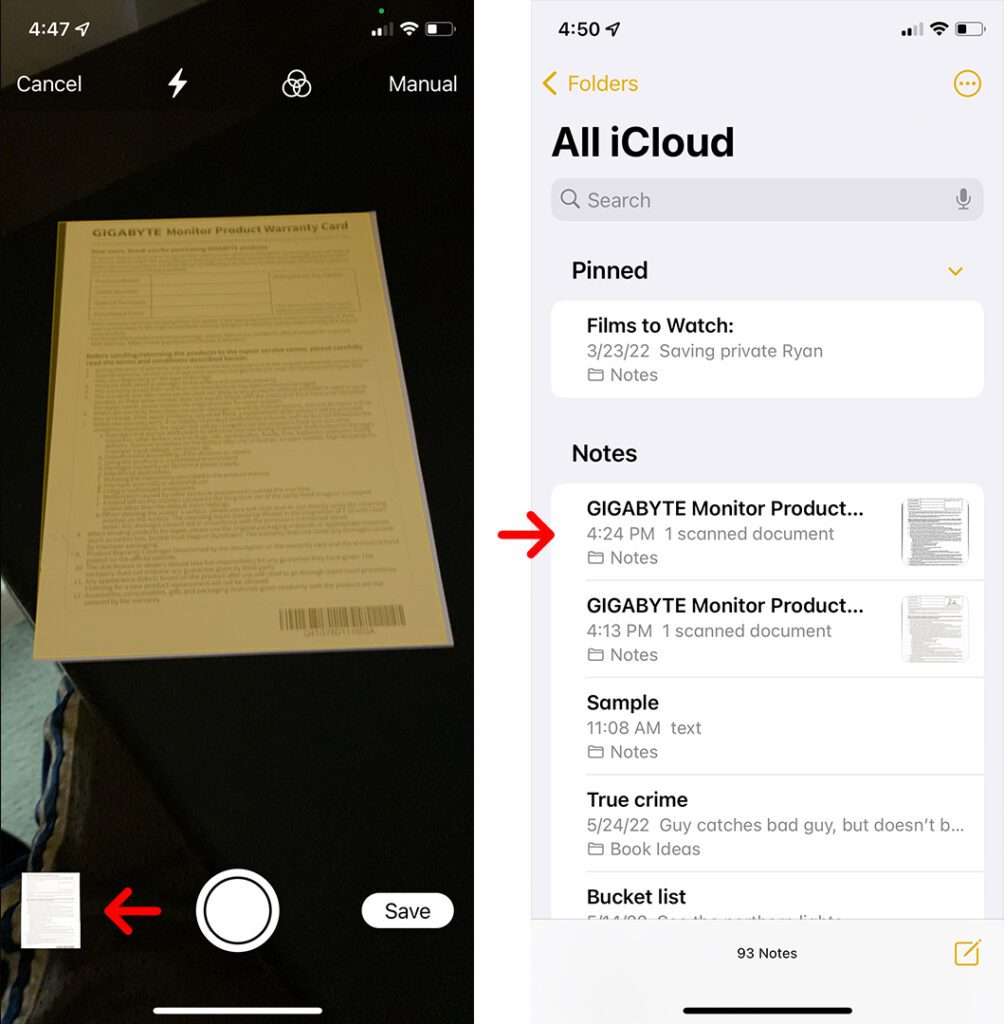
After you scan a document on your iPhone, it will save to the Notes app by default. Once you open the note, you can tap the image to edit it. Then use the buttons at the bottom of your screen to edit your document and tap Done in the top-left corner to save it.
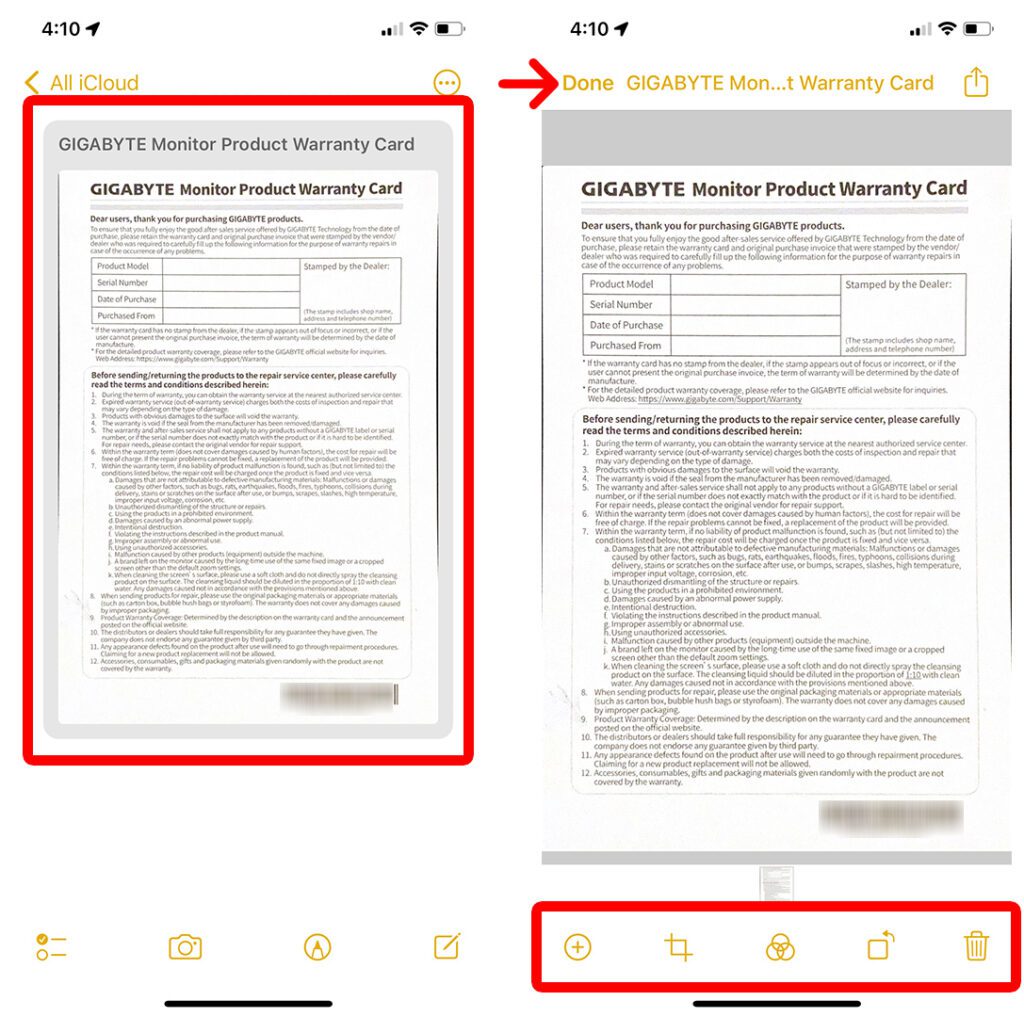
Starting on the left, the plus sign icon will let you scan a new document. Then the square icon to the right will let you adjust the corners of the original image to improve the image. Then the icon with three circles in the middle will let you change the contrast and color of the document. Finally, the button just to the left of the trash icon lets you rotate the image by 90 degrees.
How to Share a Document on an iPhone
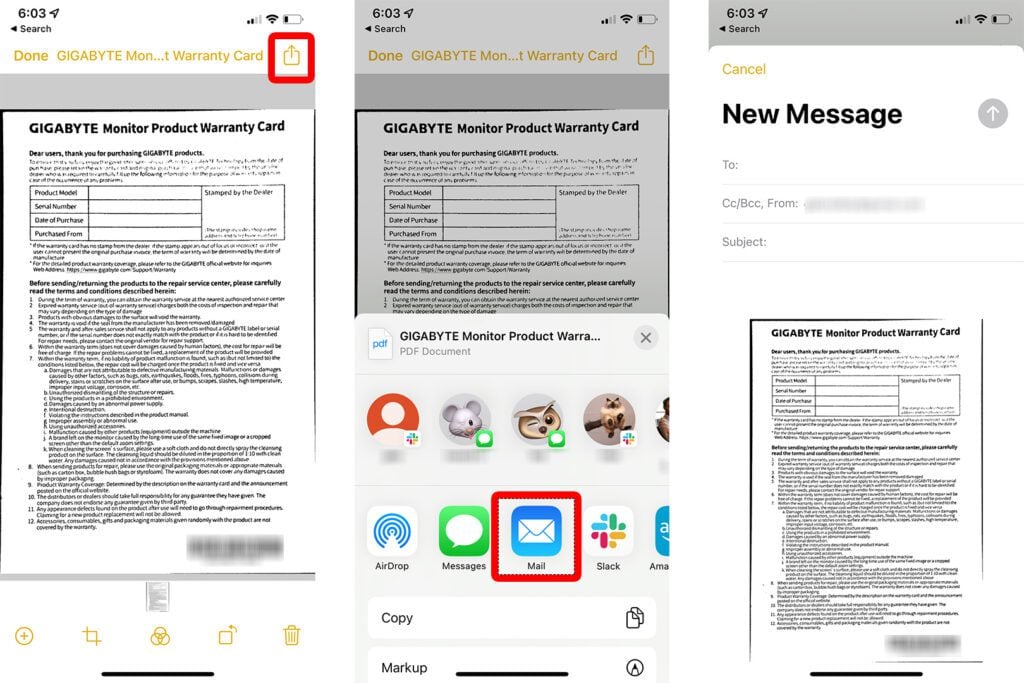
To share a document after scanning it on your iPhone, open the note with your document. Then tap the share icon in the top-right corner of your screen. Finally, choose who you want to send it to or if you want to share it via text message, email, or another channel.
How to Add a Signature to a Document on an iPhone
To add a signature to your scanned document, tap the share icon in the top-right corner of your screen. Then scroll up and select Markup. Next, tap the plus sign icon in the bottom-right corner and select Signature. Finally, select your signature or create one to add it to the document.

Once you add a signature, you can drag it anywhere on your document and use the corners to resize it.
Read More: How to print from your iPhone
