Apple’s smart speaker won’t be very smart until you set it up. Luckily, it’s very easy to set up a HomePod as long as you have your iPhone or iPad handy. Here’s how to set up your HomePod or HomePod Mini in two ways, and how you can start streaming music from your iPhone or iPad to your HomePod.
How to Set Up Your HomePod with and iPhone
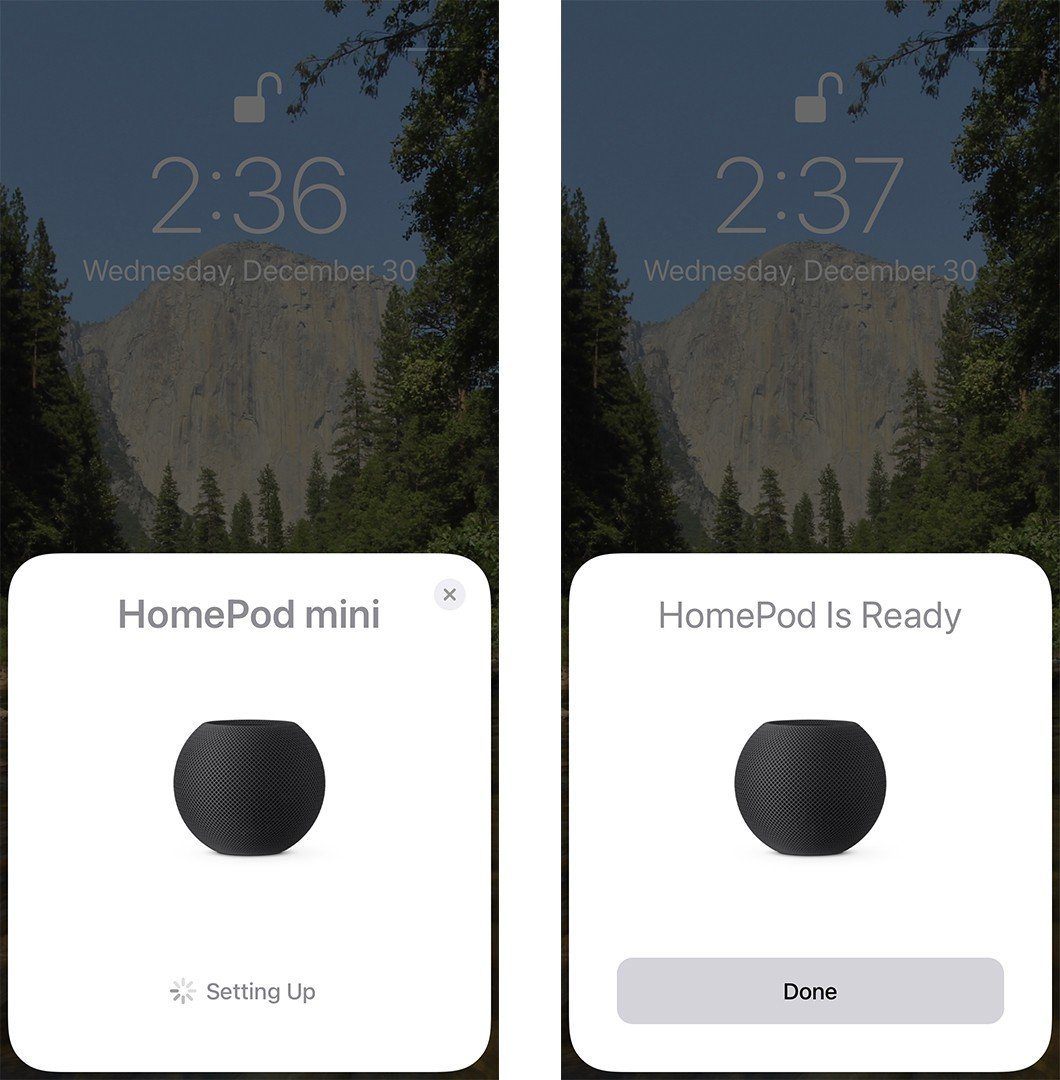
To set up your HomePod, plug it into an outlet and wait until you hear a chime and a white light appears on top. Then hold your unlocked iPhone next to it and tap Set Up. Follow the on-screen instructions, center the HomePod into your iPhone’s viewfinder, then wait for it to finish setting up.
- Plug your HomePod into an outlet. Wait until you hear a chime, and a white spinning light appears on the top of your HomePod.
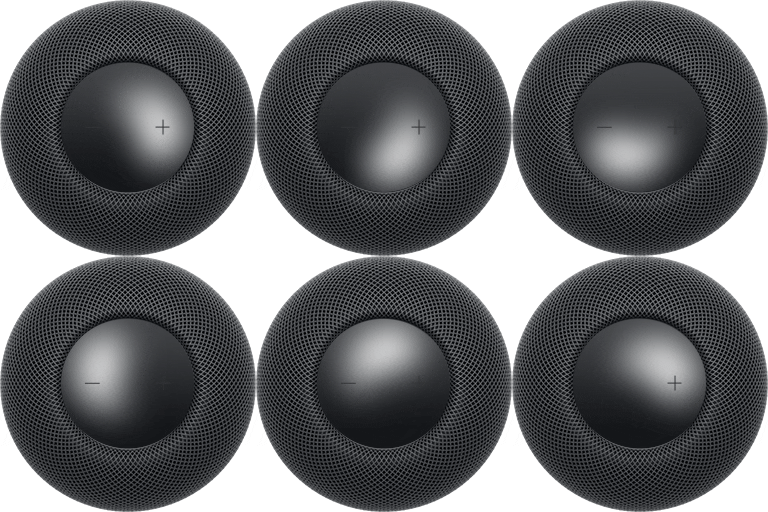
- Then hold your unlocked iPhone or iPad next to the HomePod. Ensure that you have Bluetooth enabled on your iOS device and that you have a strong WiFi connection.
- Next, tap Set Up when it pops up on your device’s screen.
- Then choose which room your HomePod is in and tap Continue.
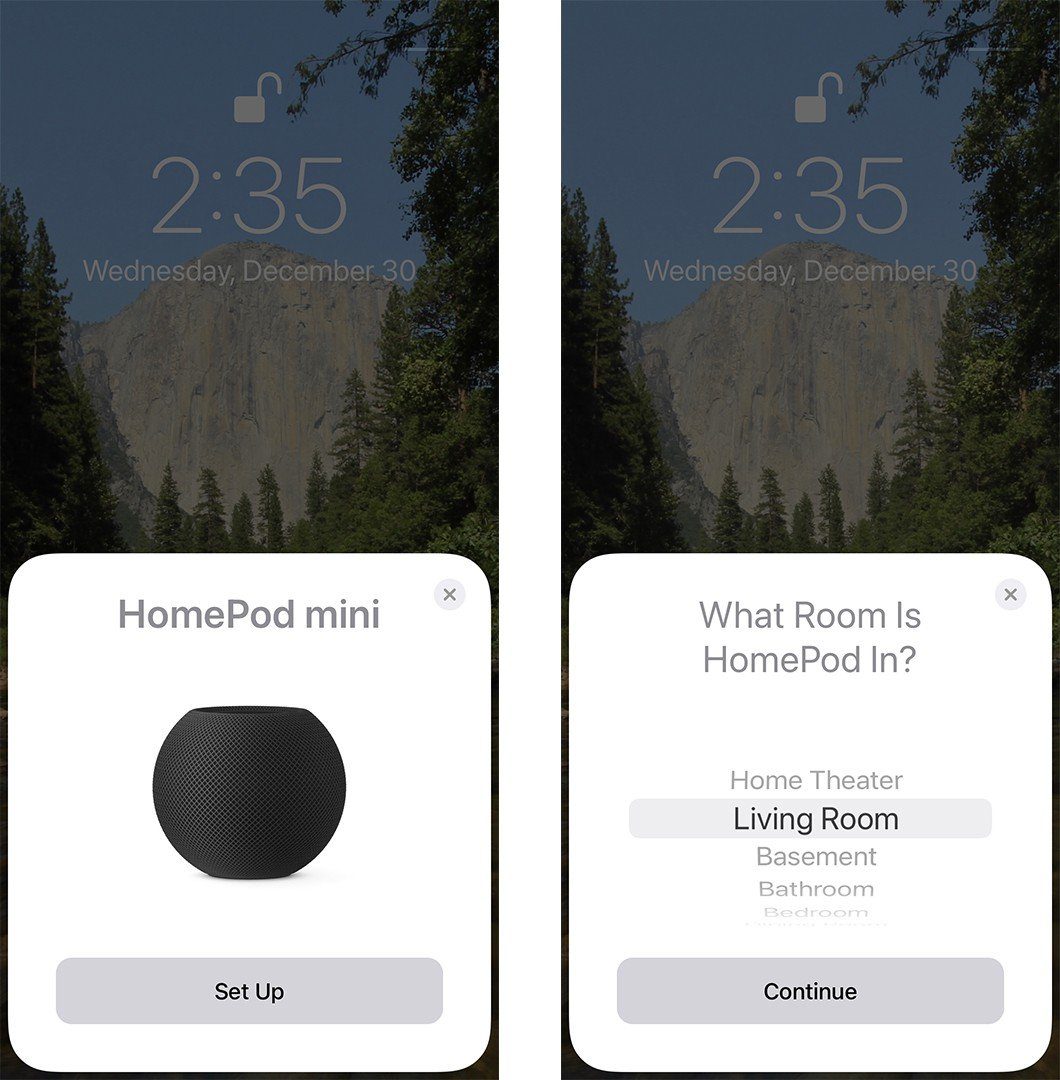
- Next, follow the on-screen instructions to set up your HomePod. You will be asked if you want to set up two HomePods as a stereo pair, and if you want to use personal requests. You will also see two more screens with information about what your HomePod can do.You can change these settings in the Home app later.
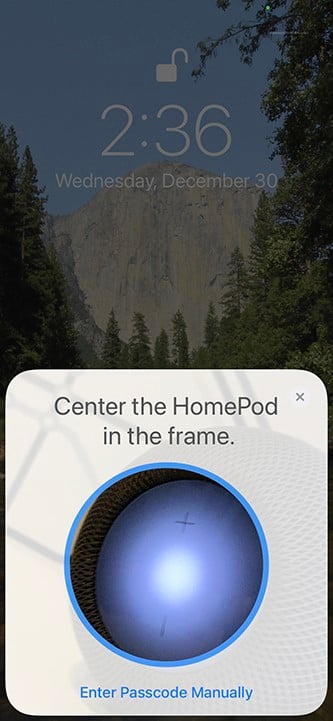
- Then center the top of your HomePod in the circular frame on your screen. You will see a circle on your device’s screen. Simply position the top of your HomePod in the middle of that circle until you can hear a tone.
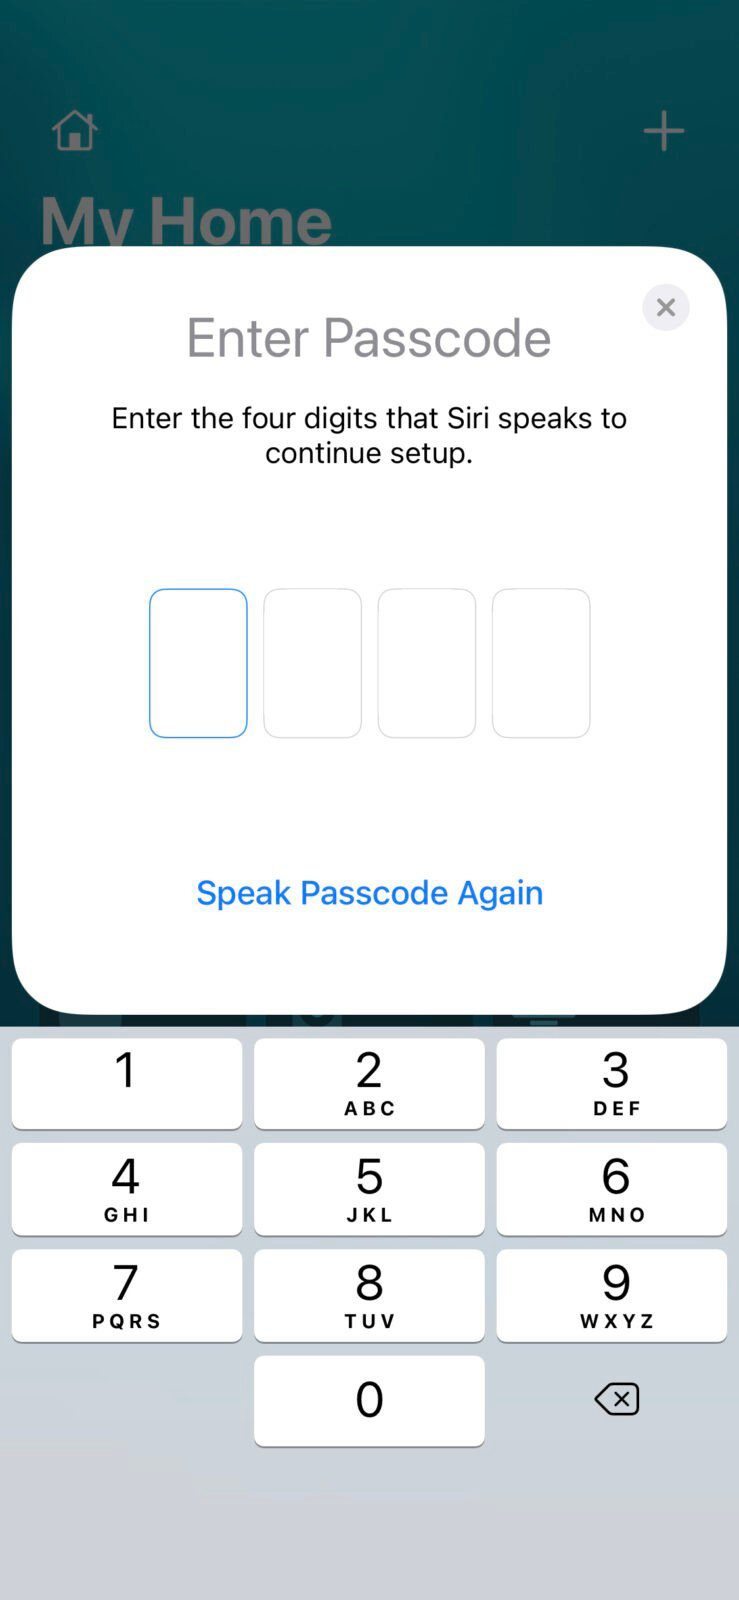
- Wait as your HomePod is being set up. This might take a few minutes.
- Finally, tap Done when the setup process is complete. You will know your HomePod is set up when Siri greets you.Once Siri speaks, you can respond by speaking without using your iPhone or iPad.
Siri will then ask you to repeat a few phrases. This will help your HomePod understand your voice. You can stop this process at any time by saying, “Hey, Siri, stop.”
How to Set Up Your HomePod Manually
To set up your HomePod manually, open the Home app on your iPhone or iPad. Then tap the plus sign icon and select Add Accessory. Next, tap Don’t Have a Code or Can’t Scan at the Bottom and then select HomePod. Finally, follow the on-screen instructions.
- Open the Home app on your iPhone or iPad. This is an app that comes with your iPhone or iPad, and it has an icon of a yellow home.
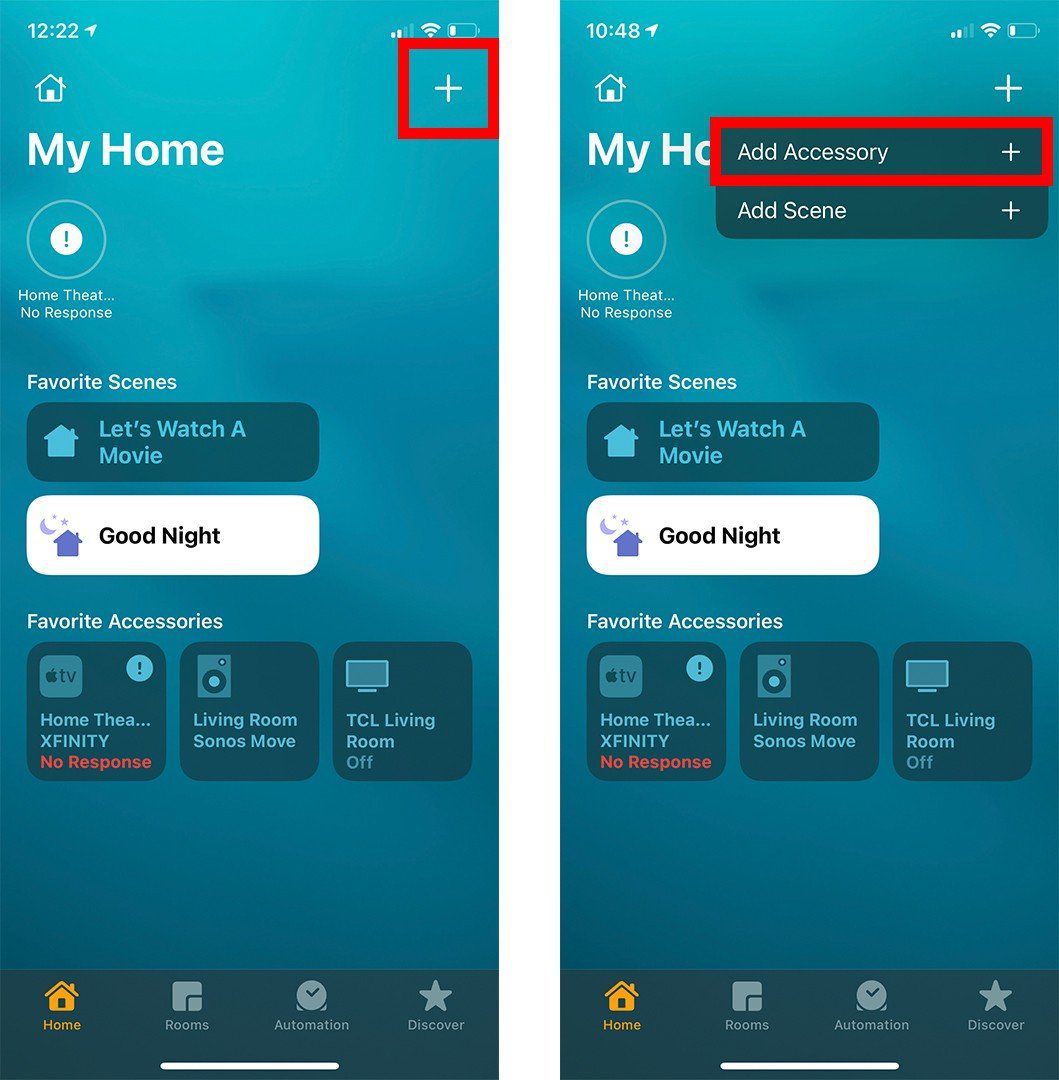
- Then tap the plus sign icon. You will see this in the top-right corner of your screen.
- Next, tap Add Accessory. You will see this in a pop-up menu after you tap the plus sign icon.
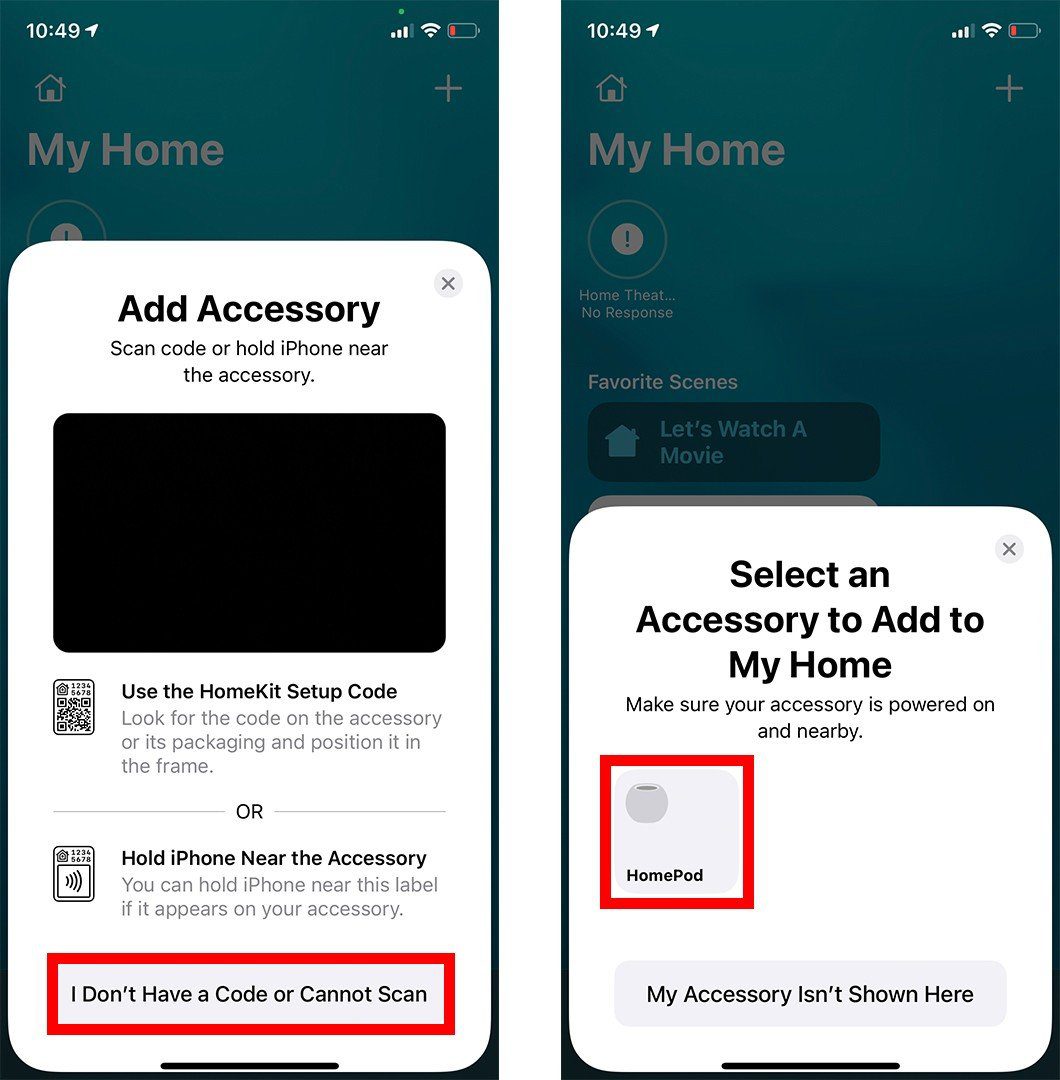
- Then select Don’t Have a Code or Cannot Scan.
- Next, tap HomePod.
- Then tap Set Up.
- Finally, follow the on-screen instructions to finish the setup.
Once you set up your HomePod, you should make sure that you have Handoff enabled. This feature lets you transfer music from your iPhone by holding it near your HomePod.
How to Enable Handoff on Your HomePod
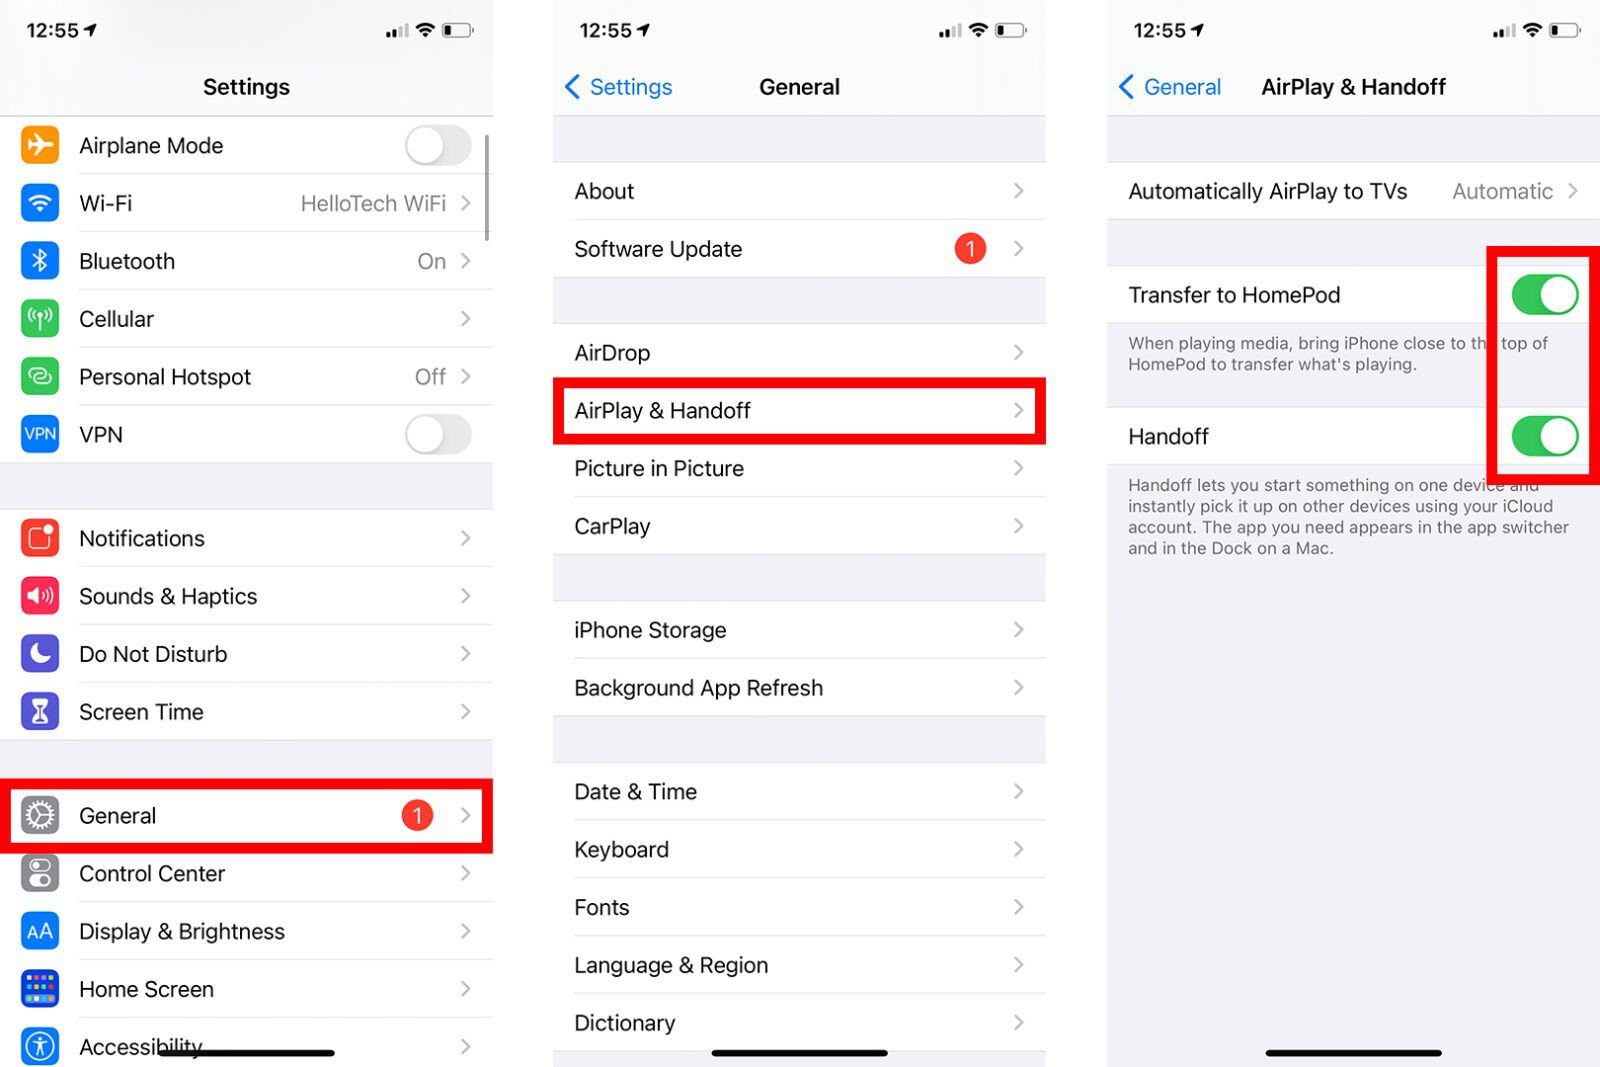
To enable Handoff for your HomePod, open the Settings app on your iPhone. Then go to General > AirPlay & Handoff and make sure that Transfer to HomePod and Handoff are both turned on.
With Handoff enabled, you can transfer music to your HomePod by holding your iPhone next to it for a few seconds. You can also transfer music back from your HomePod by holding your iPhone next to it again.
You can also ask Siri to play music by saying, “Hey, Siri, play [song, album, artist, playlist, or genre].” However, this will only work if you have an Apple Music subscription. This will give you access to over 70 million songs ad-free.
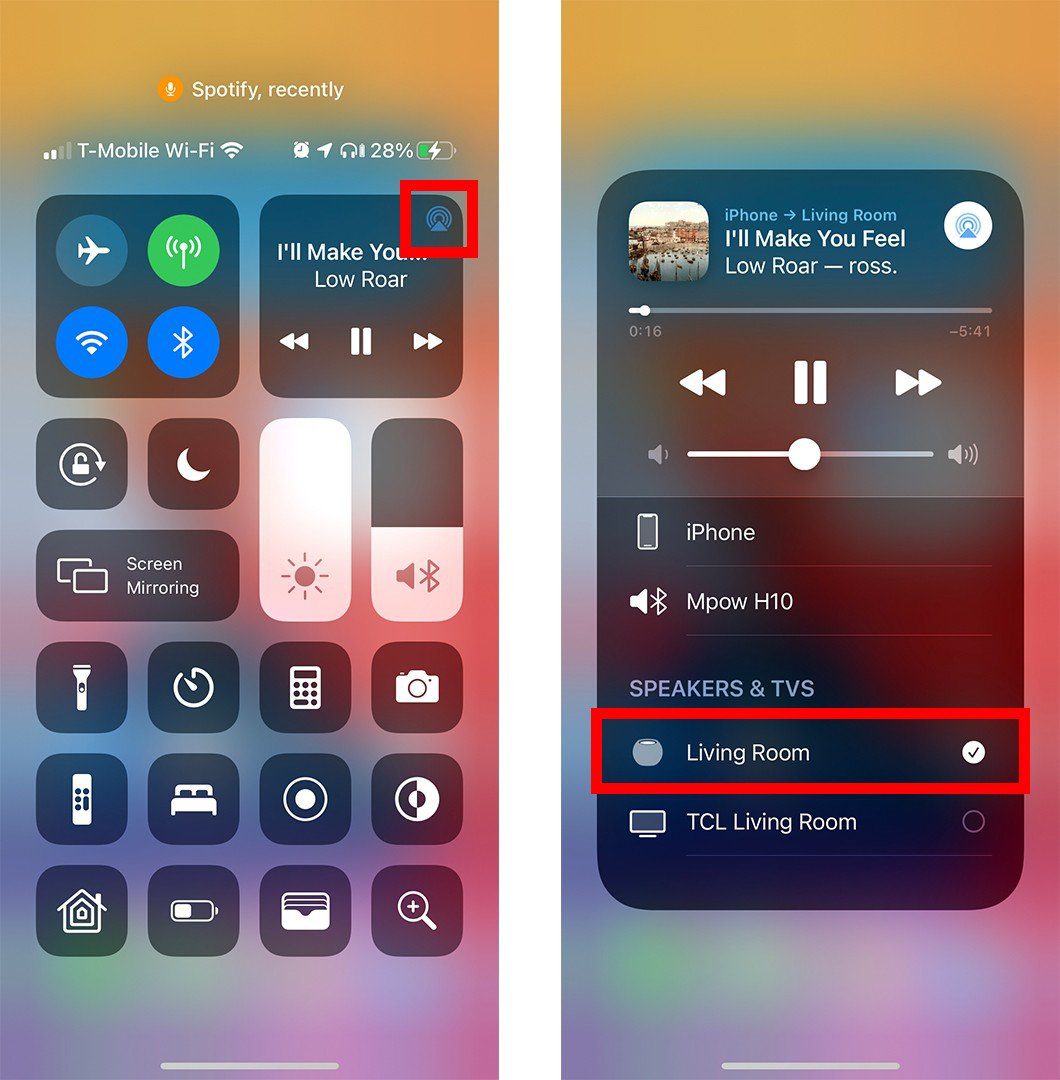
Finally, you can use AirPlay to stream music from your iPhone or iPad to your HomePod. To do this, you can swipe down from the top-right corner of your screen on an iPhone X or newer, or you can swipe up from the bottom of the screen on an iPhone 8 or earlier. Then tap the Airplay icon in the top-right corner of your screen and select your HomePod from the list.
If you have any problems with your HomePod, check out our step-by-step guide on how to reset your HomePod to factory settings.
This article has been updated with more recent information
