Buy Directly from HelloTech and Save: Ring, Nest, Sonos, and More. Schedule Free Consultation.

How to Set Up a Ring Video Doorbell

Setting up your Ring doorbell is an easy process. If you recently got this smart video doorbell, follow the steps below to make the device work properly. All you need is the unit itself, a smartphone, and a WiFi connection. Here’s how to set up your Ring video doorbell:

Note: These steps are only for the Ring Video Doorbell, not for the Ring Video Doorbell 2, or the Pro/Elite models.

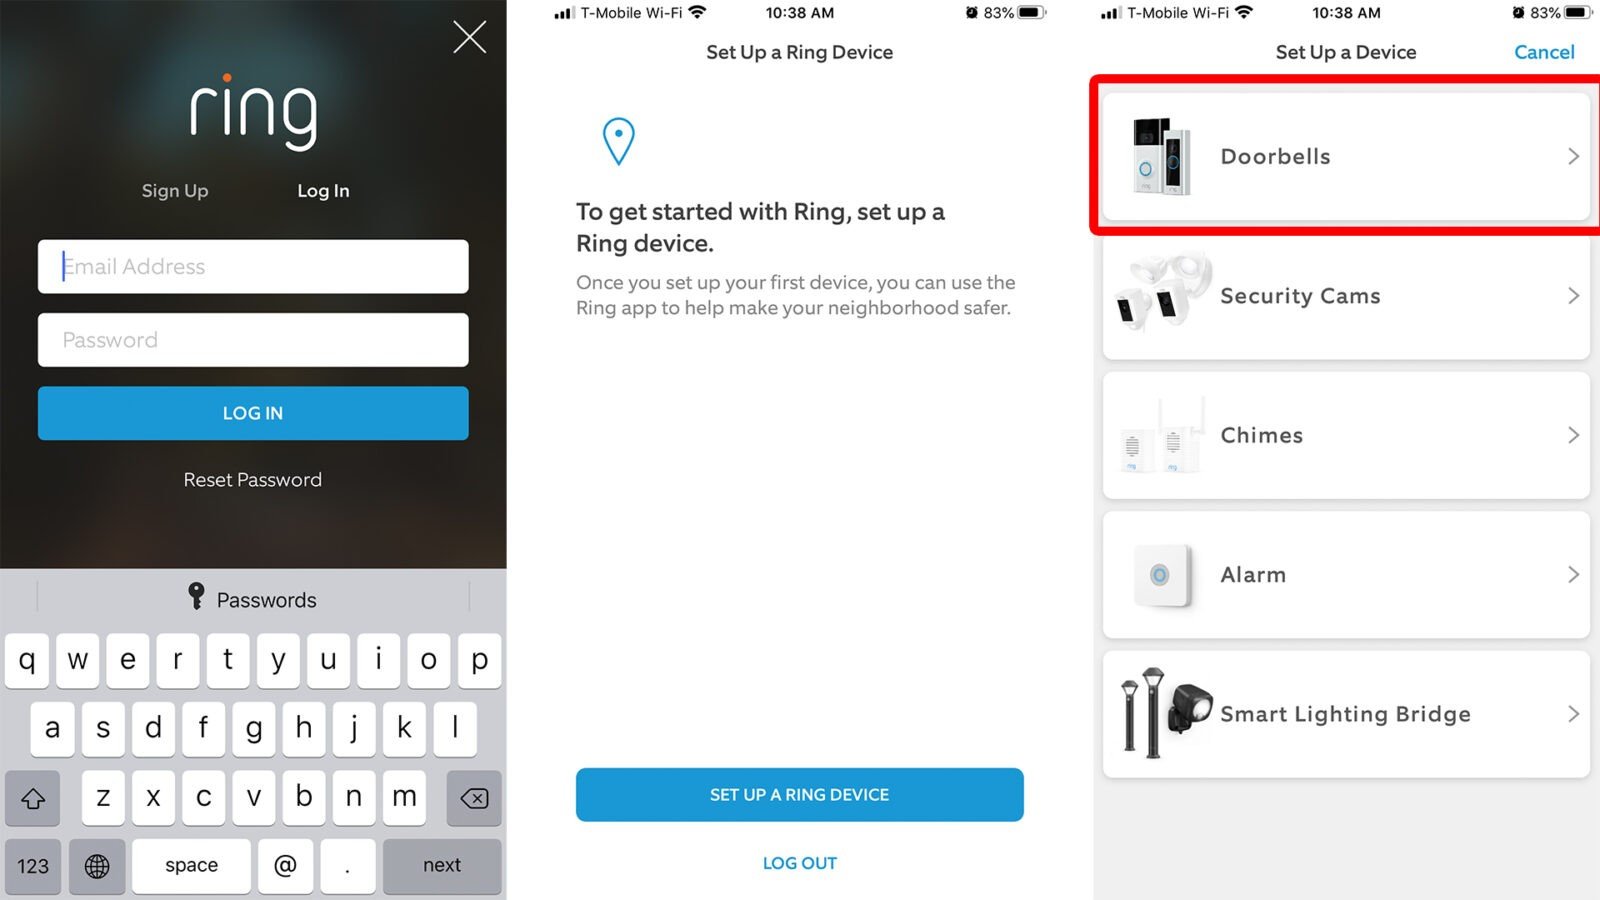
  1. Download and launch the Ring app. The app is available for download on the Apple App Store for iOS devices and the Google Play Store for Android devices. Alternatively, you can also download the app directly from their website at ring.com/gettheapp.
  2. In the app, tap Create Account. Then follow the on-screen instructions to create a new account. This will involve entering your first and last name, your country, email address, and a password.
  3. Open your confirmation email and click verify.
  4. Sign in to the app and tap Set Up a Device > Doorbells.
  5. Use your phone to scan the QR Code or MAC ID on the back of your Ring device. You can also find this QR code in the Quick Start Guide that came with the Ring device. When a green line or green box appears over or around the code, you can proceed to the next step.

    Note: If you can’t scan the code, tap “Set Up Without Scanning > Ring Video Doorbell” to proceed to the rest of the steps.

  6. Set your location. Type in your address and then confirm.

    Note: Some features of your doorbell will not work if you do not specify your location. These features include motion scheduling, light scheduling, or dispatching emergency services through Ring Alarm.

  7. Set up a name for your Ring doorbell. You can choose one of the set names or create a custom name.
  8. Press the orange button on the back of your Ring device. This will turn on Setup Mode on your Ring doorbell. You will then see a spinning white light on the front of your doorbell. 
  9. Tap Continue on the Ring app.
  10. Connect your phone to your Ring WiFi network. On iOS devices, go to Settings > Wi-Fi > and tap the Ring WiFi network. If you’re using Android, swipe down from the top of your screen, tap WiFi, then tap the Ring WiFi network. The network will be named something like Ring-123456.
  11. Then connect the Ring doorbell to your WiFi. Make sure to connect to the WiFi network closest to where the Ring doorbell will be installed. Enter the password and connect when prompted. 

    Note: When your doorbell connects to the internet, it may update its internal software. You will see a flashing white light on the front of the device. Wait until the flashing stops to continue setup.

    Warning: Do not ring the doorbell while it is updating its internal software.

  12. Test your doorbell once its update is complete. Push the front button to make a test call.

Now that you know how to set up your Ring Video Doorbell, also check out our guide on how to install Ring doorbell without an existing doorbell.

HelloTech editors choose the products and services we write about. When you buy through our links, we may earn a commission.

Recent Posts

How to Take Screenshot on Any iPhone

Learn how to take a screenshot on an iPhone X, and any other model of… Read More

4 months ago

How to Forget WiFi Network on a Mac

Learn how to forget a WiFi network on your Mac, so your computer won’t automatically… Read More

4 months ago

How to Set Up Guest WiFi Network

Learn how to set up a guest WiFi network for the next time you have… Read More

4 months ago

How to Record Your Screen on Windows 11 PC

Whether you want to record a video you found online or you need to show… Read More

4 months ago

How to Split Your Screen on Windows 10 PC

With a Windows 10 PC, you can easily fill your entire screen with two different… Read More

4 months ago

How to Connect Smart Plug to Alexa

Learn how to connect your smart plug to Alexa. Also, what a smart plug is… Read More

4 months ago

This website uses cookies.