With a Windows 10 PC, you can easily fill your entire screen with two different apps split down the middle. Windows Snap Assist makes it easy to multitask with a browser window on one side of your screen and a text document on the other. Here’s everything you need to know about how to split your screen on a Windows 10 PC using your mouse or keyboard shortcuts, and how to change your split-screen settings.
How to Split Your Screen with a Mouse
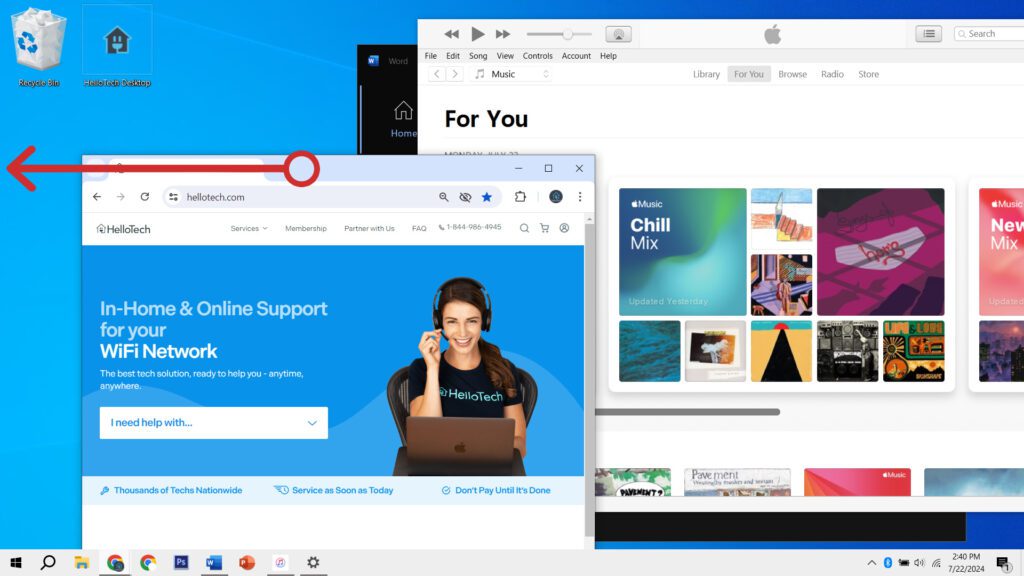
The easiest way to split your screen on a Windows 10 PC is to drag a window to the edge of your screen. For example, if you click and hold the top of a window and drag it all the way to the left side of your screen, it will fill up that half of the screen when you let go of your mouse.

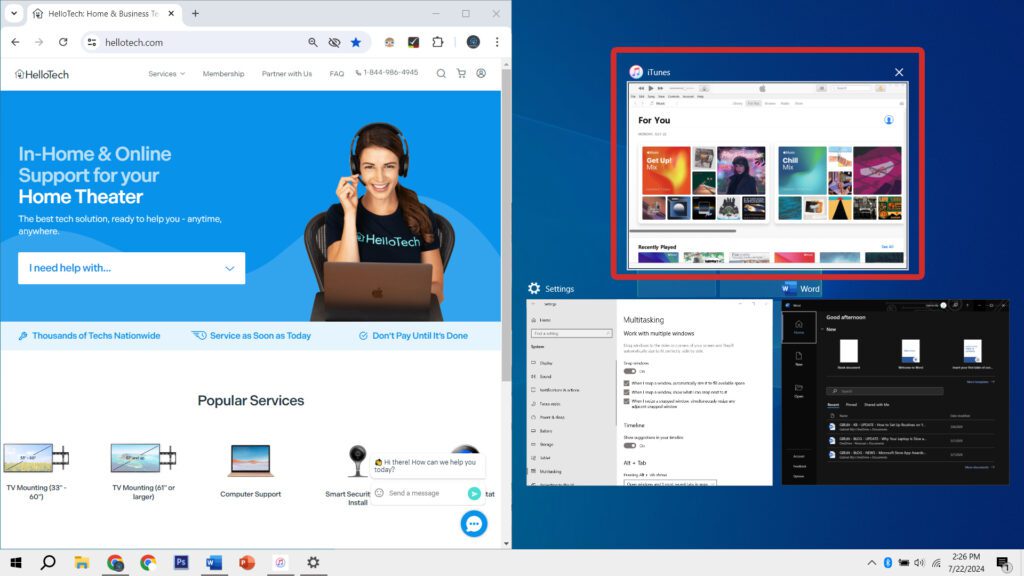
After you move a window to the side of your screen, you will see all your other open windows in the other half of the screen. You can select any of these windows to split your screen between the two. However, depending on your display settings, some windows might take up more than half of your screen.

Once you select a second window, your screen will split evenly between the two windows. Then, you can click and hold the space between the two windows to resize them both at once.

You can also drag a window to any corner of your screen to split your screen into 4 different areas. Or you can drag a window to the top of your screen to quickly make it fill your whole screen.
How to Split Your Screen with Keyboard Shortcuts
To split your screen using keyboard shortcuts, press the Windows + Left/Right Arrow keys. This will move the currently selected window to the left or right half of the screen. When you release the keys, you can choose another app to fill the other half of the split screen.

You can also press the Windows + Up Arrow keys to make any app full-screen or the Windows + Down Arrow keys to minimize a window.
Read More: How to set up dual monitors on Windows 10
How to Change Split Screen Settings in Windows 10
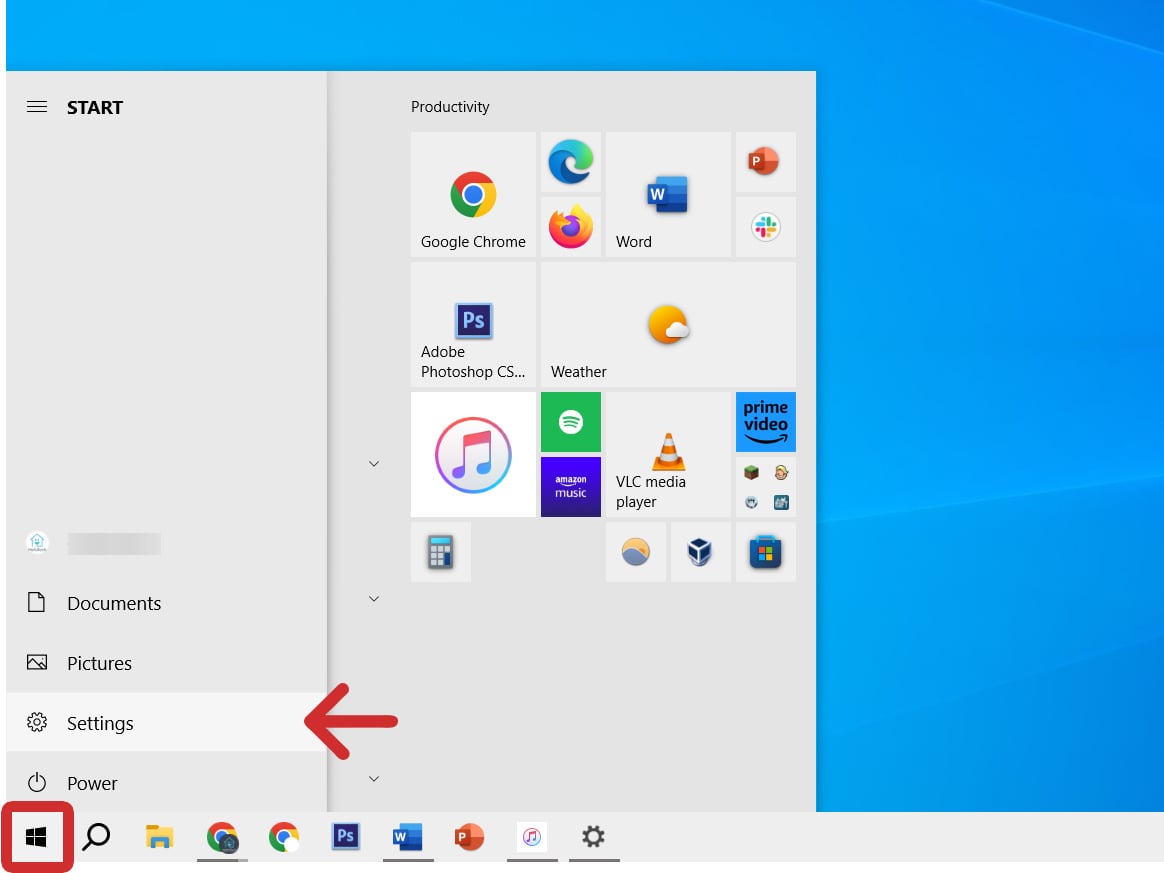
- Press the Windows + i keys on your keyboard. When you press these keys at the same time, a Settings window will open. Alternatively, you can click the Windows logo at the bottom of your screen and select the Settings gear icon.

- Then, go to System.

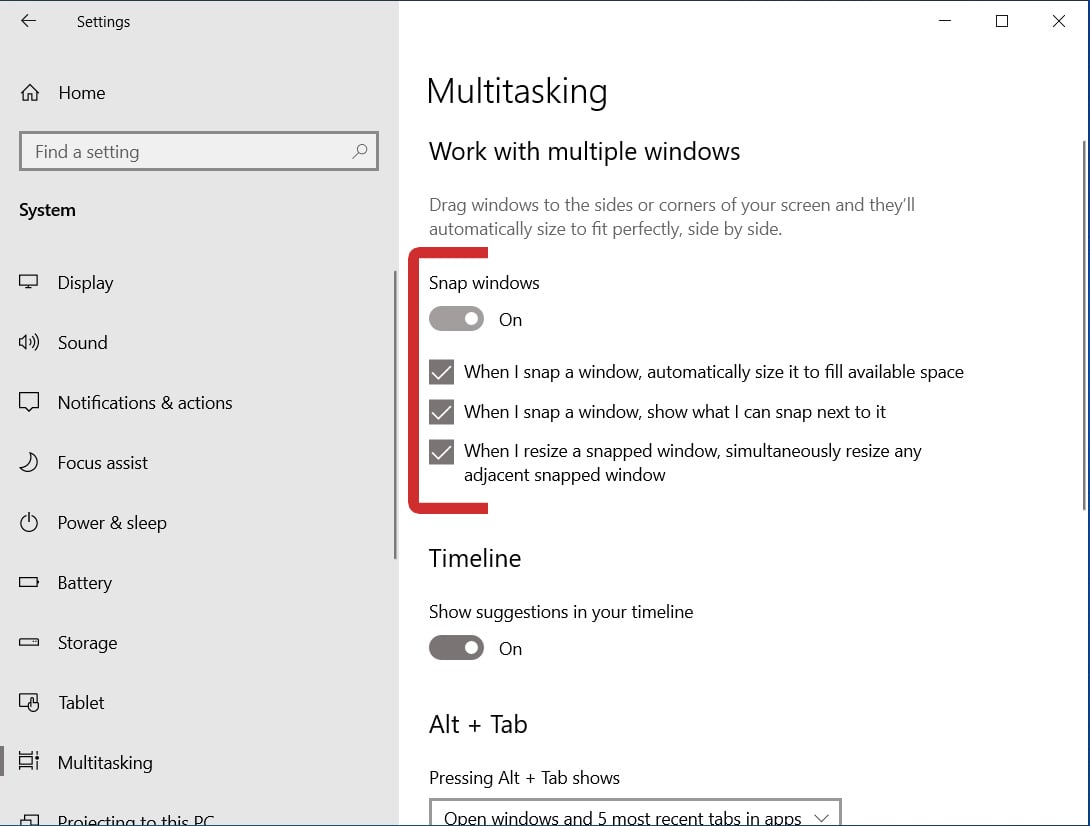
- Next, select Multitasking. You will see this in the left sidebar. If you don’t see this option, try expanding the Settings window by clicking the square icon in the top-right corner.

- Finally, make sure Snap Windows is turned On.

Here are the other multitasking settings you can change:
- When I snap a window, automatically size it to fill available space: With this option disabled, your windows will not fill the empty space on your split screen. Instead, they will only ever fill up half your screen, even if you have another split-screen window that has been resized.
- When I snap a window, show what I can snap next to it: With this option disabled, you won’t see any other windows to choose from when you drag a window to one side of your screen or use the keyboard shortcuts to split your screen. This removes a step and makes multitasking smoother.
- When I resize a snapped window, simultaneously resize any adjacent snapped window: With this option disabled, only one window will be resized when you select the line between apps and drag to the left or right.
Read More: How to screenshot on a Windows 10 PC
