Whether your computer is experiencing problems, or you just want to get rid of applications that you don’t use anymore, there are lots of ways to uninstall programs on your Windows 10 PC. You can quickly uninstall some programs through the Start menu or via Settings. However, if you want to uninstall some Windows programs, you will have to do so through the Control Panel or by using third-party apps. Here’s how to uninstall any program on your Windows 10 PC.
How to Uninstall Programs Using the Windows Start Menu
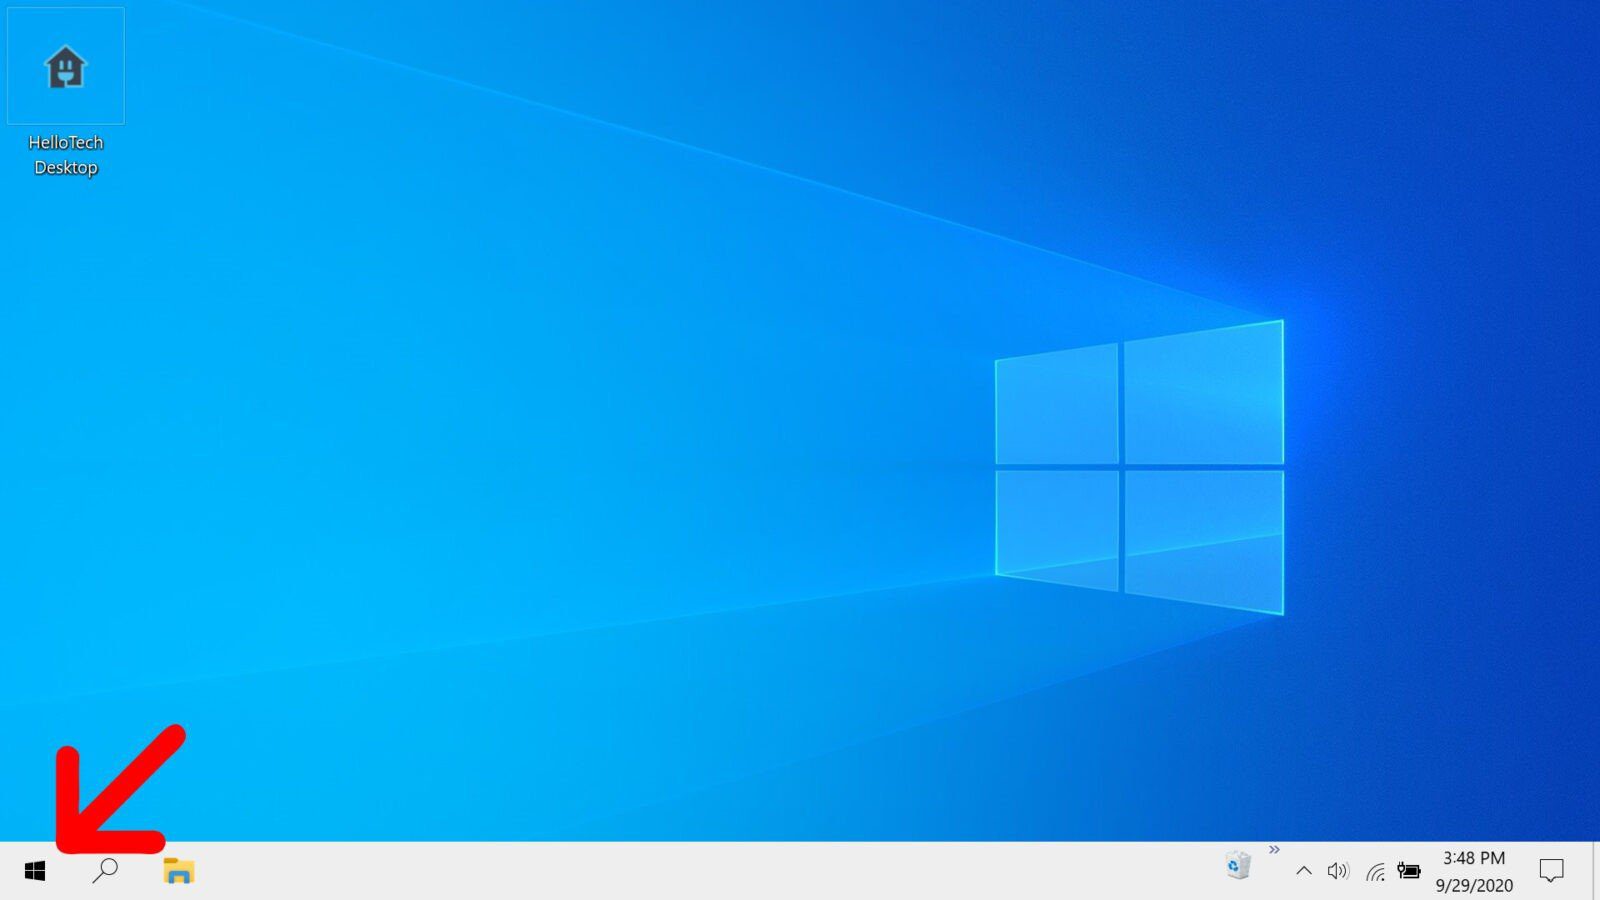
To uninstall programs through the Start menu, click on the Windows button in the bottom-left corner of your screen. Then locate the program you want to uninstall in the list of apps, right-click it, and select Uninstall. Finally, click Uninstall in the pop-up message to confirm.
- Click the button with the Windows logo in the bottom-left corner of your screen. You can also press the button with the Windows logo on your keyboard. This will open the Start menu.
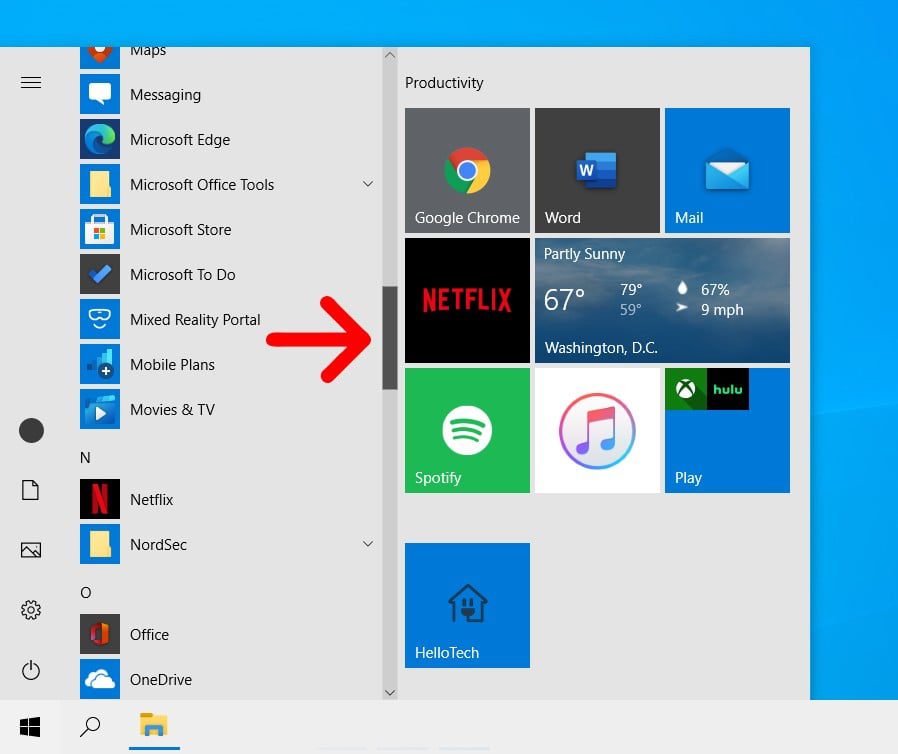
- Then locate the program that you want to uninstall. You can find all your programs listed alphabetically on the left side of your screen. You can simply scroll up and down the list using your mouse wheel or by selecting the scroll bar on the right side of the app column.
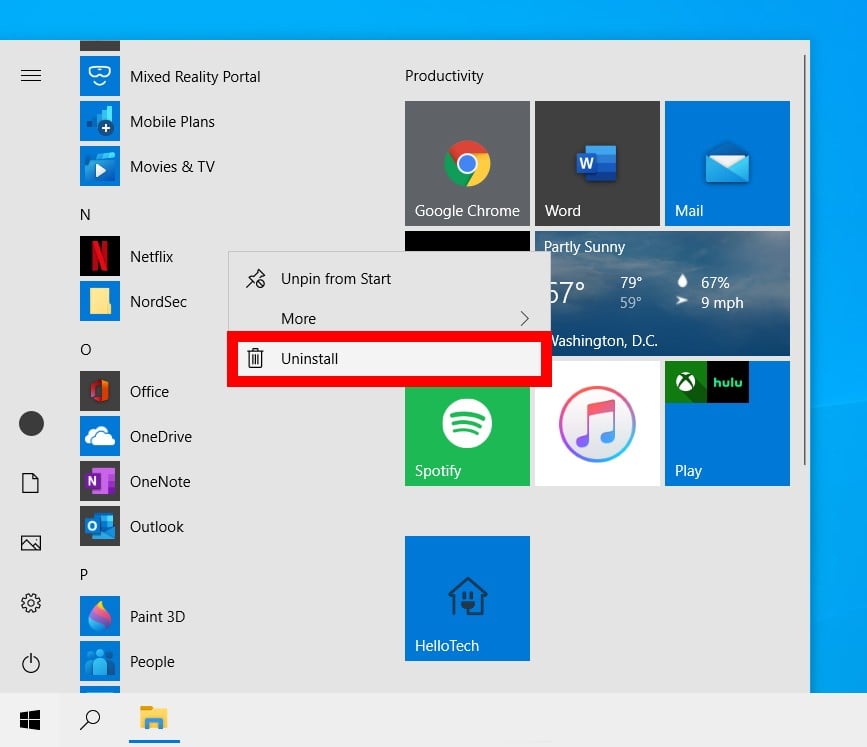
- Next, right-click on the program. This will cause a small window to pop up.
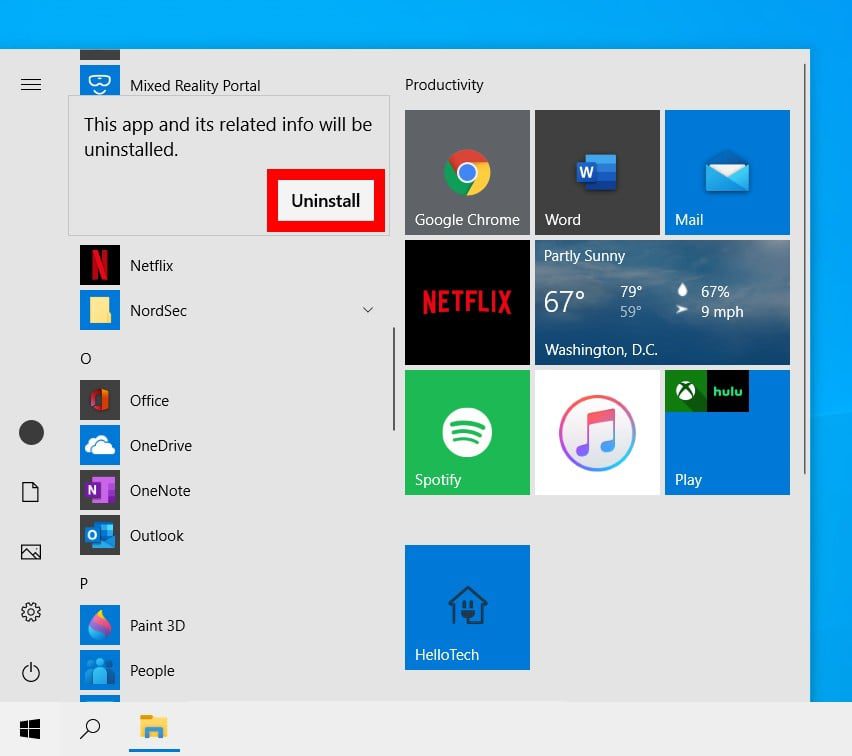
- Then click Uninstall. After clicking Uninstall, a pop-up message will appear that says, “This app and its related info will be uninstalled.”
- Finally, click Uninstall in the pop-up message.
This is the easiest way to uninstall a program on Windows 10. However, if you try to uninstall certain programs, you might see a Settings window or Control Panel open. Check out our sections below to find out how to uninstall a program through Settings or the Control Panel.
How to Uninstall Programs Through Settings
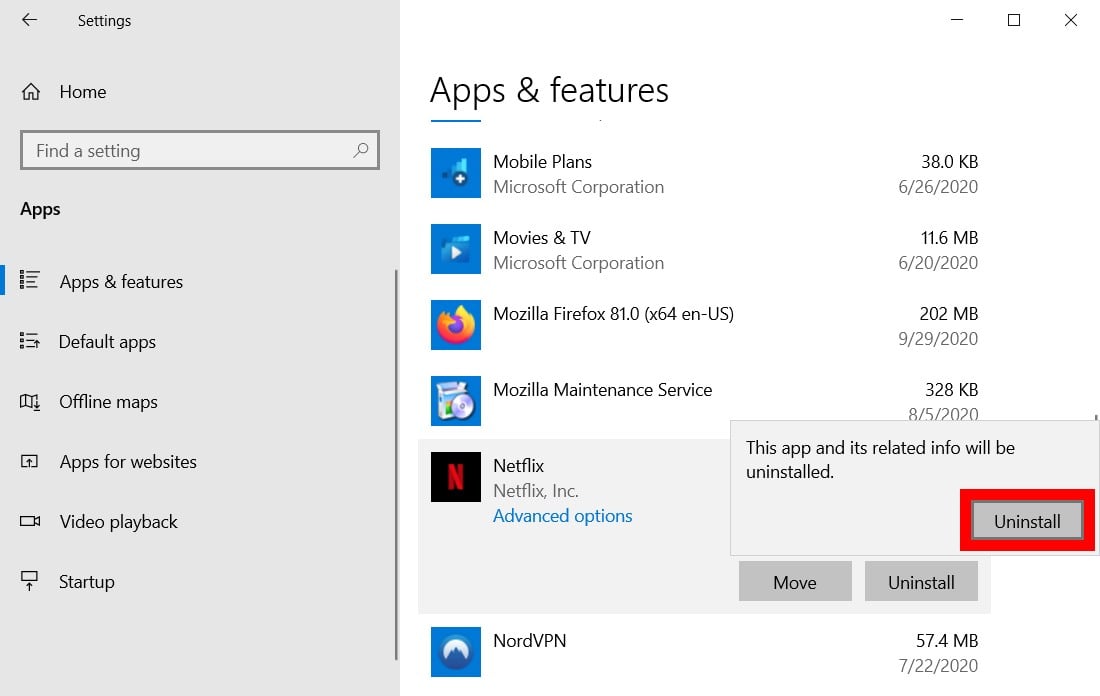
To uninstall programs through Settings, open the Windows start menu and click Settings. Then go to Apps > Apps & features and click the program you want to uninstall. Finally, select Uninstall and click Uninstall in the pop-up message.
- Open the Start menu. You can do this by clicking the button with the Windows logo in the bottom-left corner of your screen.
- Then click Settings. This is the button with the gear-shaped icon just above the power button.
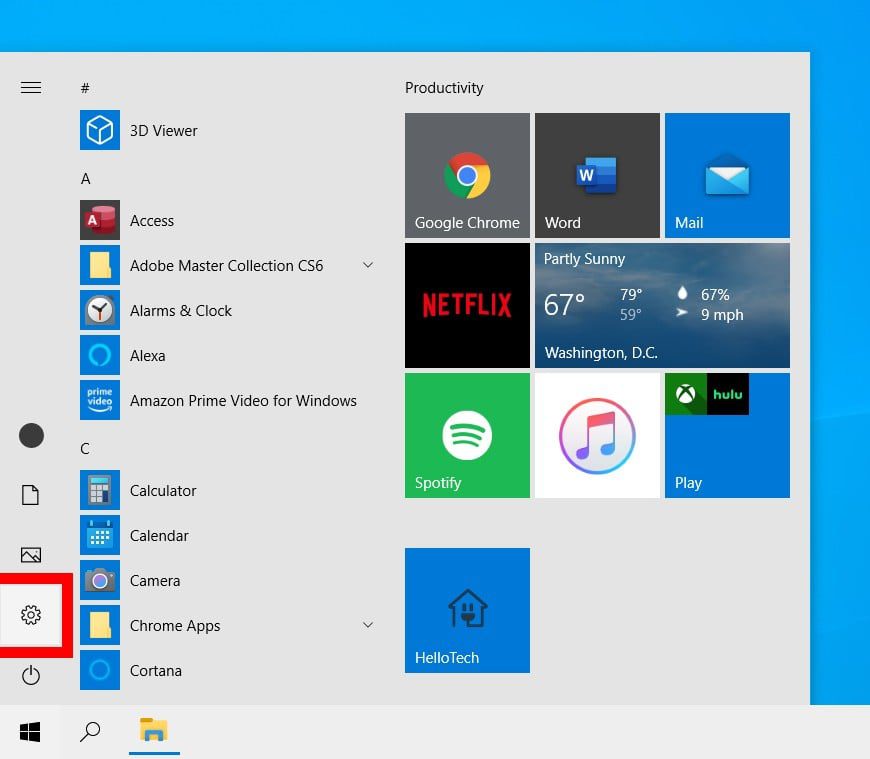
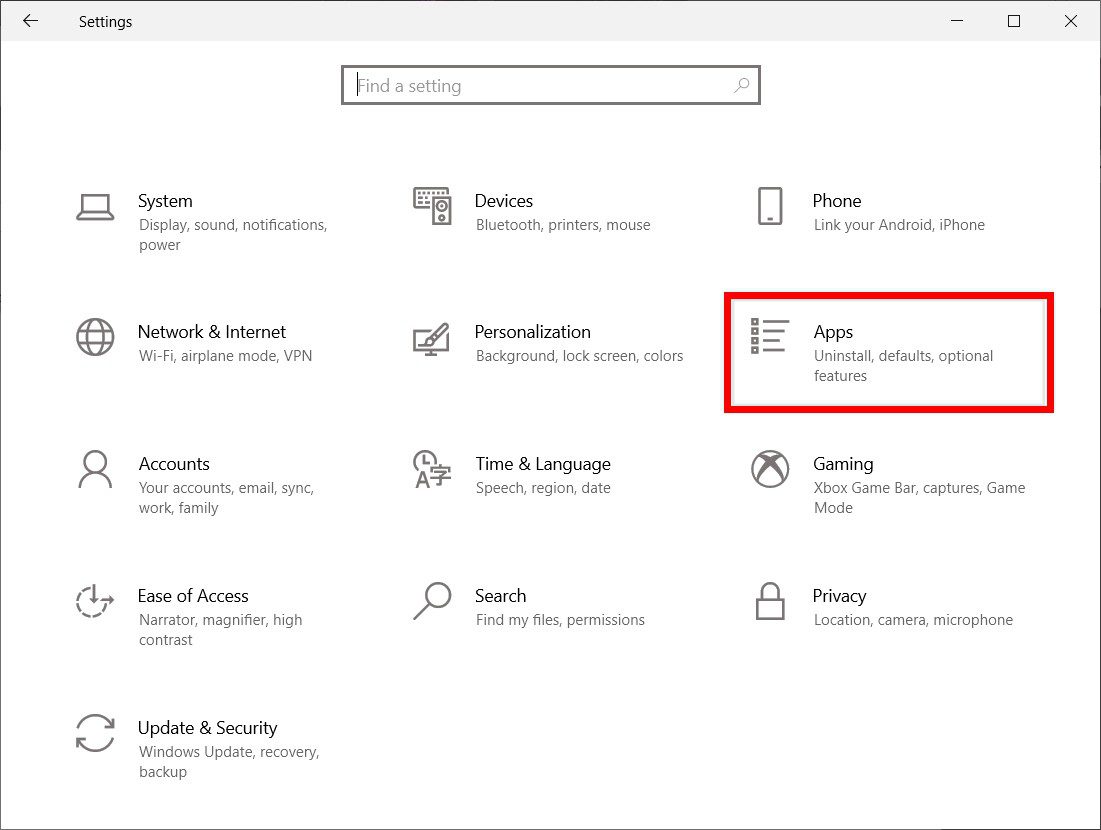
- Next, select Apps.
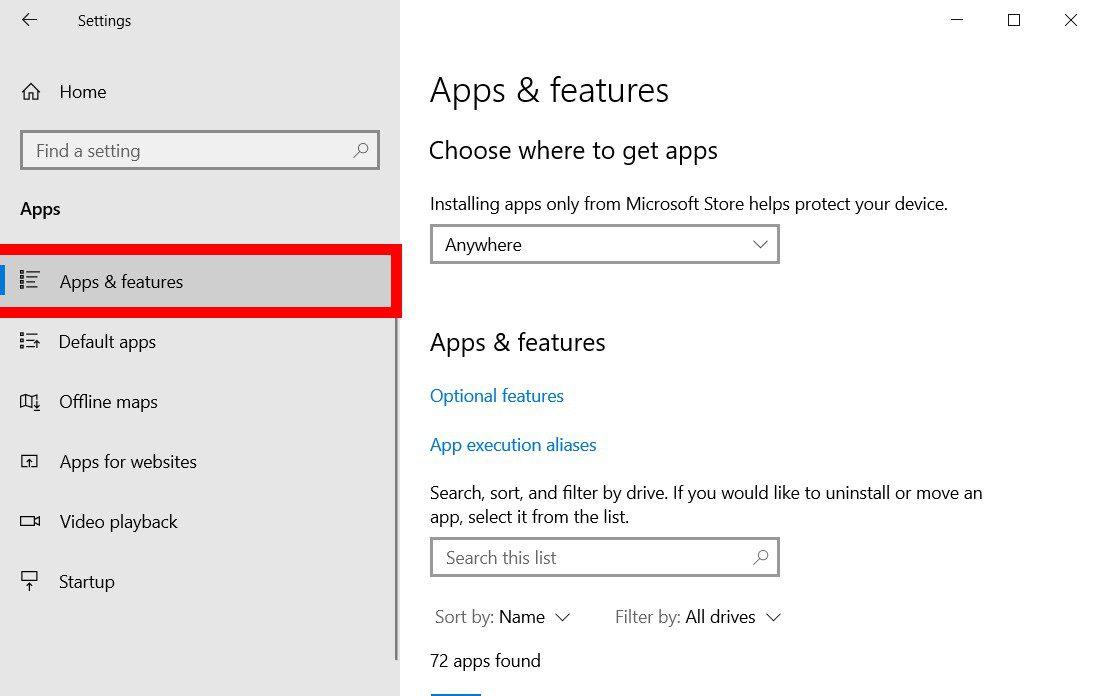
- Then click Apps & Features. You will see this in the left sidebar of the Settings window. If you don’t see this option, you can expand the Settings window.
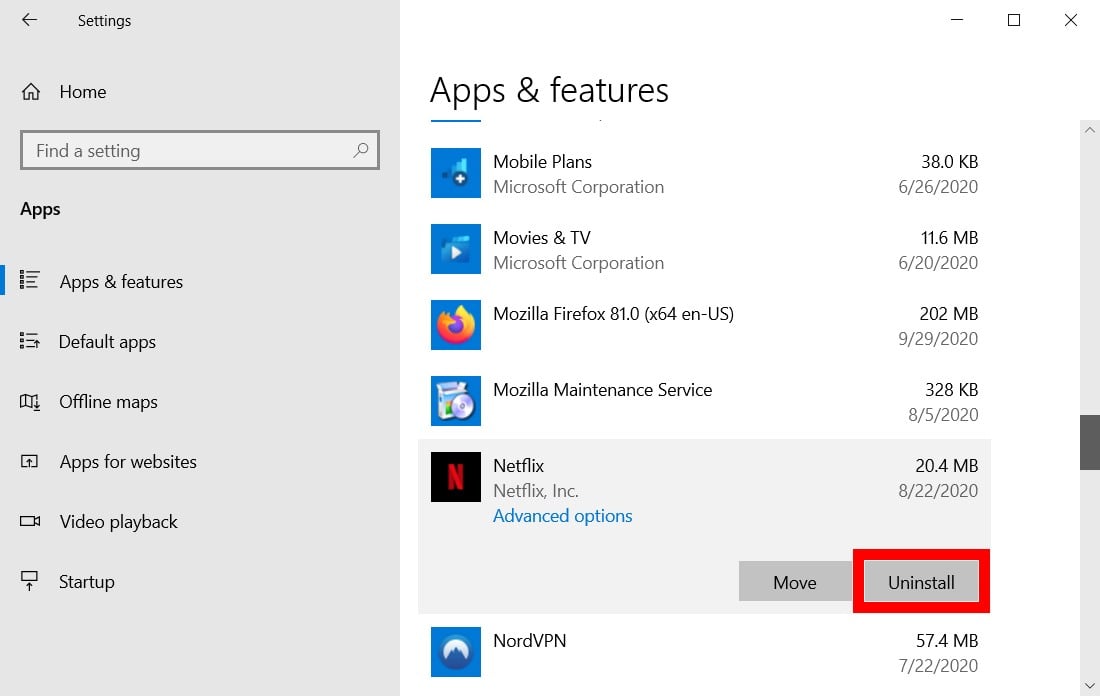
- Then scroll down and click the program you want to uninstall. You can either use your mouse wheel or select the scroll bar on the right side of the window. You can also use the search bar located at the top of the window to find the program you want to uninstall.
- Next, click Uninstall.
- Finally, select Uninstall in the pop-up message.
How to Uninstall Programs Through the Control Panel
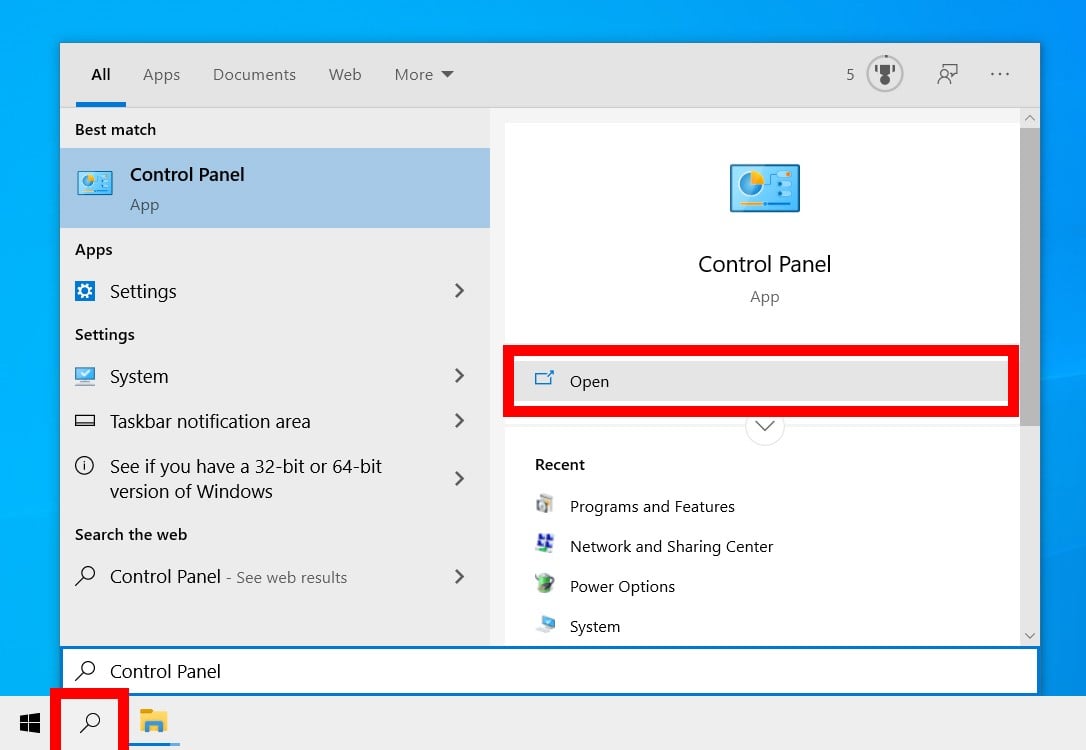
To uninstall a program through the Control Panel, open the Windows Search Box and type Control Panel into the search bar. Then click Open and select Programs and Features. Finally, select a program, click Uninstall, and click Yes in the pop-up message to confirm.
- Open the Windows Search Box. You can do this by clicking the magnifying glass icon in the bottom-left corner of your screen.
- Then type Control Panel into the search bar and click Open. You can also hit Enter on your keyboard.
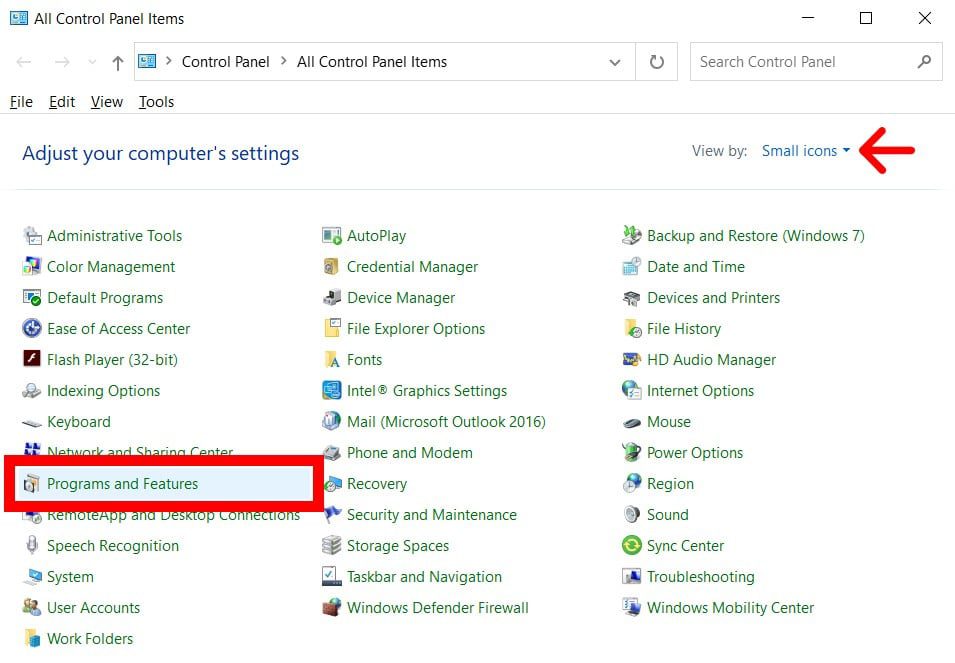
- Next, click Programs and Features. If you don’t see this option, click the drop-down menu next to View by in the top-right corner of the window and select Small icons. If you are in the Category view, you can also click Uninstall a program under Programs.
- Then right-click a program and select Uninstall. You can also double-click the program or click the Uninstall button above the list of apps.
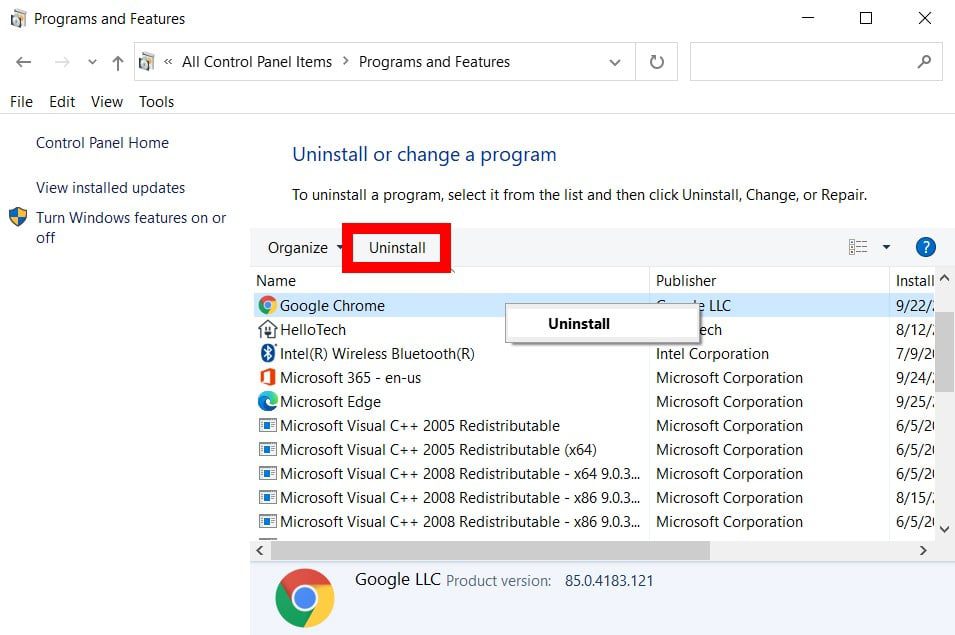
- Finally, click Yes to confirm that you want to uninstall the program.

In some instances, the program will be instantly removed when you click Uninstall, while other programs will lead you directly to their own uninstallation wizard. Just keep clicking Next until the program is finally uninstalled. However, make sure that the uninstallation wizard does not try to make you keep any files or install any new programs during the process.
If you were not able to uninstall a program using the methods above, you can always try using a third-party app. One of the best Windows 10 uninstallation apps you can get for free is IObit.
How to Uninstall Programs Using IObit
To uninstall a program using IObit, download and install the application on your Windows 10 computer. Then open the downloaded file and go through the installation process. Next, select a program and click the Uninstall button.
- Go to the IObit website.
- Then click the Free Download link. You won’t be required to enter your credit card or any other personal information when you download the free version.
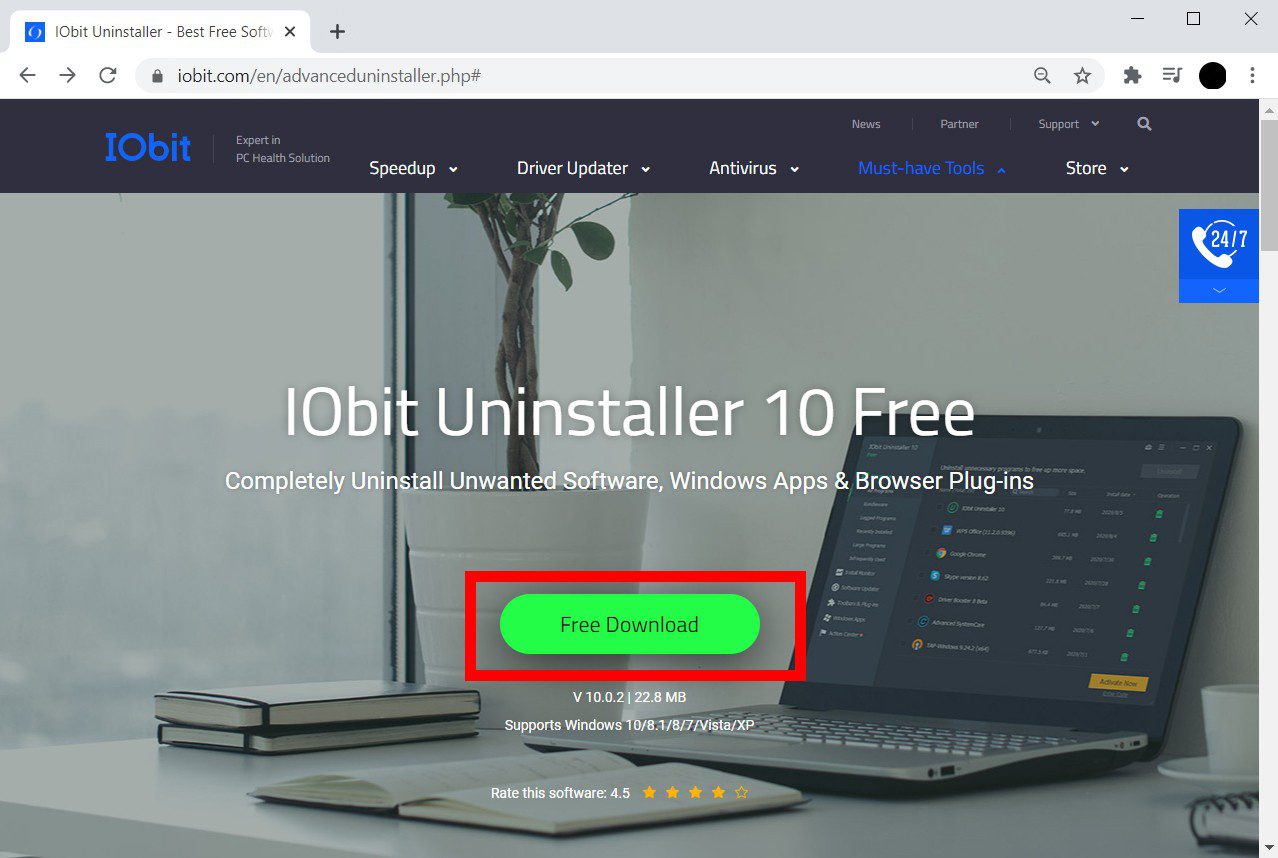
- Next, click Download Now. This will be the big green button at the top of the page.

- Then open the downloaded file. Search your Downloads folder for a file called iobituninstaller.exe. To open the file, double click it.
- Next, go through the installation process. You can do this by clicking Install, and then clicking Next on the following screens.
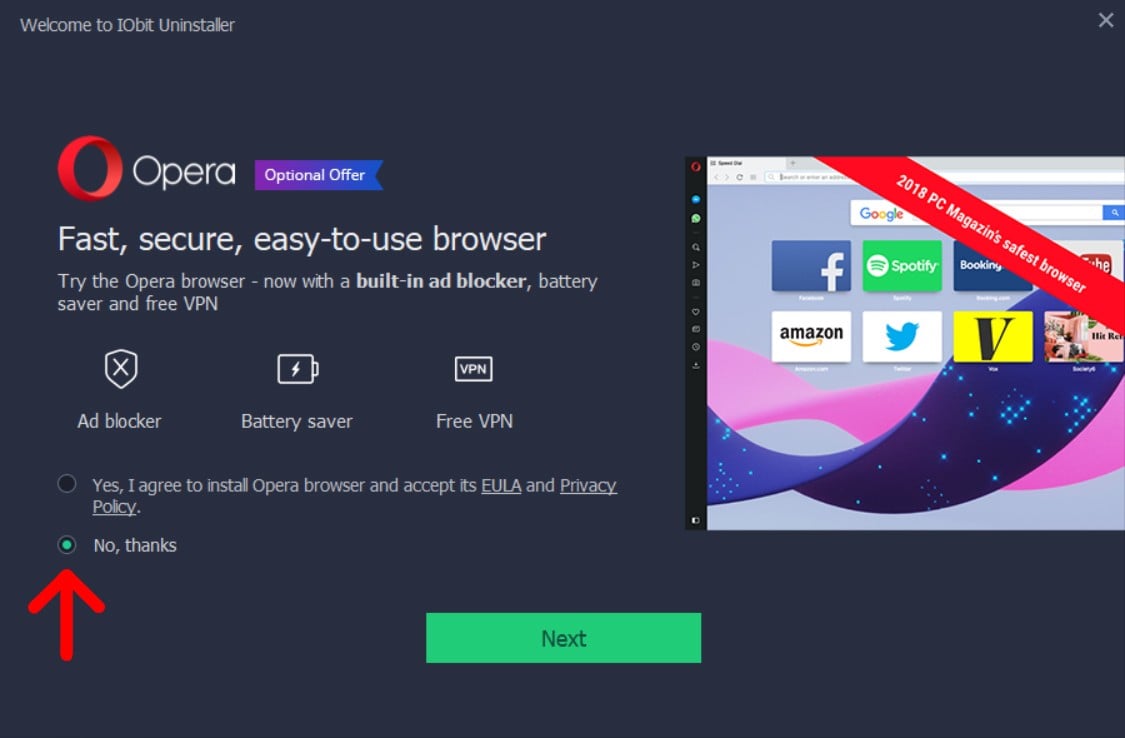
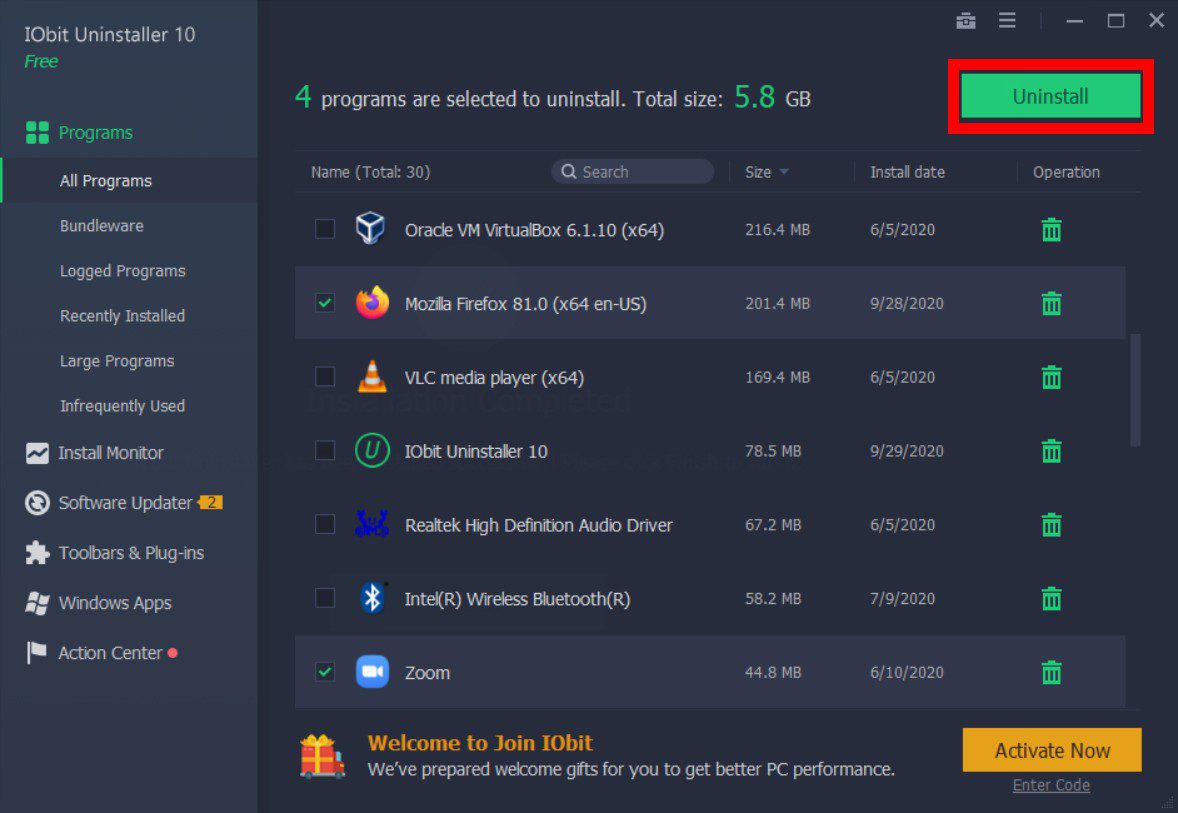
- Then select the programs you want to uninstall. Once IObit finishes installing, it will automatically scan your computer for all your programs. You can then use the left sidebar to find your recently installed programs, large programs, Windows apps, and more. Click the square to the left of the icon to select a program or multiple programs you want to uninstall.
- Next, click Uninstall. You will see this big, green button in the top-right corner of the window. Once you click it, a pop-up window will appear.
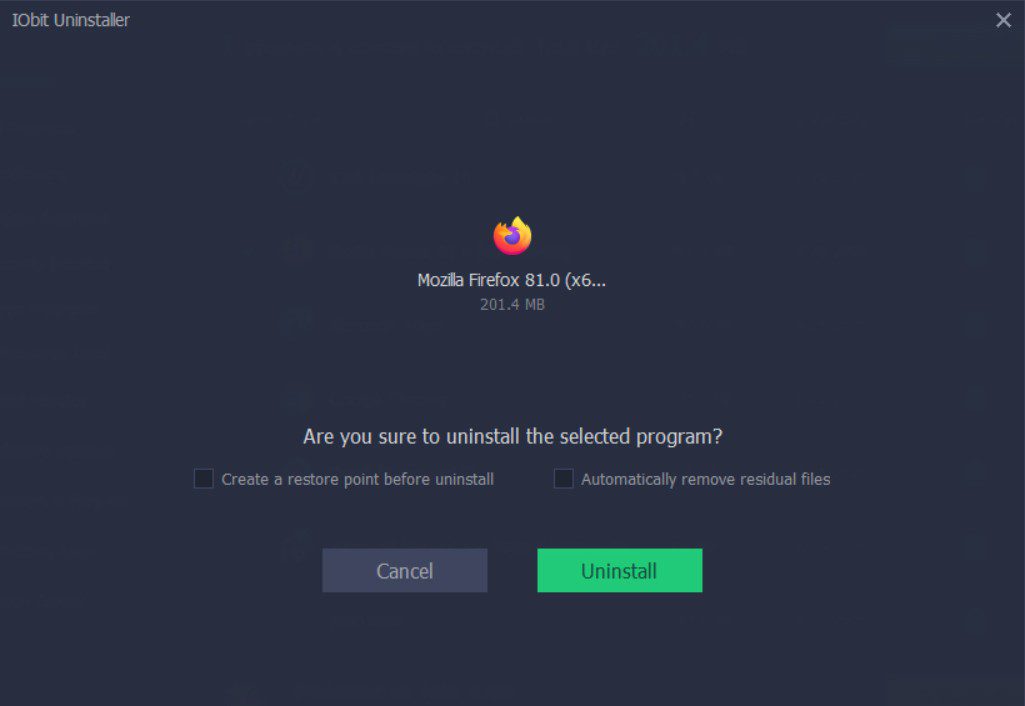
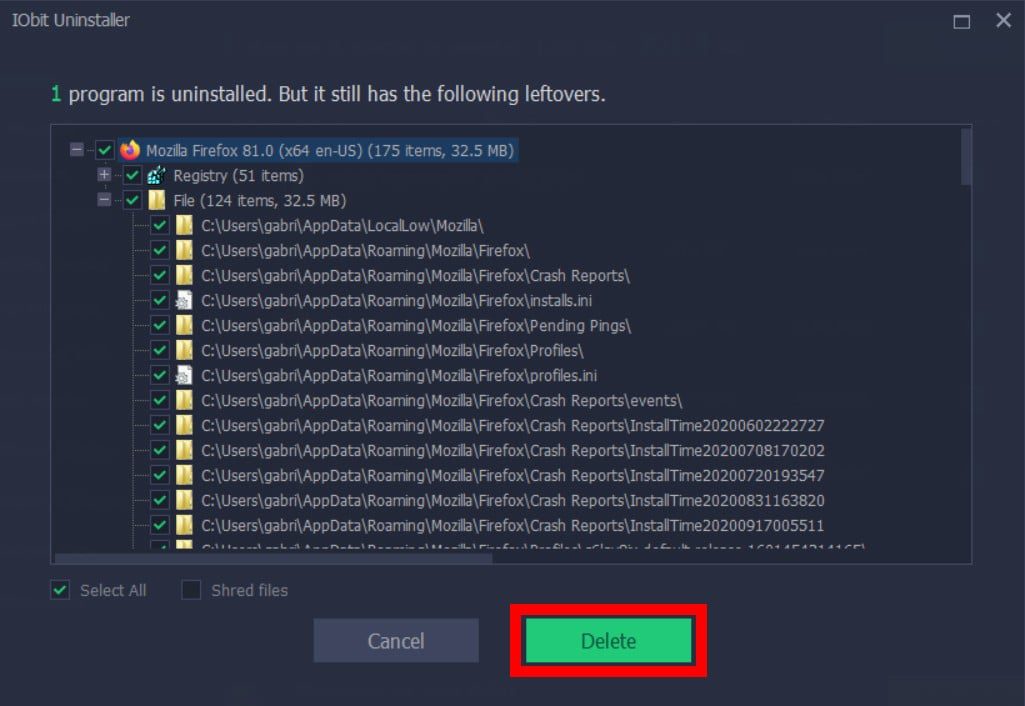
- Finally, click Uninstall. On this screen, you can also choose to create a restore point, which lets you make a backup of your computer state in case uninstalling the program causes any problems. Also, you can choose to automatically remove residual files, such as registry files, temporary files, and more.
If you’re looking for new programs to install, check out our list of the best Windows 10 apps.
